

Is your kitchen extractor fan cover looking dirty or clogged? Removing it might seem tricky, but it’s easier than you think.
Knowing how to take off your extractor fan cover is the first step to keeping your kitchen fresh and clean. In this guide, you’ll find simple, clear steps that anyone can follow—no special tools or skills needed. By the end, you’ll be ready to give your fan the deep clean it deserves, making your kitchen a healthier and more pleasant space.
Keep reading to learn how to do it quickly and safely.
Tools You Need
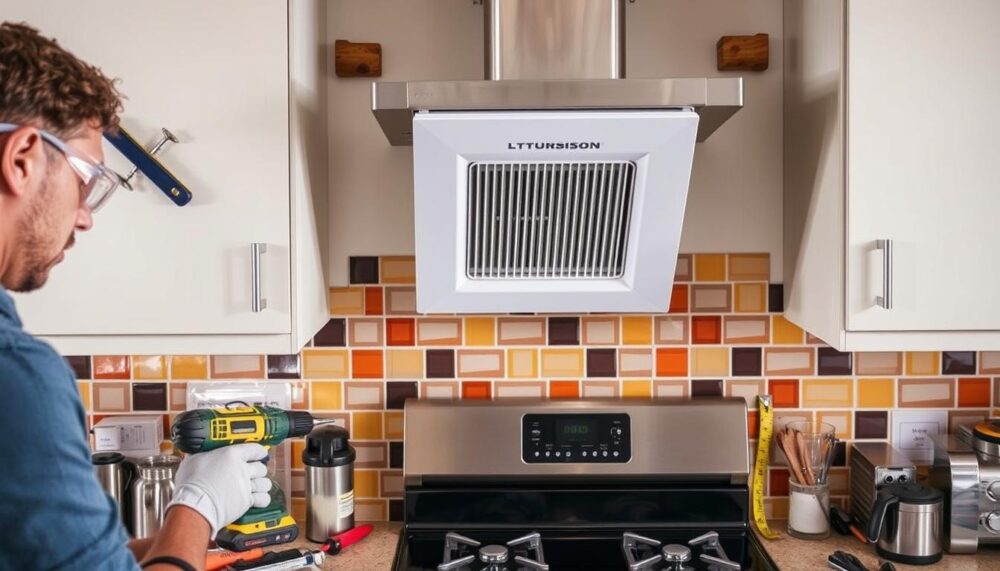
Removing a kitchen extractor fan cover is easier with the right tools. Having them ready saves time and effort. Each tool plays a specific role in the process. Using the correct equipment helps prevent damage to the fan or cover.
Here is a list of essential tools you need for this task. Keep them within reach before you start.
Flathead Screwdriver
A flathead screwdriver helps pry open clips or covers gently. It fits into narrow gaps to loosen the extractor fan cover. Use it carefully to avoid scratching surfaces.
Phillips Screwdriver
Many extractor fan covers are fixed with Phillips screws. This screwdriver matches the cross shape of these screws. It makes removing screws quick and easy.
Ladder Or Step Stool
A ladder or step stool helps you reach the extractor fan safely. Choose one that is stable and the right height for your kitchen setup. Never stretch or stand on unstable objects.
Soft Cloth
A soft cloth protects the fan and cover during removal. It prevents scratches and helps clean dust. Keep one handy to wipe down surfaces after removal.
Gloves
Wearing gloves protects your hands from sharp edges and dirt. They improve grip on slippery parts. Choose gloves that fit well and allow easy movement.
Credit: avorenovations.co.uk
Safety Precautions
Turn off the power before removing the kitchen extractor fan cover to avoid electric shocks. Use a sturdy ladder and handle parts carefully to prevent injuries.
Removing a kitchen extractor fan cover might seem straightforward, but safety should always be your top priority. Before you dive in, it's crucial to consider the potential risks involved. From electrical hazards to sharp edges, taking the right precautions will ensure a smooth and safe process.
Unplug The Power Source
Always start by disconnecting the power. This simple action can prevent electrical shocks. If your fan is hardwired, consider switching off the circuit breaker for added safety.
Wear Protective Gear
Protective gloves can safeguard your hands from sharp edges and accumulated grease. Safety goggles are also a smart choice to prevent dust and debris from irritating your eyes.
Ensure A Stable Working Environment
A stable ladder or step stool is essential if your extractor fan is mounted high. Ensure it's on a flat surface to prevent any accidental slips or falls.
Be Mindful Of Sharp Edges
Extractor fan covers often have sharp edges. Handle the cover carefully to avoid cuts. It's always better to be cautious than to rush and risk injury.
Have A Safe Place To Set Down Tools
Keep a small tray or container nearby for screws and small parts. This helps prevent loss and ensures you can reassemble the fan cover easily.
Check For Any Loose Parts
Before starting, inspect for any loose parts that might fall when the cover is removed. This proactive step can save you from unexpected surprises during the process. Taking these safety precautions not only protects you but also ensures the longevity of your kitchen extractor fan. Have you ever faced unexpected challenges when handling DIY tasks? Share your experiences and let's learn from each other.
Locate The Extractor Fan Cover
Locating the extractor fan cover is the first key step to removing it safely and efficiently. Without knowing exactly where it sits, you risk damaging the fan or surrounding surfaces. Let’s break down how you can quickly find this cover and prepare for removal.
Identify The Extractor Fan Location
The extractor fan is usually mounted on the kitchen wall or ceiling above your stove or cooking area. Look for a vent grille or a small panel with slats designed to let air pass through. If your kitchen has multiple vents, focus on the one closest to your cooking zone.
Check For Visible Screws Or Clips
Once you spot the fan cover, look closely for screws or clips holding it in place. These are often found at the edges or corners of the cover. If you don’t see any, gently feel around the frame—sometimes covers snap on and off without visible fasteners.
Use A Flashlight To Spot Hidden Fasteners
Bright kitchen lighting can sometimes hide small screws or clips, so grab a flashlight to get a better view. Shine the light along the edges and inside any vents. This helps you spot tiny fasteners that need loosening before you can remove the cover.
Consider The Material And Design
Extractor fan covers come in various materials like plastic, metal, or glass. Some have a flat panel, while others are curved or decorative. Knowing the design can hint at how the cover is attached—plastic covers often snap off, while metal ones usually require unscrewing.
Ask Yourself: Is The Cover Removable Without Tools?
Some covers are designed for easy cleaning and pop off with a gentle push or pull. Others need a screwdriver or special tool. Try applying light pressure to see if the cover budges, but don’t force it—this helps avoid breakage.

Credit: www.create-enjoy.com
Turn Off Power Supply
Before you touch anything on your kitchen extractor fan, the first and most important thing is to turn off the power supply. This step is crucial to avoid any risk of electric shock or damaging the fan’s electrical components. It might seem obvious, but many people rush into the job without fully cutting off the power, which can lead to accidents.
Have you ever started a home project and suddenly realized you forgot to turn off the power? It’s a common oversight that can be easily prevented by double-checking the breaker or fuse box. Your safety depends on it.
Locate The Correct Circuit Breaker
Start by finding your home’s main electrical panel. Look for the breaker labeled for the kitchen or specifically for the extractor fan if it’s marked. If you’re unsure, turn off the main breaker to be completely safe.
Turning off the right breaker saves you from unnecessary power outages in other parts of your home. It also makes restoring power easier once the job is done.
Use A Voltage Tester To Confirm Power Is Off
Never assume the power is off just because you flipped the switch. Use a voltage tester to check the fan’s wiring or the fan cover area. This small tool is inexpensive and a great investment for home safety.
Testing ensures you won’t get shocked when you start removing the cover. It’s a quick step that can prevent serious injury.
Inform Others In Your Home
Let everyone in your household know that you are turning off the power to the kitchen area. This avoids someone accidentally turning the breaker back on during your work. It also helps prevent confusion if other appliances temporarily lose power.
Clear communication keeps everyone safe and aware, especially if you live with kids or roommates who might not understand the risks.
Identify Fasteners
Before you remove your kitchen extractor fan cover, it’s essential to identify the fasteners holding it in place. Fasteners come in various shapes and sizes, so knowing what you’re dealing with helps you choose the right tools and avoid damage. Have you ever started a project only to find the wrong screwdriver or wrench? That’s why this step saves time and frustration.
Common Types Of Fasteners
You’ll most likely find one or more of these fasteners securing your extractor fan cover:
- Screws:Often Phillips or flathead, screws are the most common fastener type.
- Bolts:Larger than screws, bolts may require a wrench or socket.
- Clips or Snap-Fits:Plastic or metal clips that snap into place—no tools needed but be gentle.
- Magnets:Some covers use magnets to hold the panel, meaning no visible fasteners.
How To Spot Fasteners On Your Fan Cover
Look closely around the edges and corners of the extractor fan cover. Fasteners are often hidden under grease or dust, so wipe the surface clean first. Shine a flashlight at different angles to catch any small screws or clips that might blend in.
Choosing The Right Tool For Each Fastener
Once you’ve identified the fasteners, match them with the correct tool. A Phillips screwdriver won’t work on a flathead screw, and using the wrong size can strip the head. If clips hold the cover, avoid screwdrivers and try gently prying with a plastic tool to prevent damage.
What If Fasteners Are Hard To Reach?
Sometimes fasteners are tucked behind the fan or in tight spots. In those cases, a magnetic screwdriver or a flexible extension can help you reach them easily. Have you ever struggled with awkward angles? Using the right tool makes all the difference.
Remove Screws Or Clips
Removing the kitchen extractor fan cover starts with detaching the screws or clips. These fasteners hold the cover firmly in place. Carefully removing them ensures you avoid damage to the cover or fan. Use the right tools for a smooth process and to keep everything intact.
Identify The Type Of Fasteners
Kitchen extractor fan covers use either screws or clips. Screws are usually visible on the edges or center. Clips may be hidden under the cover or along the sides. Knowing the type helps you choose the correct tool and method.
Gather The Necessary Tools
Prepare a screwdriver set for screws—usually a Phillips or flathead. For clips, a flathead screwdriver or a trim removal tool works well. Having the right tools reduces the risk of slipping or breaking parts.
Remove Screws Safely
Turn screws counterclockwise to loosen them. Keep a firm grip on the screwdriver to avoid stripping screws. Place removed screws in a small container to prevent loss. Do not force screws; they should come out easily.
Release Clips Carefully
Insert a flathead screwdriver or trim tool under the clip edge. Gently pry the clip away from the cover. Work around the cover to release all clips evenly. Avoid using too much force to prevent breaking clips or the cover.
Detach The Cover Gently
Detaching the kitchen extractor fan cover requires a gentle approach to avoid any damage to both the cover and the fan itself. Rushing or using excessive force can lead to cracks or misalignment, which might affect your fan’s performance. Taking your time and being careful ensures the cover comes off smoothly and stays intact for easy cleaning or replacement.
Assess The Attachment Points
Before you start pulling on the cover, take a close look at how it’s attached. Some covers snap on, while others might be held by screws or clips. Identifying these points helps you know where to apply pressure or which screws to loosen, so you don’t accidentally break anything.
Use Appropriate Tools If Needed
If you see screws, grab a screwdriver that fits perfectly to avoid stripping them. For clips, a flathead screwdriver or a plastic pry tool works well to gently pop the cover free. Having the right tools on hand makes the process faster and less stressful.
Apply Even Pressure
When you begin to detach the cover, apply pressure evenly across its surface. Pressing too hard in one spot can crack the plastic or bend the metal. Instead, use your hands to gently wiggle the cover while supporting it from underneath.
Watch For Hidden Fasteners
Sometimes, small screws or clips hide behind filters or stickers. Have you ever tried pulling off a cover only to find it won’t budge? That’s often because something is still holding it in place. Double-check these spots before giving up or forcing the cover off.
Keep The Cover Secure After Removal
Once detached, place the cover somewhere safe where it won’t get scratched or knocked over. A soft towel or a clean counter works well. Protecting the cover ensures it stays in good condition for when you reattach it.

Credit: www.express.co.uk
Clean The Cover And Fan
Cleaning the kitchen extractor fan cover and the fan itself is crucial for maintaining good air quality. Grease and dust build-up can reduce the fan’s efficiency. Regular cleaning ensures better performance and a fresher kitchen environment.
Start by removing loose dirt and grease from the cover. Use warm, soapy water to soak the cover. This softens stubborn grime for easy removal. Gently scrub the surface with a soft brush or cloth. Avoid harsh scrubbing to prevent damage.
Next, focus on the fan blades and motor area. Dust and grease can block airflow and cause the motor to overheat. Use a damp cloth to wipe the blades carefully. For tight spots, a small brush or cotton swab works well. Make sure the fan is completely dry before reassembling.
Prepare Cleaning Materials
- Warm water
- Mild dish soap
- Soft brush or cloth
- Small brush or cotton swabs
- Towel for drying
Soak And Scrub The Cover
- Fill a basin with warm, soapy water.
- Place the cover in the water for 10–15 minutes.
- Use a soft brush to scrub grease and dirt gently.
- Rinse with clean water and dry with a towel.
Clean The Fan Blades
- Use a damp cloth to wipe each blade carefully.
- Reach small spaces with cotton swabs or a small brush.
- Remove all dust and grease for better airflow.
- Let the blades air dry completely before reattaching.
Troubleshooting Stuck Covers
Removing a stuck kitchen extractor fan cover can be frustrating. Sometimes, the cover seems glued in place, refusing to budge no matter how hard you pull. Understanding why it’s stuck and how to carefully troubleshoot it can save you time and prevent damage to your fan or kitchen walls.
Identify The Cause Of The Stuck Cover
Start by examining the cover closely. Dirt, grease, and cooking residues often build up around the edges, acting like glue. Rust from metal parts or paint sealing the cover can also cause it to stick.
Ask yourself: Has the fan cover been in place for years without cleaning? This clue helps you decide which tools and techniques to use next.
Use Gentle Tools To Loosen The Cover
Grab a plastic scraper or an old credit card instead of sharp metal tools. These reduce the risk of scratching or denting the cover and surrounding surfaces. Insert the scraper gently between the cover and the extractor hood and wiggle it slowly.
Applying slight pressure around the edges can help break the seal caused by grease or paint. Be patient—rushing can cause cracks or chips.
Apply Heat Or Lubricants Carefully
Heat can soften stubborn grease or paint seals. Use a hairdryer on a low setting to warm the edges for a minute or two. Avoid high heat to prevent damage to plastic parts.
Alternatively, spray a small amount of cooking oil or WD-40 around the edges. Let it sit for 5-10 minutes to penetrate and loosen the stuck areas. Then, try gently prying the cover off again.
Check For Hidden Fasteners Or Clips
Sometimes, covers appear stuck because small screws or clips hold them in place. Look closely for screws under the cover or along the sides. Use a flashlight to spot any hidden fasteners.
Removing these first can save you from unnecessary force. If you miss a clip, you risk breaking it or bending the cover.
Prevent Future Sticking
Once you remove the cover, clean both the cover and extractor fan thoroughly. Removing grease and dirt regularly stops buildup that causes sticking. You might also consider applying a thin layer of cooking oil or silicone spray around edges before reinstalling the cover.
Have you ever struggled with a stuck fan cover that damaged your kitchen? Taking small preventive steps can help you avoid that hassle next time.
Reattach The Cover
Align the cover carefully with the extractor fan frame. Press it gently until it clicks or fits securely in place. Ensure it is firmly attached to avoid any gaps or looseness.
Reattaching the kitchen extractor fan cover can be a straightforward process if done carefully. After cleaning or maintaining your fan, it’s crucial to ensure the cover is securely reattached to avoid any mishaps. This step not only ensures the fan functions efficiently but also prevents dust and grime from entering the system. Let’s walk through the simple steps to reattach the cover effectively.
Ensure Proper Alignment
Before you start, check that the cover is aligned correctly with the fan's frame. Any misalignment might cause the cover to not fit snugly. Look for any guiding notches or markers on the cover and the fan’s body. These are often designed to help you align the cover effortlessly. Taking a moment to align everything correctly can save you from redoing the entire process.
Secure The Screws
Once aligned, begin securing the cover with screws. Always start by hand-tightening each screw to avoid cross-threading. Use a screwdriver to gently tighten them further, but be cautious not to overtighten, which could crack the cover. It’s a good practice to tighten screws in a diagonal pattern to ensure even pressure distribution.
Check The Seal
After securing the cover, check the edges to ensure there are no gaps. A proper seal is essential to keep the fan working efficiently. If you notice any gaps, slightly loosen the screws and readjust the cover before tightening them again. This ensures that the fan remains airtight and functions optimally.
Test The Fan
Finally, switch on the fan to test its operation. Listen for any unusual noises that might indicate the cover is not properly secured. A quiet, steady hum means everything is in place. If you hear rattling, you might need to adjust the screws or check the alignment. Testing the fan immediately can save you future headaches and keep your kitchen fresh and odor-free. Reattaching the extractor fan cover may seem minor, but it plays a significant role in maintaining your kitchen’s air quality. What challenges have you faced when handling your kitchen appliances?
Frequently Asked Questions
How Do I Safely Remove A Kitchen Extractor Fan Cover?
First, switch off the power supply to the fan. Use a screwdriver to loosen screws holding the cover. Gently pull the cover away from the wall or ceiling. Handle it carefully to avoid damage or injury.
What Tools Are Needed To Remove The Fan Cover?
You typically need a flathead or Phillips screwdriver. Sometimes a ladder is required for high-mounted fans. Ensure you have a cloth to clean the cover after removal.
How Often Should I Clean The Extractor Fan Cover?
Clean the cover every 3 to 6 months. Regular cleaning prevents grease buildup and improves fan efficiency. More frequent cleaning may be needed in busy kitchens.
Can I Remove The Fan Cover Without Turning Off Power?
No, always turn off the power before removing the cover. This prevents electrical shocks and ensures your safety during cleaning or maintenance.
Conclusion
Removing your kitchen extractor fan cover is simple with the right steps. Always switch off the power for safety. Use a screwdriver and gentle force to avoid damage. Clean the cover carefully before putting it back. Regular cleaning keeps your kitchen fresh and fan working well.
Follow these tips to handle the task confidently. Keep your kitchen extractor fan in good shape easily.