
Are you looking to remove your kitchen light cover but don’t know where to start? You’re not alone.
Many people find this simple task confusing or worry about breaking something. The good news is that it’s easier than you think. With just a few easy steps, you can safely and quickly take off your kitchen light cover, giving you access to clean it, replace a bulb, or upgrade your lighting.
Keep reading, and you’ll learn exactly how to do it without any hassle or damage. Let’s get started!
Tools Needed
Before you begin removing your kitchen light cover, gathering the right tools can make the process smooth and safe. Having everything ready prevents frustration and saves time. It also helps you avoid damaging the fixture or the ceiling.
Screwdriver
A screwdriver is often the key tool for this job. Most light covers are secured with screws, which can be either flathead or Phillips head. Check your fixture first to know which type you need.
I once tried removing a cover without the right screwdriver and ended up stripping the screws. Don’t let that happen to you—grab the correct size and type before starting.
Step Ladder Or Sturdy Stool
Reaching the light cover comfortably is essential. A step ladder or a sturdy stool helps you work safely without stretching or overreaching. Never stand on unstable furniture.
Think about your kitchen’s ceiling height. If it’s high, a taller ladder might be necessary. Safety should always be your top priority.
Gloves
Wearing gloves protects your hands from sharp edges and dust. Old light covers can be dirty or brittle, so gloves add a layer of safety. Choose gloves that still allow you to grip tools and fixtures securely.
Soft Cloth Or Towel
Having a soft cloth or towel handy helps you hold the glass or plastic cover safely. It prevents slipping and protects the cover from scratches. Plus, it’s useful for wiping dust off before reinstallation.
Flashlight
If your kitchen lighting is off during removal, a flashlight or headlamp can illuminate tight spots. It helps you see screws or clips clearly. Good lighting reduces the chance of mistakes.
Are you ready to gather these tools and tackle your kitchen light cover removal with confidence? It’s easier when you’re well prepared.
Safety Precautions
Removing a kitchen light cover requires careful attention to safety. Electrical parts can be dangerous if handled incorrectly. Taking simple safety steps protects you from shocks and injuries.
Always prepare your workspace before starting. Clear the area to avoid accidents. Use the right tools to make the process easier and safer.
Turn Off The Power
Switch off the power at the circuit breaker. Do not rely on the wall switch alone. Double-check by trying to turn on the light. This step prevents electric shocks.
Use A Sturdy Ladder
Choose a ladder that is stable and fits the height needed. Avoid standing on chairs or unstable surfaces. Position the ladder on a flat, even floor for balance.
Wear Protective Gear
Use safety gloves to protect your hands from sharp edges. Safety glasses help avoid dust or debris in your eyes. Dress in clothes that cover your skin to avoid scratches.
Handle Glass Covers Carefully
Light covers can be fragile and break easily. Hold the cover firmly but gently. Place it on a soft surface if you remove it for cleaning.
Check For Hot Bulbs
Let the bulbs cool down before touching the cover. Hot bulbs can burn your fingers. Wait at least 15 minutes after turning off the light.
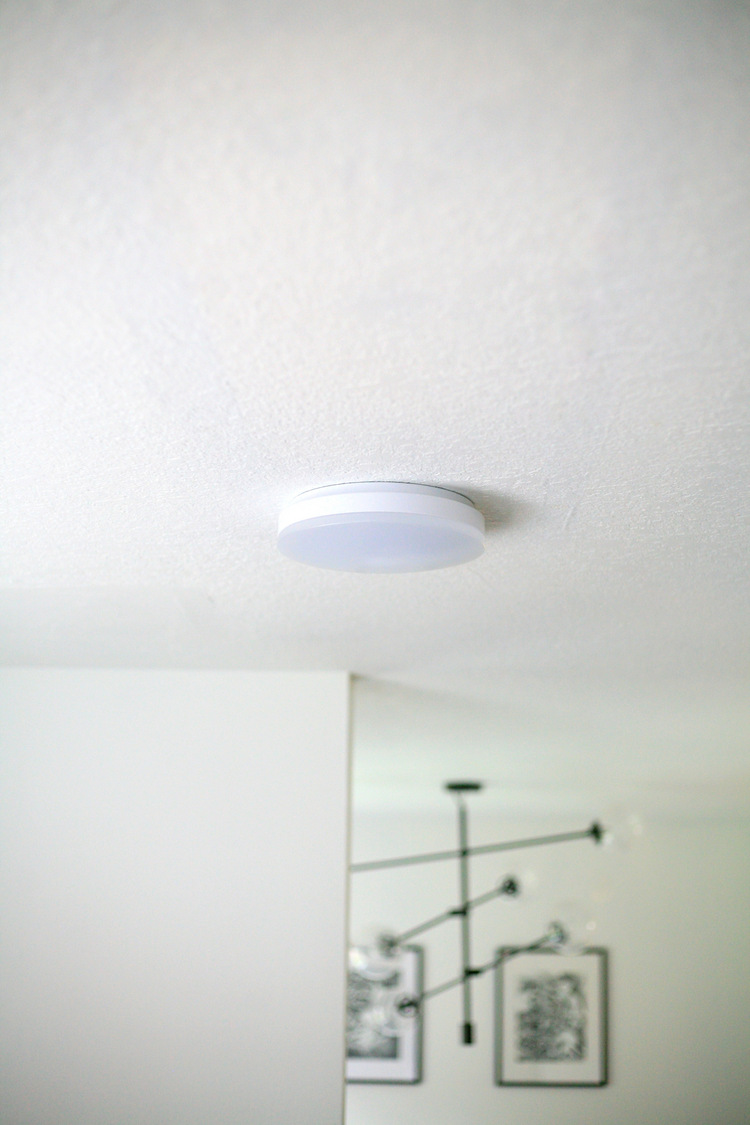
Identify Light Cover Type
Determine the type of kitchen light cover before removal. Common types include flush mounts, recessed, and fluorescent. This identification helps in choosing the right tools and techniques for a safe removal process.
Identifying the type of light cover is crucial for safe removal. Different materials require different approaches. Knowing your light cover type helps avoid damage and ensures a smooth process.
Glass Covers
Glass covers are common in kitchens. They provide a sleek, elegant look. To identify, tap gently on the cover. A glass cover will sound solid and clear. Handle with care to prevent breakage. Use a soft cloth to grip and twist gently.
Plastic Covers
Plastic covers are lightweight and durable. They usually appear in modern kitchens. Check for a slight flex when pressed. Plastic covers might snap or clip into place. Look for small clips or screws. These hold the cover securely.
Metal Covers
Metal covers add a sturdy, industrial touch. They're often in commercial kitchens. Metal covers feel cool and firm. They may have visible screws or hinges. Use a screwdriver for safe removal. Ensure power is off before handling.
Turn Off Power
Turning off the power is the safest way to start removing a kitchen light cover. Electricity can cause shocks if handled carelessly. Always make sure no power flows to the fixture before touching it.
This simple safety step protects you from harm and prevents damage to the light. It only takes a moment but keeps you safe throughout the task.
Locate The Circuit Breaker
Find your home's main electrical panel. It usually sits in a basement, garage, or utility room. Open the panel door to see the switches inside. Each switch controls power to different parts of the house.
Identify The Correct Switch
Look for a label next to the switches. It should say which rooms or areas they control. Find the switch marked for the kitchen or lighting. If labels are missing, turn off the main breaker to cut all power.
Turn Off The Power
Flip the switch down to cut power to the kitchen light. Make sure it stays in the off position. This stops electricity from reaching the fixture and makes it safe to work on.
Verify Power Is Off
Before touching the light cover, test the light switch. Turn it on and off. The light should not respond. Use a voltage tester if available. It confirms no electricity flows through the wires.
Remove Screws Or Clips
Removing the kitchen light cover often starts with taking out screws or releasing clips. These fasteners hold the cover firmly in place. Knowing the right way to handle them prevents damage and makes the task easier. Some covers use screws, while others rely on clips that snap on and off.
Using A Screwdriver
Locate the screws around the edge of the light cover. Use a screwdriver that fits the screw heads well. Turn the screws counterclockwise to loosen them. Keep the screws safe to avoid losing them. Do not force the screws. If they feel stuck, try applying gentle pressure or use a lubricant.
Once all screws are removed, gently pull the cover away from the fixture. The cover should come off smoothly without bending or breaking.
Releasing Clips
Identify the clips holding the cover. Clips usually snap into place along the cover’s edges. Press the clips gently to release their hold. Some clips may require a flat tool to pry them open carefully.
Work around the cover, releasing each clip one by one. Avoid pulling too hard to prevent cracks or damage. After all clips are released, the cover will come free easily.
Handle Fragile Covers
Handling fragile kitchen light covers requires a delicate touch and careful planning. These covers can be made of glass, thin plastic, or other breakable materials that easily crack or shatter. Taking the right precautions will protect both you and your light fixture during removal.
Prepare Your Workspace
Clear the area beneath your kitchen light to avoid accidents. Place a soft towel or blanket on the floor or countertop to catch the cover if it slips from your hands. This small step can save your cover from breaking and your cleaning from turning into a disaster.
Wear Protective Gloves
Gloves provide extra grip and protect your hands from sharp edges if the cover chips. Choose gloves with a good grip, like rubber or latex, rather than slippery fabric. Have a pair ready before you begin to feel more confident handling fragile parts.
Support The Cover Firmly But Gently
Use both hands to hold the cover securely. Avoid squeezing too hard, which might crack it, but keep a firm hold so it doesn’t slip. Imagine you’re holding a raw egg—steady and careful.
Remove Screws And Clips Slowly
Unscrew or unclip the fasteners that hold the cover in place without rushing. Sudden movements can cause the cover to fall or crack. If a screw feels stuck, try applying a little penetrating oil and wait before trying again.
Ask For Help If Needed
If the cover is large or awkward to handle alone, don’t hesitate to ask someone for assistance. An extra pair of hands can make the removal safer and smoother. Have your helper steady the cover as you loosen fasteners.
Have A Safe Spot Ready For The Cover
Once removed, place the fragile cover on a padded surface away from the work area. Avoid stacking anything on top of it and keep it out of high-traffic zones. This simple habit prevents accidental damage while you work on other parts.
Clean The Light Cover
Cleaning your kitchen light cover is an easy way to brighten up your space without buying new fixtures. Over time, dust, grease, and grime build up on the cover and dim your lighting. Taking a few minutes to clean it properly can make a big difference in how your kitchen feels and looks.
Gather The Right Cleaning Supplies
Before you start, make sure you have everything you need. A soft cloth, mild dish soap, a bucket of warm water, and a gentle brush usually do the trick. Avoid harsh chemicals that could damage the light cover’s finish or plastic.
Remove Dust And Loose Dirt
Use a dry microfiber cloth or a feather duster to remove dust and loose particles first. This step prevents dirt from turning into a sticky mess when you add water. If you skip this, you might just spread grime around instead of cleaning it off.
Soak And Wash The Cover
If your light cover is removable, soak it in warm soapy water for a few minutes. This loosens any grease and stubborn dirt. Gently scrub with a soft brush or cloth, paying attention to corners and crevices where dirt hides.
Rinse Thoroughly And Dry
Rinse the cover with clean water to remove soap residue. Leaving soap behind can leave streaks or attract more dust quickly. Dry it completely with a soft towel or let it air dry before putting it back to avoid water spots.
Check For Damage While Cleaning
Look over your light cover for cracks or discoloration while cleaning. A damaged cover can affect light quality or even become a safety hazard. If you notice any issues, it might be time to replace it instead of just cleaning.

Credit: www.create-enjoy.com
Reattach Or Replace Cover
After removing your kitchen light cover, the next step is either to reattach it securely or replace it if it’s damaged or outdated. This part of the process ensures your kitchen looks neat and the light functions safely. Handling this carefully can save you time and avoid unnecessary trips to the hardware store.
Checking The Condition Of Your Light Cover
Before reattaching, inspect the cover for cracks, chips, or discoloration. A damaged cover can affect both safety and lighting quality. If the cover looks worn out or brittle, consider replacing it to keep your kitchen looking fresh and well-maintained.
How To Reattach Your Kitchen Light Cover
Align the cover with the fixture’s mounting points carefully. Most covers either twist, snap, or screw back into place. Use gentle pressure to avoid cracking or misaligning the cover, and make sure it feels secure before finishing.
Choosing A Replacement Cover
If you decide to replace the cover, select one that matches your kitchen’s style and the fixture’s size. Think about materials like glass, plastic, or metal, depending on durability and aesthetic preferences. Don’t forget to check the compatibility with your light fixture’s attachment mechanism.
Tips For Installing A New Cover Safely
- Turn off the light switch and allow the bulb to cool before handling.
- Hold the cover steadily to avoid dropping it during installation.
- Ensure all screws or clips are tightened but not over-tightened to prevent damage.
Have you ever struggled with a light cover that just wouldn’t fit right? Taking a moment to double-check the fit and condition can save frustration and ensure your kitchen stays well-lit and inviting.
Troubleshooting Common Issues
Removing a kitchen light cover might seem straightforward, but many people encounter unexpected hurdles. Troubleshooting these common issues helps you avoid frustration and potential damage to your fixture or ceiling. Understanding what might go wrong and how to handle it empowers you to get the job done smoothly.
Stuck Or Jammed Light Covers
Light covers can get stuck due to paint, dirt buildup, or rusted screws. If you find your cover won’t budge, avoid forcing it, as this can cause cracks or breaks.
Try gently twisting while applying steady pressure. Using a rubber grip pad can increase your grip without slipping. If screws hold the cover, make sure you’re turning them the right way—sometimes they can be reverse-threaded.
Broken Clips Or Mounting Hardware
Sometimes clips or mounting brackets snap during removal, especially if they are old or brittle. This can leave the cover hanging or completely loose.
Keep spare clips on hand or purchase replacements before starting your project. If you break a clip, temporarily support the cover with a helper or a sturdy object while you install new hardware. This prevents accidents and keeps your fixture safe.
Hard-to-reach Screws Or Fasteners
Kitchen light covers often have screws hidden behind trim or in awkward spots. It’s easy to overlook these, leading to frustration when the cover won’t come off.
Use a flashlight to check carefully for all fasteners. A magnetic screwdriver can help retrieve screws that fall into tight spaces. Have a small mirror handy to see hidden areas without contorting yourself uncomfortably.
Electrical Safety Concerns
Disconnecting power is critical but sometimes overlooked. Removing covers with power on can risk shocks or short circuits.
Always turn off the circuit breaker before starting. Use a non-contact voltage tester to confirm no electricity is flowing. This simple step protects you and the fixture during removal.
Dirty Or Dusty Light Covers
Many light covers gather dust and grease over time, making them slippery or sticky to handle. This grime can also hide screws or clips.
Clean the cover gently with a damp cloth before attempting removal. This improves your grip and reveals hidden fasteners. A clean cover also reduces the risk of slipping and dropping it.

Credit: www.reddit.com

Credit: www.create-enjoy.com
Frequently Asked Questions
How Do I Safely Remove A Kitchen Light Cover?
Turn off the power to the fixture first. Use a ladder to reach the cover. Gently twist or unclip it depending on the design. Avoid using excessive force to prevent damage.
What Tools Are Needed To Remove A Kitchen Light Cover?
Typically, no special tools are required. A screwdriver may help if screws secure the cover. A ladder or step stool is essential for reaching the light safely.
How Can I Avoid Damaging The Light Cover During Removal?
Handle the cover gently and avoid twisting too hard. Support the cover with one hand while loosening screws or clips. Use soft cloth or gloves to prevent scratches.
Why Won’t My Kitchen Light Cover Come Off?
It may be secured with hidden clips or screws. Check for any small screws around the edge. Applying gentle pressure and inspecting closely can help locate fasteners.
Conclusion
Removing a kitchen light cover is easier than it seems. Take your time and follow safety steps carefully. Use the right tools to avoid damage or injury. Once the cover is off, cleaning or replacing bulbs becomes simple. Regular care helps keep your kitchen bright and fresh.
Try these steps next time you need to remove a light cover. You’ll feel confident and ready for small home tasks. Simple changes can make a big difference in your kitchen’s look.