
Your kitchen sink is one of the busiest spots in your home. It’s where you wash dishes, prepare food, and sometimes even clean your hands.
But have you ever stopped to think about how clean it really is? Germs and bacteria can easily build up in your sink, putting your health at risk. You want to keep your family safe and your kitchen fresh, right?
This guide will show you exactly how to sanitize your kitchen sink quickly and effectively. Keep reading to discover simple steps that can make a big difference in your home’s cleanliness.
Why Sanitize Your Kitchen Sink
Your kitchen sink is a hotspot for germs and bacteria. Food scraps, dirty dishes, and moisture create the perfect place for germs to grow. Sanitizing your kitchen sink helps keep your home clean and safe. It stops bacteria from spreading to your hands, food, and kitchen surfaces.
Regular cleaning alone does not kill all germs. Sanitizing removes harmful bacteria and viruses. This simple step protects your family’s health and prevents foodborne illness.
Common Germs In The Sink
Several types of germs live in kitchen sinks. These include:
- E. coli:Found in raw meat and can cause stomach illness.
- Salmonella:Comes from raw poultry and eggs, causing food poisoning.
- Staphylococcus aureus:Lives on skin and can cause infections.
- Fungi and mold:Grow in damp areas and cause allergies.
These germs thrive in wet, food-covered areas. Your sink is an ideal place for them to multiply quickly.
Health Risks Of An Unsanitized Sink
An unsanitized sink can spread germs to your hands and food. This can cause:
- Food poisoning with symptoms like vomiting and diarrhea.
- Skin infections from bacteria on the sink surface.
- Allergic reactions caused by mold and fungi.
- Cross-contamination that spreads germs to other kitchen areas.
Sanitizing your sink reduces these risks. It creates a safer cooking environment for your family.
Credit: www.housework.com
Tools And Supplies Needed
Sanitizing your kitchen sink requires the right tools and supplies to make the process effective and safe. Having everything ready before you start saves time and ensures you don’t miss any important step. Let’s look at the essential items you’ll need to get your sink sparkling clean and germ-free.
Cleaning Agents
Choose cleaning agents that target grease, grime, and food residues effectively. Common options include dish soap, baking soda, and white vinegar. Dish soap cuts through oily build-up, while baking soda acts as a gentle abrasive without scratching your sink’s surface.
White vinegar helps dissolve mineral deposits and adds a fresh scent. If you prefer, you can also pick specialized kitchen cleaners designed for stainless steel or porcelain sinks. Make sure to read labels to avoid harsh chemicals that might damage your sink or leave harmful residues.
Sanitizing Solutions
Sanitizing is different from cleaning—it kills bacteria and germs lurking in your sink. A simple and safe choice is diluted bleach (usually one tablespoon of bleach per gallon of water). Another option is a commercial sanitizer that is food-safe and EPA-approved.
For those who avoid bleach, hydrogen peroxide can be effective and less harsh. Remember to apply the sanitizer after cleaning, and allow it to sit for several minutes before rinsing. This ensures maximum germ-killing power.
Protective Gear
Protect yourself while cleaning and sanitizing to avoid skin irritation or inhaling fumes. Rubber gloves are a must—they shield your hands from chemicals and hot water. If you use bleach or strong cleaners, consider wearing a mask and working in a well-ventilated area.
Eye protection can also be helpful, especially if you’re mixing solutions or scrubbing vigorously. Taking these precautions keeps your cleaning routine safe and comfortable, so you can focus on getting your kitchen sink truly clean.
Preparing The Sink For Cleaning
Clear out all dishes and food scraps from the sink. Rinse the surface with warm water to remove loose dirt. Use a sponge or cloth to wipe away any grime before sanitizing.
Preparing your kitchen sink for a thorough cleaning is an essential step in maintaining a hygienic cooking space. Before diving into the sanitization process, it's crucial to ensure that your sink is free from any leftover debris or food particles. This not only makes the cleaning process more effective but also prevents any unpleasant odors from lingering.
Removing Debris And Food Particles
Start by donning a pair of gloves to protect your hands. Use a damp paper towel or a disposable wipe to gather visible food scraps and debris from the surface of the sink. Be sure to check around the edges where food particles often hide. Consider using a spatula or a plastic scraper to gently dislodge stubborn bits stuck to the sink. This can prevent these pieces from causing clogs later on. Did you know that regularly removing food particles can significantly reduce the growth of bacteria in your sink?
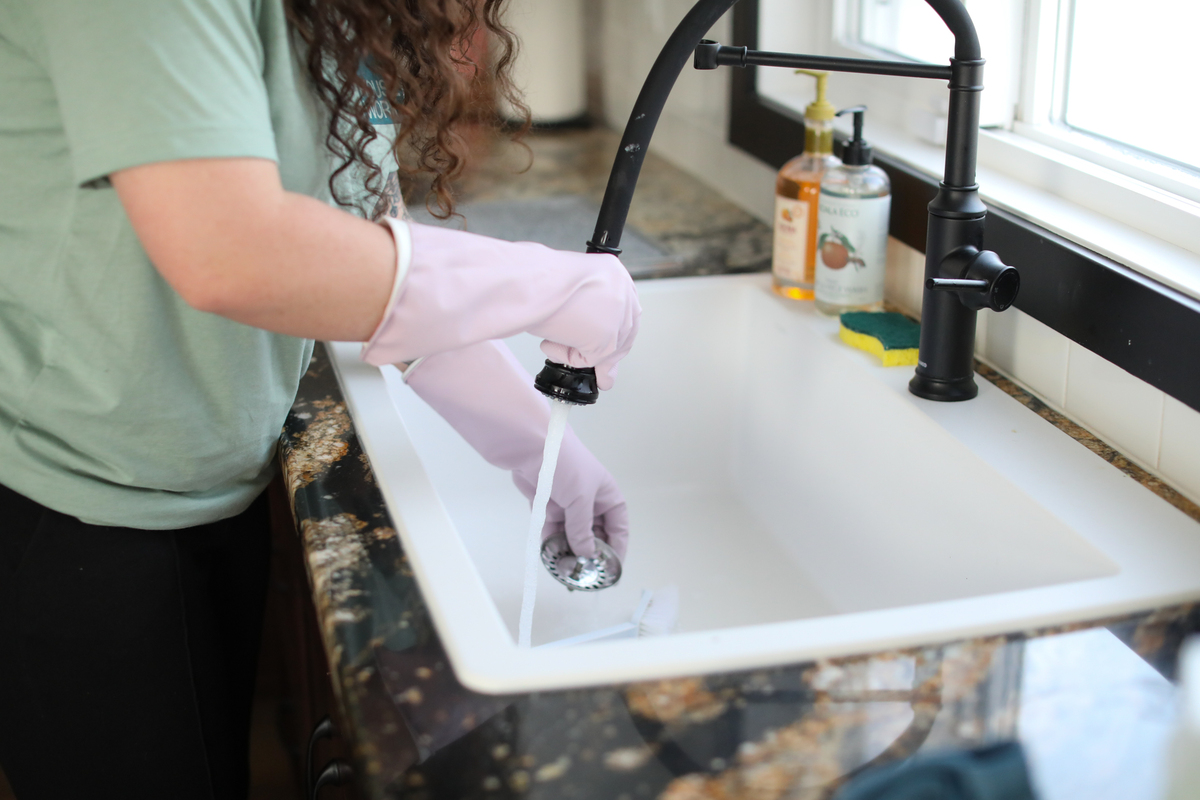
Clearing The Drain
Once the sink surface is clear, focus on the drain. Remove any visible obstructions, such as a buildup of hair or food remnants. A small brush or an old toothbrush can be handy for cleaning the drain cover. Run hot water down the drain for about 30 seconds. This helps to flush away any small particles and reduces the grease buildup in the pipes. If you've ever encountered a blocked drain, you'll appreciate how much easier it is to prevent than to fix. By preparing your sink thoroughly, you set the stage for an effective cleaning process. This simple preparation not only makes the cleaning easier but also ensures that the sink stays fresh longer. When was the last time you gave your kitchen sink this much attention?
Step-by-step Sanitizing Process
Sanitizing your kitchen sink is essential for a clean and safe cooking area. Follow a clear process to remove germs and dirt effectively. This step-by-step guide breaks down the sanitizing into simple actions anyone can do.
Initial Cleaning With Soap And Water
Start by removing any food scraps or debris from the sink. Use warm water and dish soap to wash the entire sink surface. A soft sponge or cloth works best to avoid scratches. Rinse with clean water after scrubbing.
Applying The Sanitizer
Choose a kitchen-safe sanitizer or a diluted bleach solution. Spray or apply the sanitizer evenly over all sink areas. Let the sanitizer sit for at least five minutes. This time allows it to kill bacteria and germs effectively.
Scrubbing Hard-to-reach Areas
Use an old toothbrush or small brush for corners and drain areas. Scrub under the faucet, around the drain, and inside the sink edges. These spots often hide germs and buildup. Make sure the sanitizer stays on while scrubbing.
Rinsing Thoroughly
Rinse the entire sink with clean, warm water to remove sanitizer and loosened dirt. Check for any remaining soap or sanitizer residue. Dry the sink with a clean towel or let it air dry. This keeps your sink fresh and ready for use.
Natural Alternatives For Sanitizing
Choosing natural alternatives to sanitize your kitchen sink is a smart way to keep your space clean without harsh chemicals. These options are not only eco-friendly but also gentle on your skin and surfaces. You might be surprised how common household ingredients can effectively kill germs and refresh your sink.
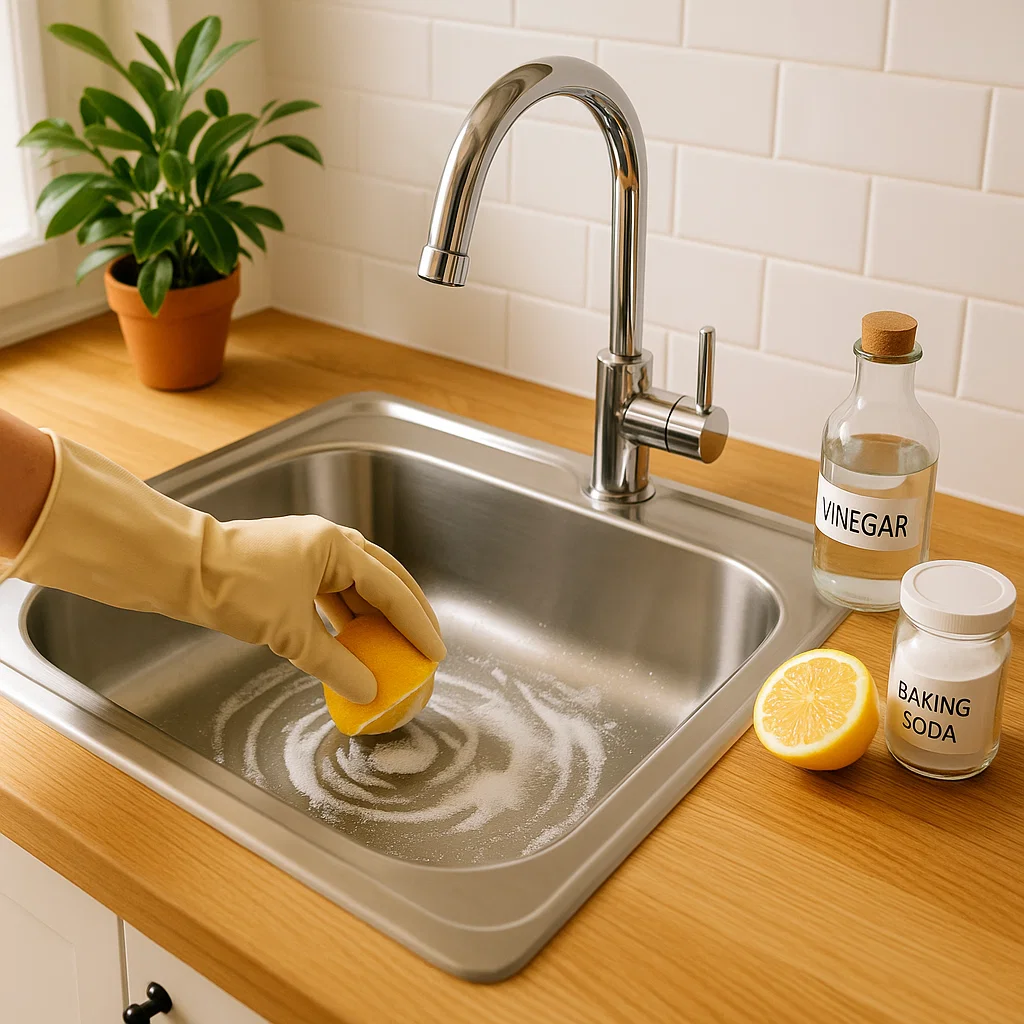
Using Vinegar And Baking Soda
Vinegar and baking soda create a powerful cleaning duo that tackles grime and bacteria. Sprinkle baking soda all over the sink, then spray or pour white vinegar on top. The fizzing reaction helps lift dirt and disinfects the area.
After the bubbling stops, scrub with a sponge or brush and rinse with warm water. This method clears away residue and neutralizes odors. Have you noticed how this simple mix often works better than expensive cleaners?
Lemon Juice Benefits
Lemon juice is a natural disinfectant with a fresh scent that brightens your kitchen. Its acidity helps break down soap scum and hard water stains while killing germs. Rub half a lemon directly on the sink surface or squeeze the juice and wipe with a cloth.
Let it sit for a few minutes before rinsing to maximize its sanitizing effect. Plus, lemon juice leaves your sink smelling clean without any artificial fragrances. How often do you use lemon in your cleaning routine?
Maintaining A Germ-free Sink
Keeping your kitchen sink germ-free is more important than many realize. It’s a hotspot for bacteria because it’s constantly wet and often filled with food particles. Your sink can quickly become a breeding ground for germs if you don’t clean it properly and regularly.
Daily Cleaning Habits
Start by rinsing your sink after every use. Food scraps left behind are a perfect place for bacteria to grow. Wiping the sink with a mild dish soap and warm water every day helps remove grease and grime before they build up.
Don’t forget to scrub the faucet handles and drain area too. These spots often get overlooked but can harbor a lot of germs. Using a soft brush or sponge makes this task quick and effective.
Weekly Deep Sanitizing
Once a week, give your sink a deep clean using a disinfectant. Mix a solution of one part bleach to ten parts water and apply it to the sink and drain. Let it sit for a few minutes before rinsing thoroughly.
If you prefer natural options, white vinegar and baking soda can work well. Sprinkle baking soda around the sink, scrub it gently, then spray vinegar and let the fizz help break down any stubborn grime. Rinse with hot water to finish.
Deep sanitizing kills bacteria that daily cleaning might miss. How often do you check if your sink still feels fresh and clean?
Avoiding Common Mistakes
One common mistake is using the same sponge or cloth for both dishes and the sink. This cross-contamination spreads germs rather than removing them. Keep separate cleaning tools for your sink to stay safe.
Another error is ignoring the garbage disposal. It can trap food bits that rot and smell. Regularly grinding ice cubes and citrus peels helps keep it fresh and clean.
Lastly, don’t leave wet sponges or dishcloths near the sink. They stay damp and encourage bacteria growth. Dry them out or replace them often to maintain a hygienic kitchen environment.
When To Replace Your Sink Accessories
Replacing your kitchen sink accessories is key to keeping your sink clean and functional. Over time, parts like faucet aerators and strainers can wear out or get clogged. This can affect water flow and harbor bacteria. Knowing when to replace these items helps maintain a hygienic kitchen environment.
Signs Of Wear And Tear
Look for cracks, rust, or discoloration on sink accessories. Reduced water flow or uneven spray patterns indicate clogs or damage. Loose or wobbly parts may cause leaks or water waste. If cleaning doesn't restore function, replacement is necessary to avoid further issues.
Replacing Faucet Aerators And Strainers
Faucet aerators and strainers can collect mineral deposits and debris. Unscrew them carefully to inspect for buildup or damage. Soaking in vinegar may clean minor clogs. Replace them if cleaning fails or parts appear damaged. New aerators improve water flow and reduce bacteria growth.
:max_bytes(150000):strip_icc()/SPR-how-pro-cleaners-clean-a-sink-11781060-6d7babfdf0074ca79564864a6c7325dd.jpg)
Credit: www.thespruce.com

Credit: www.abt.com
Frequently Asked Questions
How Often Should I Sanitize My Kitchen Sink?
You should sanitize your kitchen sink at least once a day. Daily cleaning prevents bacteria buildup. Regular sanitizing keeps your sink hygienic and safe for food preparation.
What Is The Best Way To Sanitize A Kitchen Sink?
Use a mixture of bleach and water or vinegar and baking soda. Scrub the sink thoroughly, then rinse well. This kills germs effectively and removes grime.
Can Natural Ingredients Effectively Sanitize Kitchen Sinks?
Yes, natural ingredients like vinegar and baking soda can sanitize sinks. They are non-toxic and safe. However, bleach is stronger for heavy contamination.
Is It Safe To Use Bleach To Sanitize Kitchen Sinks?
Yes, bleach is safe when diluted properly. Use one tablespoon of bleach per gallon of water. Rinse the sink thoroughly after sanitizing to avoid residue.
Conclusion
Sanitizing your kitchen sink keeps your home healthy and fresh. Clean regularly to stop germs and bacteria build-up. Use simple, safe cleaners for best results. Don’t forget to rinse well after each clean. A clean sink helps prevent food contamination.
Small habits make a big difference over time. Keep your kitchen safe with these easy steps. Your family deserves a clean and safe space. Make sink cleaning part of your routine today.