
Are you ready to create something both practical and stylish for your kitchen? Learning how to sew a kitchen apron is easier than you think, and it gives you a chance to add a personal touch to your cooking space.
Imagine slipping on an apron that fits perfectly, protects your clothes, and reflects your unique style. In this guide, you’ll discover simple steps to make your own kitchen apron, even if you’re new to sewing. Keep reading, and by the end, you’ll have the skills to craft a beautiful apron that makes every cooking moment more enjoyable.
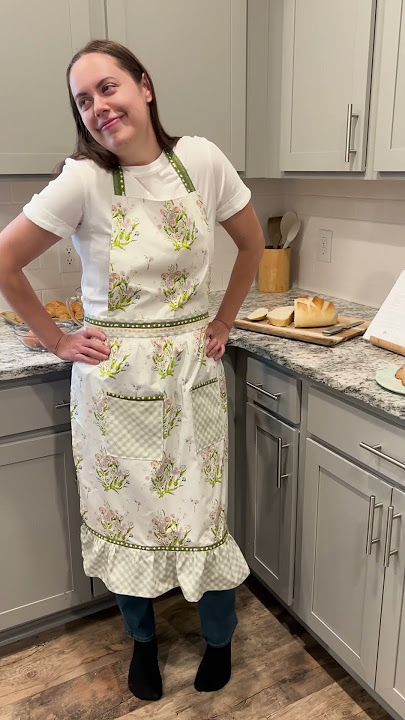
Credit: www.agfblog.com
Choosing The Right Fabric
Choosing the right fabric for your kitchen apron is more important than you might think. The fabric affects how comfortable your apron feels, how it holds up over time, and even how easy it is to clean. You want something durable but also easy to work with, especially if this is your first sewing project.
Best Fabrics For Aprons
Think about fabrics that can handle spills and stains without losing shape or color. Cotton and cotton blends are popular choices because they’re breathable and strong. Denim is another excellent option if you want a tougher apron that stands up to heavy use.
Linen has a nice texture but wrinkles easily, so it might need more care. Canvas is very durable and often used in professional kitchens. You might also consider oilcloth or coated fabrics if you want a water-resistant apron.
Color And Pattern Ideas
What colors make you happy while cooking? Darker colors like navy or charcoal hide stains better. Bright colors or fun patterns can add a bit of personality and make the apron feel more like your own creation.
Stripes, polka dots, or floral prints can brighten your kitchen routine. If you’re worried about matching your apron to your kitchen, try neutral tones or classic patterns like gingham. Remember, the fabric’s design should inspire you to wear your apron often.
Fabric Care Tips
Check the washing instructions before you buy your fabric. Cotton and denim usually handle machine washing well, but fabrics like linen might shrink or wrinkle more. If your fabric is pre-washed, it’s less likely to shrink after sewing.
Consider how often you’ll wash your apron. You want a fabric that stands up to frequent cleaning without fading or losing strength. Avoid delicate fabrics that require dry cleaning, as that can make your apron less practical.
Gathering Your Tools
Before sewing a kitchen apron, gather all needed tools. Having everything ready saves time and makes the process smooth. This list covers basic supplies and some extras that help with details.
Essential Sewing Supplies
- Fabric – Choose cotton or linen for easy cleaning.
- Thread – Pick a color matching your fabric.
- Sewing machine – Makes stitching faster and neater.
- Scissors – Sharp ones for cutting fabric cleanly.
- Measuring tape – Measures fabric and apron parts accurately.
- Pins – Hold fabric pieces together while sewing.
- Iron – Press fabric flat for better sewing.
- Seam ripper – Fixes mistakes quickly and easily.
Optional Accessories
- Fabric chalk or pencil – Marks sewing lines on fabric.
- Bias tape – Adds decorative edges or ties.
- Buttons or snaps – For adjustable straps or closures.
- Decorative trims – Adds style to plain aprons.
- Pocket patterns – Create extra storage on the apron.
- Thimble – Protects fingers during hand sewing.
Measuring And Cutting
Measuring and cutting are essential first steps for sewing a kitchen apron. Accurate measurements ensure the apron fits well and looks neat. Cutting fabric pieces precisely saves time and material. This section guides you through taking measurements, making a simple pattern, and cutting fabric.
Taking Accurate Measurements
Start by measuring your body or the person who will wear the apron. Measure the width from the chest to the side. Measure the length from the chest down to where you want the apron to end. Don't forget the neck strap length and the ties for the waist. Use a soft tape measure for best results. Write down all measurements clearly.
Creating A Simple Pattern
Use paper to draw your apron pattern. Mark the width and length based on your measurements. Add extra space for seams, about 1 inch on each side. Draw the neck curve and armholes smoothly. Mark the straps and ties separately. Keep the pattern simple for easy cutting and sewing. Use a ruler and pencil for straight lines.
Cutting Fabric Pieces
Place your pattern on the fabric. Pin it down to prevent slipping. Use sharp fabric scissors for clean edges. Cut around the pattern carefully. Cut separate pieces for the body, neck strap, and waist ties. Keep fabric flat and smooth as you cut. Check each piece against your pattern before moving on.
Sewing The Apron Body
Sewing the apron body is a rewarding part of the process. You'll see your fabric transform into a functional piece. This step involves stitching the main panels and adding seams and hems. Let's dive into the details.
Stitching The Main Panels
First, gather your main fabric pieces. Align them with the right sides facing each other. Pin them together to hold the fabric in place. Use a straight stitch to sew along the edges. Leave a small gap at the top for the neck strap. Be sure to backstitch at the beginning and end.
Check your stitches for any missed spots. Remove the pins carefully to avoid snagging. Your main panels should now be securely attached.
Adding Seams And Hems
Press the seams open with an iron. This step ensures a clean finish. Next, fold the raw edges over twice to create a hem. This helps prevent fraying and adds durability.
Pin the hem in place around all edges. Use a straight stitch to secure the hems. Take your time to sew evenly. This will give your apron a polished look.
After sewing, press the hems flat. Your apron body is now ready for straps and finishing touches.
Adding Straps And Ties
Adding straps and ties to your kitchen apron is where the design truly comes to life. These components not only keep the apron secure but also add comfort and style. Paying attention to how you make and attach these straps can make a big difference in how your apron fits and feels while you work.
Making Neck And Waist Straps
Start by choosing a sturdy fabric for the straps—cotton twill tape or bias tape works well. Cut your neck strap to about 20-24 inches long; this length usually fits most people comfortably but can be adjusted based on your measurements.
For waist ties, cut two strips, each around 28-32 inches. This length gives you enough fabric to tie a neat bow or knot behind your back or front. Fold the strips in half lengthwise, sew along the edge, then turn them right side out for a clean, finished look.
Have you tried using different fabrics for straps to add a pop of color or texture? It’s a simple way to personalize your apron without extra bulk.
Attaching Straps Securely
Securely attaching the straps ensures your apron holds up through every meal prep session. Pin the neck strap ends to the top corners of the apron body, making sure the strap sits comfortably around your neck.
Sew the straps on with a strong stitch, like a backstitch or reinforced zigzag, to prevent them from pulling loose. For waist ties, attach them at the side seams, slightly above the apron’s midpoint for a flattering fit.
Double stitch or add a small square with an X inside at the attachment points for extra strength. This simple step saved my apron from tearing during a busy holiday dinner—how will you make sure your straps stay put?

Credit: www.youtube.com
Incorporating Pockets
Adding pockets to your kitchen apron transforms it from just a piece of fabric into a practical tool. Pockets give you a handy place to keep your phone, recipe cards, or even a small towel while you cook. But where should you place these pockets for the best balance of style and convenience?
Pocket Placement Ideas
Think about what you’ll carry most often in your apron pockets. If you tend to keep your phone or a pen close, placing pockets at hip level makes them easy to reach without bending over. For items like recipe cards or a small notepad, higher pockets near the chest area work well.
Consider adding multiple pockets of different sizes. A large pocket on one side can hold a kitchen towel, while smaller ones on the other side keep utensils or a thermometer handy. You might even try angled pockets for easier access, especially if you move around a lot while cooking.
Ask yourself: where do you naturally place your hands when working? Align pockets to these spots for seamless convenience. You can sketch your apron layout before cutting fabric to visualize the best spots.
Sewing Functional Pockets
Choose sturdy fabric for your pockets, ideally the same material as your apron to maintain durability. Reinforce the pocket edges with double stitching to prevent wear and tear from frequent use. Adding a lining to your pockets increases strength and keeps the shape intact.
When sewing the pockets, leave enough room at the top for easy access but avoid making them too loose to prevent items from falling out. Topstitching around the edges not only secures the pockets but adds a neat, professional look.
Try adding small dividing seams inside larger pockets. This creates compartments for different tools and stops them from clumping together. Have you ever lost a pen inside your apron pocket? Dividers solve this problem.
Finally, test your pockets by placing the items you plan to carry inside and moving around a bit. This quick trial will show if adjustments are needed before final sewing.
Finishing Touches
Finishing touches can transform your kitchen apron from simple to stunning. These final steps add personality and polish to your creation. They also ensure your apron looks neat and feels comfortable to wear.
Decorative Embellishments
Adding decorations lets you express your style and make your apron unique. Consider sewing on colorful buttons or attaching a small pocket with a fun pattern. You could also use fabric paint or iron-on patches for quick, creative flair.
Think about what you use your apron for. Would a loop to hold a towel or a pen holder be helpful? These practical touches can also serve as decorative elements, making your apron both beautiful and functional.
Ironing And Final Adjustments
Ironing your apron gives it a crisp, professional look. Smooth out wrinkles, especially along the seams and straps, so everything lies flat. Use a steam iron and press gently to avoid damaging delicate fabrics.
Check the fit one last time before declaring your apron finished. Adjust the ties if they feel too loose or tight. A well-fitting apron stays comfortable and stays in place while you cook or bake.
Have you noticed how a simple press can change the whole appearance? It’s often the last step that makes your handmade apron look like it came from a store.

Credit: www.youtube.com
Caring For Your Apron
Caring for your kitchen apron helps keep it fresh and looking new. Proper care extends the life of the fabric and maintains its color. Simple steps can protect your apron from wear and stains. Follow these easy instructions to keep your apron clean and ready for use.
Washing Instructions
Wash your apron in cold or warm water to prevent shrinking. Use a gentle detergent that is safe for colored fabrics. Avoid bleach, as it can damage the material and fade colors. Turn the apron inside out before washing to protect any prints or embroidery. Air dry or tumble dry on low heat to keep the fabric soft and strong.
Stain Removal Tips
Act quickly to remove stains for best results. Blot spills with a clean cloth to absorb excess liquid. Use mild soap and water to gently rub the stain. For tougher stains, try a mixture of baking soda and water. Let it sit on the stain for a few minutes before washing. Avoid harsh chemicals that can harm the fabric. Always test stain removers on a small, hidden area first.
Frequently Asked Questions
What Materials Do I Need To Sew A Kitchen Apron?
You need fabric, thread, scissors, pins, measuring tape, and a sewing machine. Cotton or linen fabric works best for durability and comfort.
How Long Does It Take To Sew A Kitchen Apron?
Sewing a kitchen apron usually takes 1 to 2 hours. This depends on your sewing skills and the apron’s complexity.
Can Beginners Easily Sew A Kitchen Apron?
Yes, apron sewing is ideal for beginners. The project involves simple cuts and straight stitching, making it easy to follow.
How Do I Customize The Apron Size?
Measure your waist and desired length before cutting fabric. Adjust dimensions to fit your height and comfort preferences.
Conclusion
Sewing your own kitchen apron can be fun and useful. You only need some fabric, thread, and basic sewing skills. Follow the steps carefully, and take your time. Soon, you will have a practical apron that fits perfectly. It can protect your clothes and add style in the kitchen.
Plus, making something by hand feels good. Try different fabrics and designs to match your taste. Keep practicing, and your sewing skills will grow. Enjoy cooking with your new apron!