
Your kitchen sponge is one of the dirtiest items in your home, filled with germs and bacteria that can make your dishes and countertops unsafe. But what if you could kill those germs quickly and easily using something you already have—a microwave?
Learning how to sterilize a kitchen sponge in the microwave not only saves you money but also protects your health. Keep reading, and you’ll discover simple, effective steps that will make your sponge cleaner and your kitchen safer in just minutes.
Why Sterilize Kitchen Sponges
Keeping your kitchen sponge clean is more important than you might think. These small tools are essential for daily chores, but they can also become a hotspot for germs if not properly sterilized. Understanding why you should sterilize your kitchen sponges can help you protect your health and keep your kitchen safe.
Bacteria Growth On Sponges
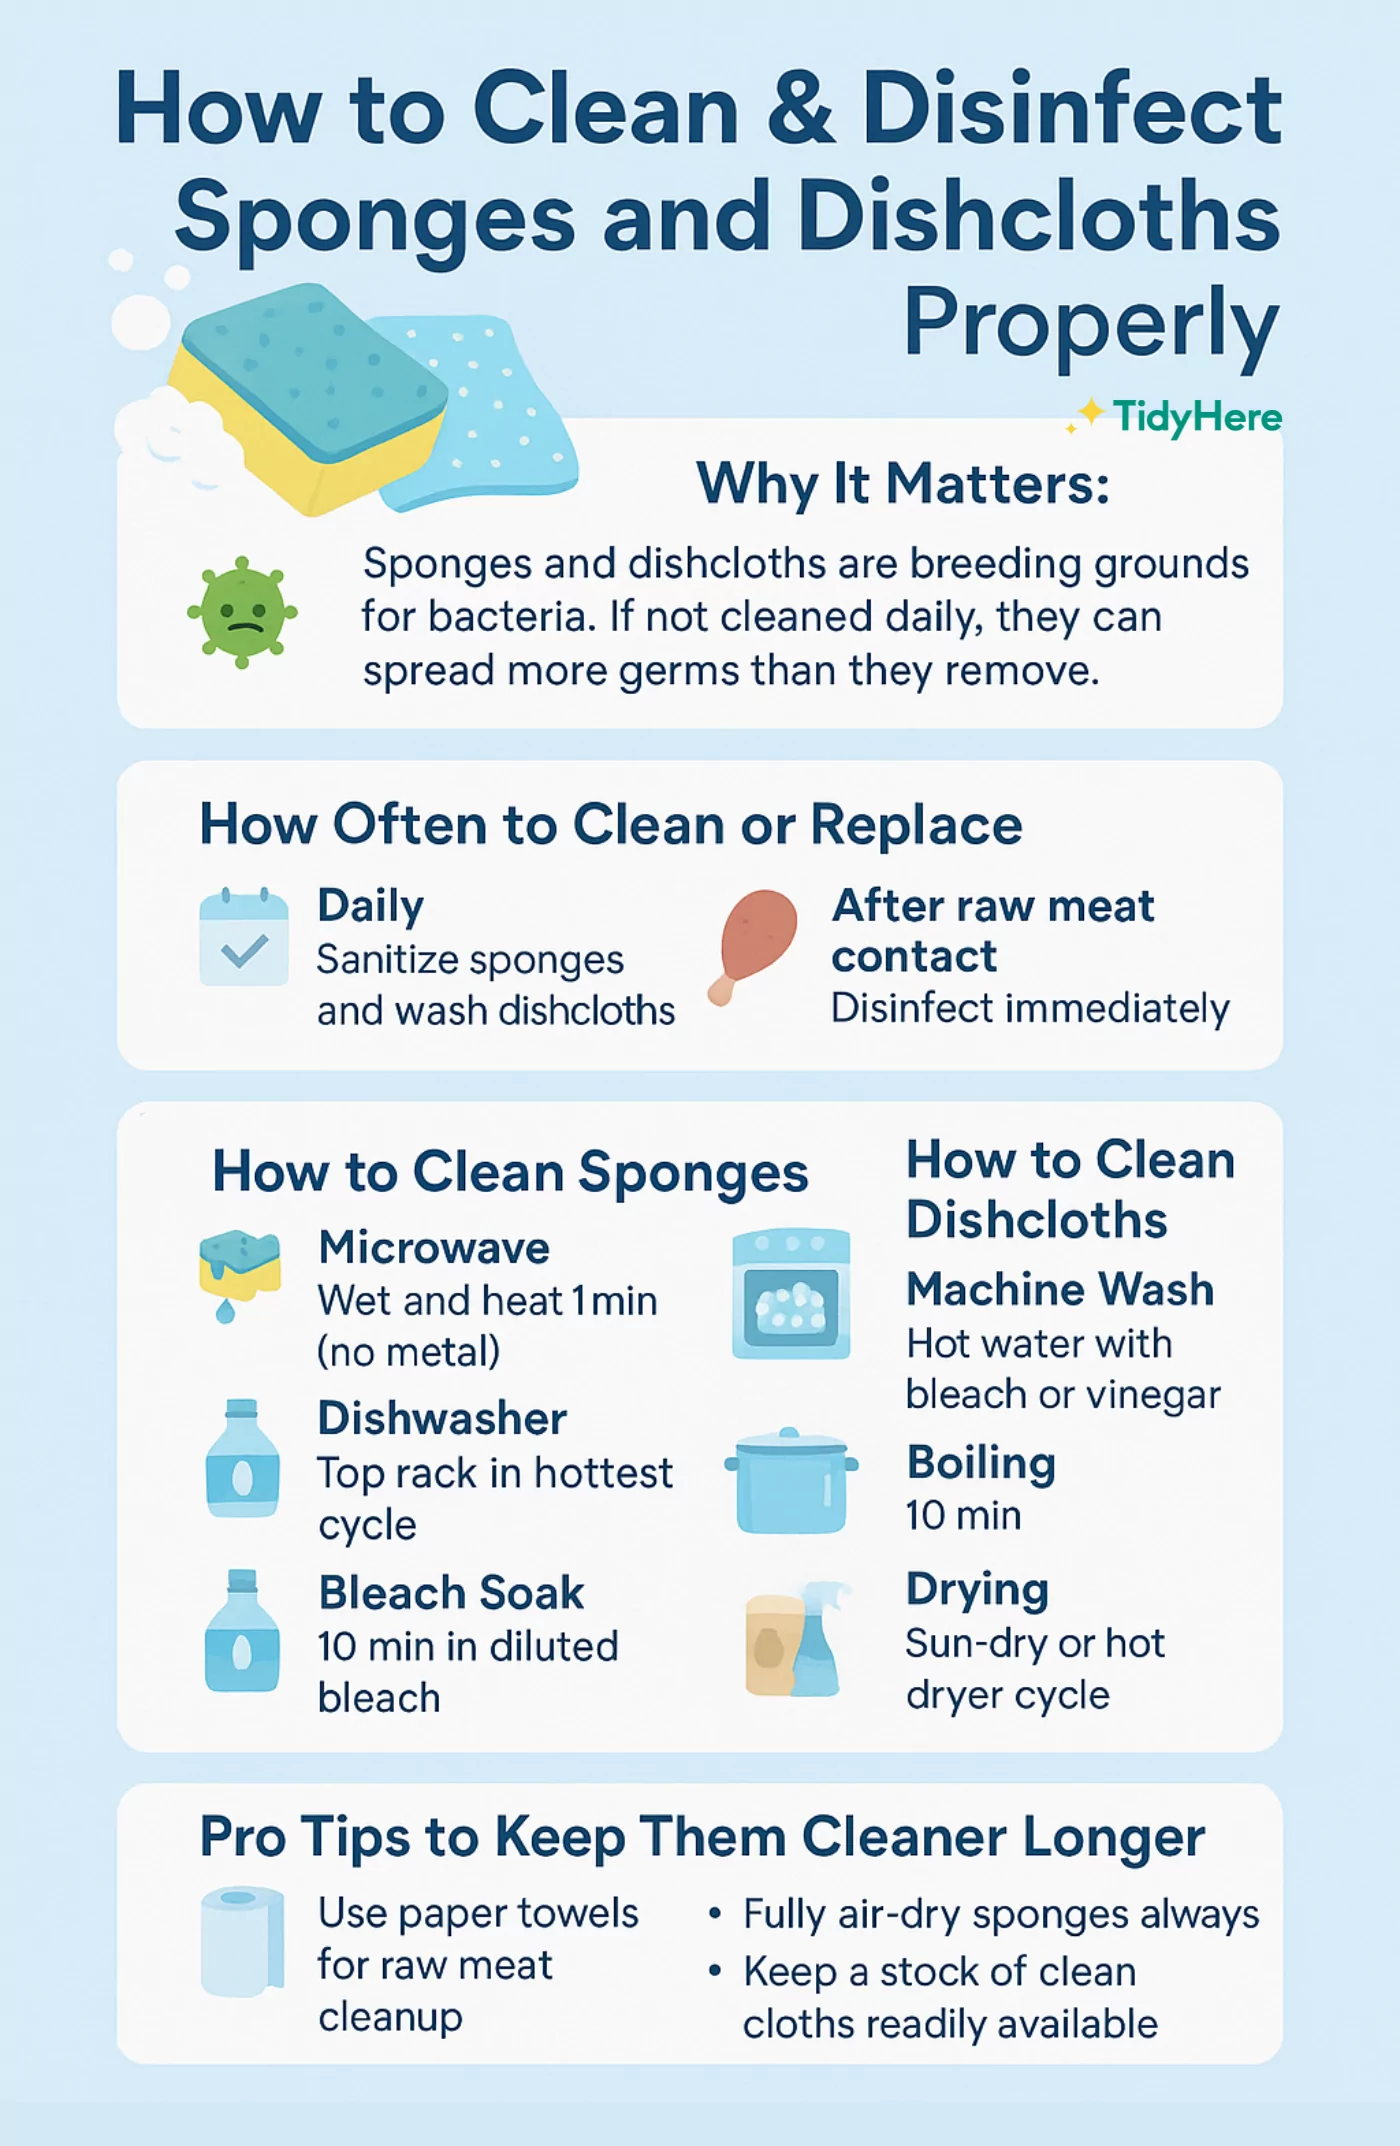
Kitchen sponges are damp and full of tiny food particles, making them a perfect breeding ground for bacteria. Studies show that sponges can harbor more bacteria than a toilet seat. This includes harmful bacteria like E. coli and Salmonella, which thrive in warm, moist environments.
Think about how often you use your sponge without giving it a deep clean. Each time you wipe surfaces or dishes, bacteria multiply quickly. Without sterilization, these germs stay on your sponge and spread around your kitchen.
Health Risks Of Contaminated Sponges
Using a contaminated sponge can lead to cross-contamination. This means bacteria from raw meat or dirty surfaces can transfer to your clean dishes or countertops. The result? An increased risk of food poisoning and other illnesses.
People with weakened immune systems, young children, and the elderly are especially vulnerable. Even if you feel fine, using a dirty sponge can cause stomach bugs or skin infections. Have you ever wondered if your sponge is making you sick without you knowing it?
Sterilizing your kitchen sponge regularly breaks the cycle of bacteria growth. It helps maintain a healthier kitchen environment and protects your family from preventable health risks.
Preparing The Sponge For Microwaving
Preparing the sponge properly is crucial before microwaving it for sterilization. It helps avoid damage and ensures the sponge heats evenly. Taking simple steps makes the process safe and effective.
Rinsing And Wetting The Sponge
Start by rinsing the sponge thoroughly under running water. Remove any food particles or soap residue stuck inside. The sponge must be completely wet before microwaving. A dry sponge can catch fire in the microwave. Squeeze the sponge to soak it fully but avoid dripping water.
Checking For Metal Or Damage
Inspect the sponge carefully for any metal parts like scrubbing pads or wires. Metal can cause sparks and damage the microwave. Also, check for tears or holes. A damaged sponge will not heat evenly and may break apart. Only use a clean, intact sponge for microwaving.
Microwave Settings And Timing
Microwaving a kitchen sponge is a quick way to kill germs and bacteria. Setting the microwave correctly is important to avoid damage or fire risk. Timing and power level are the key factors for effective sterilization.
Optimal Power Level
Use a high power setting on your microwave for best results. Most microwaves have a "High" or "Full Power" option, usually at 700 to 1000 watts. This level heats the sponge evenly and kills germs effectively.
Lower power levels may not generate enough heat to sterilize the sponge properly. Avoid using the defrost or low power mode. These settings do not produce enough heat to clean the sponge.
Recommended Duration
Heat the sponge for about 1 to 2 minutes on high power. This duration is long enough to kill bacteria and viruses inside the sponge. Do not exceed 2 minutes to prevent the sponge from catching fire.
Always make sure the sponge is wet before microwaving. A dry sponge can burn quickly and create smoke. After microwaving, let the sponge cool before handling.

Credit: tidyhere.com
Step-by-step Microwave Sterilization
Microwaving your kitchen sponge is a quick and effective way to kill germs and keep your kitchen hygienic. It’s a simple process that anyone can do with just a few precautions to ensure safety and effectiveness. Let’s break down the steps to help you sterilize your sponge properly using your microwave.
Placing The Sponge Safely
Before microwaving, make sure your sponge is wet. A dry sponge can catch fire in the microwave. Soak it thoroughly in water and then wring out the excess, but keep it damp.
Place the sponge in a microwave-safe bowl or container to catch any drips and avoid direct contact with the microwave’s interior. This setup reduces mess and prevents damage to your microwave.
Running The Microwave
Set your microwave to high power and heat the sponge for about 1 to 2 minutes. The exact time depends on your microwave’s wattage—higher wattage models require less time.
Watch your sponge carefully while it’s heating. If you notice any burning smell or smoke, stop the microwave immediately. This safety check can prevent accidents.
Cooling Down Period
After microwaving, let the sponge cool down before handling it. The sponge will be extremely hot and could burn your fingers if touched too soon.
Place it on a heat-safe surface and allow it to cool for at least 5 minutes. This pause also lets the steam finish the sterilization process inside the sponge’s pores.
Safety Tips When Microwaving Sponges
Microwaving a kitchen sponge is a quick way to kill germs. It also requires careful handling. Sponges can catch fire or get damaged if not microwaved properly. Follow safety tips to protect yourself and your microwave.
Avoiding Fires And Damage
Always soak the sponge with water before microwaving. A dry sponge can catch fire quickly. Place the sponge in a microwave-safe container with water. Do not microwave sponges with metal parts or scrubbing pads.
Heat the sponge for no longer than two minutes. Stay near the microwave to watch for smoke or burning smells. Stop the microwave immediately if you see sparks or smoke.
Handling Hot Sponges
Use tongs or an oven mitt to remove the sponge. It will be very hot and can burn your skin. Let the sponge cool down on a safe surface before touching it with bare hands.
Do not squeeze the sponge right after microwaving. Hot water and steam may come out and cause burns. Wait until the sponge is cool enough to handle safely.
Alternative Methods To Sterilize Sponges
Sponges can harbor bacteria and germs. Regular cleaning is crucial for maintaining hygiene. If you prefer not to use a microwave, several alternative methods can be effective.
Boiling Water Technique
Boiling water kills bacteria efficiently. Place your sponge in a pot. Fill with water until the sponge is fully submerged. Bring the water to a boil. Let the sponge boil for 5 minutes. Carefully remove and let it cool.
Dishwasher Cleaning
Your dishwasher can also sterilize sponges. Place the sponge on the top rack. Run a full cycle with hot water and a drying cycle. This method cleans and sanitizes simultaneously.
Using Bleach Solutions
Bleach solutions are powerful disinfectants. Mix 3/4 cup bleach with 1 gallon of water. Soak the sponge for 5 minutes. Rinse thoroughly with water before using it again. This method ensures deep cleaning.
How Often To Sterilize Your Sponge
Sterilizing your kitchen sponge is key to keeping your kitchen clean and safe. How often you do this depends on how much you use the sponge. Daily use means you should sterilize it more often. Regular sterilization stops germs and bacteria from growing. This keeps your sponge fresh and your dishes cleaner.
Sponges can hold many germs due to constant contact with food and water. A good habit is to sterilize your sponge at least once a day. This prevents bacteria build-up and bad smells. If you use your sponge less, sterilizing it every few days might be enough. Always watch for signs that your sponge needs a deeper clean or replacement.
Signs You Need To Replace It
- Foul or sour smell that won’t go away.
- Spongy texture becomes hard or crumbly.
- Visible mold or dark spots on the sponge.
- Stains that do not wash out after cleaning.
- The sponge breaks apart during use.
These signs mean your sponge no longer cleans well. It’s time to throw it away and get a new one.
Daily Maintenance Tips
- Rinse the sponge thoroughly after every use.
- Squeeze out excess water to keep it dry.
- Store it in a clean, dry place with good air flow.
- Microwave the sponge for one to two minutes to kill germs.
- Replace the sponge every one to two weeks for best hygiene.
Following these tips helps your sponge last longer and stay cleaner. Daily care combined with regular sterilization keeps your kitchen safer.

Credit: www.absolutesolutions.com.sg

Credit: household-tips.thefuntimesguide.com
Frequently Asked Questions
How Long To Microwave A Kitchen Sponge For Sterilization?
Microwave the damp kitchen sponge for 1-2 minutes on high power. This duration kills most bacteria effectively without damaging the sponge.
Can Microwaving Kill All Bacteria On A Sponge?
Microwaving kills most bacteria but may not eliminate all spores. Regular sponge replacement is recommended for complete hygiene.
Should A Sponge Be Wet Before Microwaving?
Yes, always wet the sponge before microwaving. A damp sponge prevents fire hazards and helps steam sterilize effectively.
Is It Safe To Microwave A Kitchen Sponge Daily?
Microwaving daily is safe if the sponge is wet. However, replace sponges regularly to avoid bacteria buildup and odors.
Conclusion
Sterilizing a kitchen sponge in the microwave is quick and easy. It kills most bacteria and keeps your sponge fresh longer. Always wet the sponge before microwaving to avoid fire risks. Clean sponges help keep your kitchen safe and hygienic.
Try this simple step regularly to reduce germs. A clean sponge means cleaner dishes and surfaces. Small habits make a big difference in kitchen health. Give your sponge a quick microwave boost today.