
Your kitchen sponge is one of the dirtiest items in your home, but you probably use it every day without thinking twice. Did you know that if you don’t sterilize it regularly, it can become a breeding ground for harmful bacteria?
That’s why learning how to properly sterilize your kitchen sponge is so important. You’ll discover simple, effective ways to keep your sponge clean and safe. Stick with me, and you’ll never worry about germs hiding in your sponge again.
Why Sterilize Kitchen Sponges
Kitchen sponges might seem harmless, but they are one of the dirtiest items in your home. You use them to clean dishes, wipe counters, and soak up spills, which means they harbor plenty of germs. Sterilizing your sponge is essential to keep your kitchen safe and prevent bacteria from spreading.
Common Germs On Sponges
Sponges are perfect breeding grounds for bacteria due to their moist and porous nature. Some common germs found on sponges include:
- E. coli:Often from raw meat juices or contaminated food, it can cause severe stomach issues.
- Salmonella:Linked to poultry and eggs, it can lead to food poisoning.
- Staphylococcus aureus:This germ can cause skin infections and food poisoning.
- Mold and Yeast:These fungi thrive in damp environments, causing unpleasant odors and potential allergic reactions.
These germs multiply rapidly if the sponge isn’t cleaned or sterilized regularly. Imagine wiping your counter with a sponge full of bacteria—does that really clean your kitchen?
Health Risks Of Dirty Sponges
Using a dirty sponge is like inviting germs into your kitchen and onto your food. It increases the risk of foodborne illnesses, which can be severe, especially for kids, the elderly, or people with weakened immune systems.
Besides stomach problems, bacteria from sponges can cause skin infections if you have cuts or scrapes on your hands. Even worse, some germs produce toxins that are not destroyed by cooking, meaning they can make you sick despite thorough food preparation.
Have you ever thought about how often your sponge gets replaced or cleaned? Ignoring this small step could be risking your family’s health every day. Taking time to sterilize your sponge is a simple but powerful way to protect your kitchen and your wellbeing.
:max_bytes(150000):strip_icc()/hydrogen-peroxide-uses-home-4174809-05-3c126f03778d46f4858d75c2780429a9.jpg)
Credit: www.thespruce.com
Methods To Sterilize Sponges
Spoiled kitchen sponges can harbor harmful bacteria, making sterilization an essential task for any clean kitchen. You don’t have to replace your sponge after every use if you sterilize it properly. Here are practical methods you can try to keep your sponge safe and fresh.
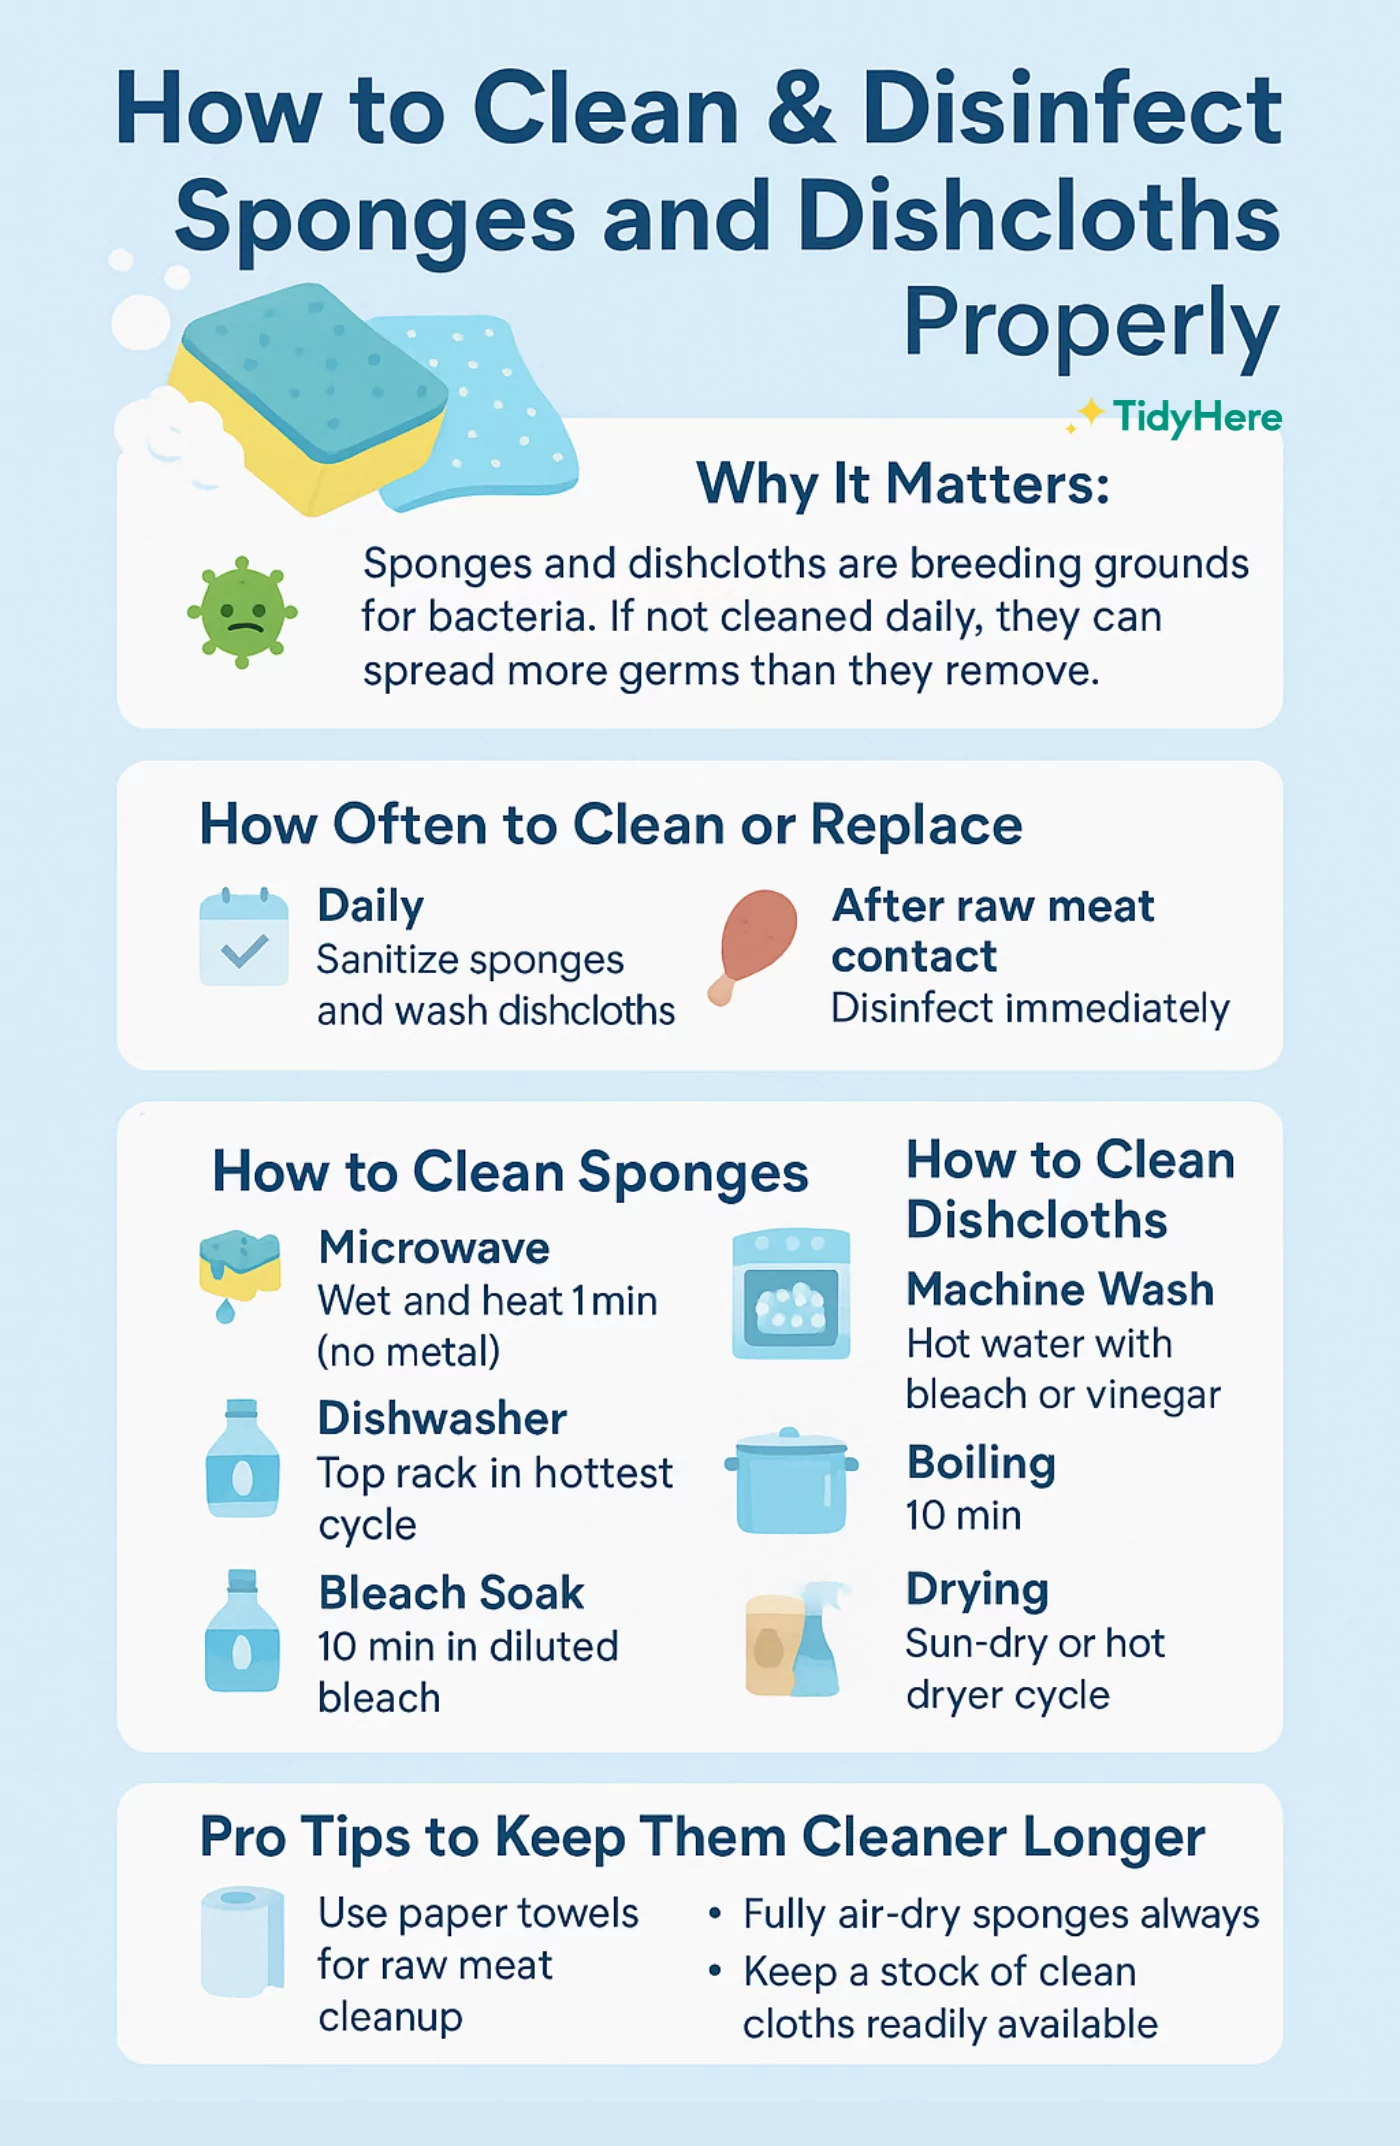
Microwave Technique
Wet your sponge thoroughly before placing it in the microwave. Heat it on high for about one to two minutes. The heat kills most bacteria, but be careful—the sponge will be hot when you take it out.
Have you noticed how quickly your sponge picks up odors? Microwaving can help reduce that unpleasant smell too.
Boiling Method
Simply drop your sponge into a pot of boiling water for five minutes. This method is easy and effective at killing germs. Make sure your sponge is completely submerged during boiling for the best result.
This technique has saved me countless times when I forgot to clean my sponge regularly. It’s quick and doesn’t require any special tools.
Dishwasher Cycle
Place your sponge in the dishwasher’s top rack and run it through a hot wash cycle. The combination of heat and detergent works well to sanitize. This method is great if you already run your dishwasher daily.
Have you tried this? It’s a convenient way to multitask while cleaning your dishes.
Using Bleach Solution
Mix 3/4 cup of bleach with one gallon of water. Soak your sponge in this solution for five minutes. Rinse thoroughly afterward to remove any bleach residue.
Bleach is a powerful disinfectant, but use it carefully. This method works well if you want a deep clean after heavy kitchen use.
Vinegar Soak
Soak your sponge in full-strength white vinegar for five minutes. Vinegar naturally kills many types of bacteria and is safe to use. After soaking, rinse your sponge well and let it dry.
Using vinegar is a gentle yet effective alternative if you prefer natural cleaning products. Have you ever thought of vinegar as a sponge sanitizer?
Step-by-step Microwave Sterilization
Place the damp kitchen sponge in the microwave-safe container. Heat it on high for about two minutes to kill germs. Let it cool before use to avoid burns.
Sterilizing a kitchen sponge using a microwave is simple and effective. Microwaving kills bacteria and keeps your sponge clean. Follow these steps to ensure a sanitized sponge.
Preparing The Sponge
Ensure the sponge is wet. A dry sponge can catch fire in the microwave. Rinse it thoroughly under running water. Squeeze out excess water to avoid dripping. This step is crucial for safety.
Microwaving Duration
Place the sponge in the microwave. Set the timer for one to two minutes. This duration is enough to kill most germs. Ensure the microwave is set on high power. This maximizes the effectiveness of sterilization.
Safety Tips
Watch the sponge while microwaving. Never leave it unattended. Be cautious when removing it as it will be hot. Use tongs or an oven mitt to handle it. Let it cool before using it again. This prevents burns and ensures safety.
Best Practices For Sponge Care
Keeping your kitchen sponge clean and well-maintained is essential to avoid spreading germs and unpleasant odors. By adopting smart care habits, you can extend the life of your sponge and keep your kitchen safer. Let’s explore some practical ways to care for your sponge effectively.
Regular Cleaning Frequency
Cleaning your sponge regularly prevents bacteria from building up. Ideally, you should sanitize your sponge daily or at least every other day if you use it often. You can microwave a damp sponge for one to two minutes or soak it in a bleach solution for a few minutes to kill germs.
Do you notice a foul smell or slimy texture before your scheduled cleaning? That’s a clear sign to clean it immediately. Staying consistent with this routine can save you from kitchen contamination.
Proper Drying Techniques
After every use, wring out your sponge thoroughly to remove excess water. A damp sponge is a perfect breeding ground for bacteria. Place it in a spot with good air circulation where it can dry quickly, such as on a raised rack or in a dish drainer.
Avoid leaving your sponge in the sink or in a closed container, as trapped moisture encourages mold growth. Have you tried hanging your sponge with a clip? It’s a simple trick that helps it dry faster and stay fresh longer.
When To Replace Sponges
No matter how well you clean and dry your sponge, it won’t last forever. Replace your sponge every two to four weeks, depending on usage and condition. If you spot tears, persistent odors, or discoloration, it’s time to toss it out.
Think about how often you use your sponge and how dirty it gets. A heavily used sponge needs replacement more frequently. Keeping track of its condition helps you avoid using a sponge that could harm your kitchen hygiene.
Alternatives To Traditional Sponges
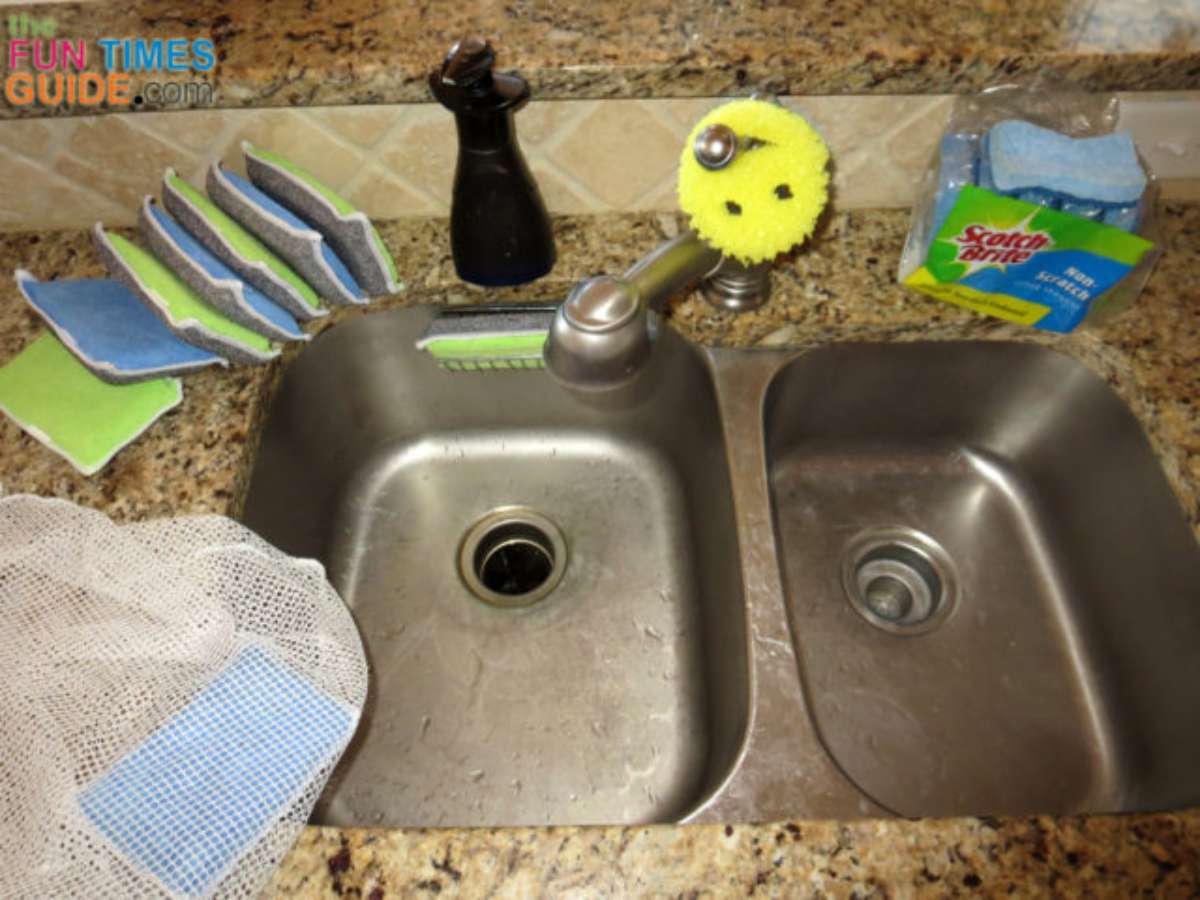
Traditional kitchen sponges can harbor bacteria despite regular cleaning. Looking beyond these common sponges can improve your kitchen hygiene and reduce waste. Let's check out some practical alternatives that might fit better with your routine and values.
Silicone Scrubbers
Silicone scrubbers are easy to clean and dry quickly, which helps prevent bacteria buildup. You can simply rinse them under hot water or pop them in the dishwasher for a deep clean. Their durability means you won’t need to replace them as often as traditional sponges, saving money over time.
Have you noticed how often your sponge starts to smell? Switching to silicone might solve that problem entirely. Plus, their flexible texture makes scrubbing pots and pans surprisingly effective without scratching surfaces.
Reusable Cloths
Reusable cloths, like microfiber or cotton dishcloths, offer a versatile cleaning option that you can wash and reuse multiple times. Toss them in your washing machine after each use to keep them fresh and bacteria-free. They also dry faster than sponges, reducing the chance of germs multiplying.
Think about the last time you cleaned with a cloth—did it feel as thorough as a sponge? You might be surprised at how well a damp cloth can wipe away grease and crumbs, especially when combined with a good cleaning spray.
Natural Fiber Sponges
Natural fiber sponges, made from materials like cellulose or loofah, are biodegradable and compostable. They absorb water well and break down naturally, which reduces environmental impact. To keep them clean, you can soak them in vinegar or lemon juice regularly.
Have you tried using a loofah sponge in your kitchen? Its rough texture works great on stuck-on food without harsh chemicals. Choosing natural fibers can be a simple way to make your cleaning routine greener without sacrificing effectiveness.

Credit: tidyhere.com
Credit: household-tips.thefuntimesguide.com
Frequently Asked Questions
How Often Should I Sterilize My Kitchen Sponge?
You should sterilize your kitchen sponge at least once a week. Regular sterilization reduces bacteria and keeps your kitchen hygienic. If the sponge smells or looks worn, replace it immediately to avoid contamination.
What Is The Best Method To Sterilize A Kitchen Sponge?
Microwaving a damp sponge for 1-2 minutes is the most effective sterilization method. It kills most bacteria and germs quickly. Ensure the sponge is wet to avoid fire hazards and always supervise the process.
Can I Use Bleach To Sterilize My Kitchen Sponge?
Yes, soaking your sponge in a bleach solution for 5 minutes sterilizes it effectively. Use one tablespoon of bleach per gallon of water. Rinse thoroughly afterward to remove bleach residues before use.
Does Boiling A Kitchen Sponge Kill All Bacteria?
Boiling a kitchen sponge for 5 minutes kills most bacteria and germs. It’s a simple and chemical-free sterilization method. However, repeated boiling may degrade the sponge faster over time.
Conclusion
Sterilizing your kitchen sponge keeps your kitchen clean and safe. Regular cleaning stops germs from spreading. Use simple methods like microwaving or soaking in vinegar. These steps take little time but help a lot. Replace your sponge often to avoid bad smells.
Clean sponges last longer and work better. A clean sponge means healthier dishes and counters. Small habits make a big difference in your kitchen. Keep your sponge fresh to protect your family’s health. Simple care leads to a cleaner home every day.