
Your kitchen sponge is one of the most used tools in your home, but are you storing it the right way? If not, it could be harboring harmful bacteria and odors that affect your dishes and health.
You might think it’s just a simple sponge, but how you care for and store it makes a huge difference. Keep reading to discover easy and effective ways to store your kitchen sponge so it stays clean, lasts longer, and keeps your kitchen fresh.
Don’t let a small mistake turn your sponge into a big problem!

Credit: food52.com
Choosing The Right Sponge
Choosing the right kitchen sponge is important for cleanliness and durability. A good sponge cleans well and lasts longer. It also resists odors and bacteria. Knowing the types and materials helps pick the best one for daily use.
Types Of Kitchen Sponges
- Cellulose Sponges:Made from natural wood fibers. They absorb water well and are biodegradable.
- Foam Sponges:Soft and flexible. They dry quickly but may not last as long.
- Abrasive Sponges:Have a rough side for scrubbing tough stains. Good for pots and pans.
- Silicone Sponges:Non-porous and easy to clean. They resist bacteria and odors.
Materials And Durability
| Material | Durability | Cleaning Ability | Resistance to Odors |
|---|---|---|---|
| Cellulose | Moderate | Good | Low |
| Foam | Low to Moderate | Moderate | Low |
| Abrasive | High | Excellent | Moderate |
| Silicone | High | Good | High |
Proper Sponge Drying Techniques
Proper sponge drying techniques are essential to keep your kitchen sponge clean and free from bacteria. A damp sponge creates the perfect environment for germs to grow quickly. Drying your sponge thoroughly after each use can extend its life and maintain hygiene in your kitchen.
Air Drying Methods
Letting your sponge air dry is one of the simplest ways to keep it fresh. Place the sponge in an open area where air can circulate freely around it. Avoid leaving it in the sink or on a flat surface where water can pool.
You can prop the sponge upright or lay it on a rack with holes to allow water to drain away easily. I once left my sponge on the counter overnight and noticed a bad smell the next day—air drying properly helped eliminate that issue quickly. How often do you check if your sponge is drying thoroughly?
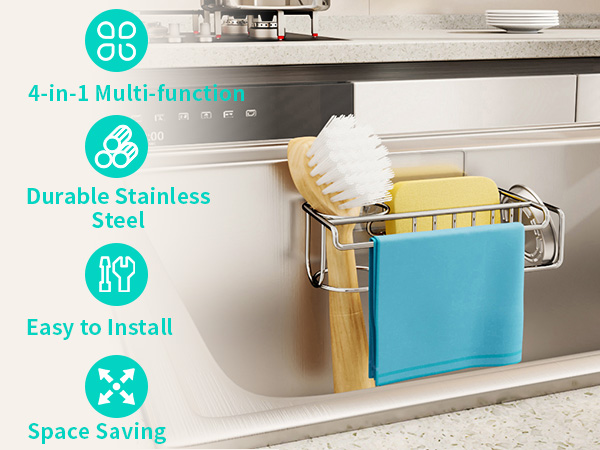
Using A Sponge Holder
A sponge holder helps keep your sponge dry and organized. Look for holders that allow drainage and air flow, such as ones with slats or perforations. These holders reduce contact with wet surfaces, speeding up the drying process.
Some holders attach to the sink or wall, keeping the sponge off countertops and away from bacteria hotspots. Investing in a good sponge holder can save you time and prevent unpleasant odors. Have you tried different holders to see which one works best for your kitchen setup?
Cleaning And Sanitizing Sponges
Store kitchen sponges in a dry, well-ventilated place to prevent bacteria growth. Avoid leaving sponges in a wet sink or closed container. Regularly rinse and squeeze out excess water to keep them clean and fresh.
Keeping your kitchen sponge clean and sanitized is essential for maintaining a healthy kitchen environment. Sponges are a breeding ground for bacteria due to their constant exposure to food particles and moisture. By adopting effective cleaning methods, you can ensure that your sponges remain hygienic and safe for daily use. Let's dive into some practical ways to clean and sanitize your kitchen sponge effectively.
Microwave Cleaning
One of the easiest ways to sanitize your sponge is by using your microwave. Simply wet your sponge and place it in the microwave for about one minute on high power. The heat will kill most of the bacteria lurking in your sponge. Ensure the sponge is damp before microwaving to prevent any risk of fire. If your sponge has a metallic scrub pad, avoid this method to prevent sparks. Remember to let it cool before handling to avoid burns.
Dishwasher Cleaning
Your dishwasher can double as a sponge cleaner. Place your sponge on the top rack and run it through a regular wash cycle with your dishes. The combination of hot water and detergent will help sanitize it. This method is convenient if you're running your dishwasher daily. It's a hands-off approach that integrates seamlessly with your routine. Plus, it's a great way to make the most of your dishwasher's capabilities.
Using Bleach Solutions
For a more thorough clean, consider using a bleach solution. Mix 3/4 cup of bleach in one gallon of water and soak your sponge for about five minutes. This method is highly effective in killing bacteria. Ensure you rinse the sponge thoroughly after soaking to remove any bleach residue. While bleach is powerful, using it occasionally is enough to maintain cleanliness. This method is especially useful if your sponge has been used to clean up raw meat juices or other potentially harmful substances. Have you ever considered how these simple steps could drastically reduce the germs in your kitchen? Implementing these cleaning methods can help you maintain a cleaner and healthier home.

Credit: www.walmart.com
Storage Locations For Sponges
Choosing the right storage location for your kitchen sponge is crucial to keep it dry, clean, and long-lasting. Where you place your sponge can either help it dry quickly or trap moisture, leading to unpleasant odors and bacteria growth. Let’s look at some smart ways to store your sponge that keep your kitchen hygienic and your sponge ready for use.
Avoiding Damp Areas
Sponges stored in damp spots stay wet for too long, creating a perfect home for bacteria. Avoid leaving your sponge directly on the sink edge or inside the sink basin where water collects.
Have you ever noticed a sponge smelling bad just a day after use? That’s often because it stayed wet in a poorly ventilated spot. Keep your sponge away from areas where water pools or where humidity is high.
Instead of tossing your sponge on the countertop near the faucet, find a place where air flows freely. This simple change can cut down on unpleasant smells and keep your sponge fresher.
Ideal Storage Spots
Look for a location that allows your sponge to dry quickly between uses. A small rack or holder placed near the sink but off the counter can be perfect.
- Use a sponge holder with drainage:It lets water drip away and air circulate, speeding up drying.
- Consider a magnetic sponge holder:These attach to your faucet or sink side, keeping your sponge suspended and dry.
- Place it near a window or vent:Fresh air helps prevent moisture buildup.
I switched from leaving my sponge flat on the counter to using a hanging holder, and I noticed it lasted twice as long without smelling. This small change made cleaning less frustrating and more hygienic. What simple switch can you try today to make your sponge storage better?
Replacing Sponges Regularly
Replacing kitchen sponges regularly is essential for maintaining a clean and healthy kitchen. Sponges can harbor bacteria and unpleasant odors over time. Changing them often helps prevent the spread of germs and keeps your kitchen fresh.
Signs To Replace
- Foul or sour smell coming from the sponge
- Visible mold or dark spots on the sponge
- Sponge feels slimy or unusually soft
- Worn-out texture or pieces falling apart
- Sponges used for raw meat or heavy grease stains
Recommended Replacement Frequency
Change kitchen sponges every one to two weeks. Sponges used daily or for tough cleaning may need replacement more often. If you notice any signs above, replace the sponge immediately. Regular replacement ensures better hygiene and reduces bacteria buildup in your kitchen.
Alternative Cleaning Tools
Alternative cleaning tools provide a fresh way to keep your kitchen clean without relying on traditional sponges. These tools often last longer and dry faster, reducing germs and odors. They make kitchen cleanup easier and more hygienic.
Reusable Cloths
Reusable cloths are soft and absorbent, perfect for wiping surfaces and washing dishes. They dry quickly and can be washed many times. These cloths reduce waste and save money over time. Use them damp for better cleaning power.
Silicone Scrubbers
Silicone scrubbers resist stains and dry fast. Their flexible bristles clean without scratching pots or pans. They do not trap bacteria like sponges do. Silicone scrubbers are easy to rinse and keep fresh. They last longer and need less replacement.

Credit: www.amazon.ca
Frequently Asked Questions
How Should I Store A Kitchen Sponge To Prevent Bacteria?
Store your kitchen sponge in a dry, well-ventilated spot. Avoid leaving it wet or in a closed container. This reduces bacteria growth and keeps the sponge fresh longer.
Can I Keep My Kitchen Sponge Near The Sink?
Avoid storing the sponge directly on the sink. Water splashes keep it damp, promoting bacteria. Use a sponge holder or rack that allows air circulation.
How Often Should I Replace My Kitchen Sponge?
Replace your kitchen sponge every 1 to 2 weeks. Sponges harbor bacteria even with cleaning. Frequent replacement ensures hygiene and prevents odors.
Is It Safe To Microwave A Kitchen Sponge For Cleaning?
Yes, microwaving a damp sponge for 1-2 minutes kills most bacteria. Ensure the sponge is wet to avoid fire hazards. Let it cool before use.
Conclusion
Storing your kitchen sponge properly keeps it clean and lasts longer. Keep it dry between uses to stop germs from growing. Place it where air can reach all sides. Change your sponge often for best results. Clean sponges help keep your kitchen safe and fresh.
Simple habits make a big difference in hygiene. Start practicing these tips today and enjoy a healthier kitchen space.