
Your kitchen sponge works hard every day, scrubbing away dirt and grime. But have you ever thought about where you leave it when you're done?
How you store your kitchen sponge can make a big difference in keeping it clean, fresh, and ready to use. If you want to avoid unpleasant odors and harmful bacteria, this guide is for you. Keep reading to discover simple, effective ways to store your kitchen sponges and keep your kitchen healthier.
Choosing The Right Sponge
Choosing the right kitchen sponge is more important than you might think. It affects how well you clean, how long the sponge lasts, and even how hygienic your kitchen stays. Picking the perfect sponge means balancing durability, effectiveness, and ease of storage.
Types Of Kitchen Sponges
There are various types of kitchen sponges, each designed for specific cleaning tasks. Some common options include:
- Cellulose sponges:Made from natural fibers, they absorb water quickly and are good for everyday cleaning.
- Synthetic sponges:Often more durable, these resist odors but may not absorb as well.
- Scrubber sponges:Feature a rough side for tough grime and a soft side for gentle cleaning.
- Silicone sponges:Easy to clean and quick drying, reducing bacteria growth.
Choosing a type depends on your cleaning needs and how you plan to store and maintain the sponge.
Material Benefits
Material plays a big role in sponge performance and hygiene. For example, cellulose sponges are biodegradable and eco-friendly but can harbor bacteria if left wet.
Silicone sponges dry faster and resist smells, making them a smart choice if you want less maintenance. Synthetic sponges offer durability but might not break down easily in compost.
Think about what matters most to you—environmental impact, longevity, or ease of cleaning—when picking your sponge material.
Sponge Sizes And Shapes
The size and shape of your sponge affect how comfortable it is to use and where you can store it. Larger sponges cover more surface area but can be bulky to dry properly.
Smaller sponges are easier to handle and store but may require more effort for bigger jobs. Shapes like rectangular or oval can fit better in certain holders or drying racks.
Ask yourself: do you prefer a sponge that fits in your hand easily, or one that tackles large pots quickly? The right size and shape make a big difference in your daily kitchen routine.
Proper Cleaning Techniques
Keeping your kitchen sponges clean is essential for maintaining a hygienic cooking space. Proper cleaning techniques can extend the life of your sponges and prevent harmful bacteria from spreading. Let’s look at simple steps you can take to keep your sponges fresh and safe.
Daily Rinsing And Squeezing
After each use, rinse your sponge thoroughly under hot water. This removes food particles and soap residue that can cause odors and bacterial growth.
Make sure to squeeze out all excess water. A damp sponge is a breeding ground for germs, so drying it quickly is key.
Do you notice your sponge smelling bad after just a day? This simple habit can make a big difference.
Disinfecting Methods
Regular disinfecting helps kill bacteria that rinsing alone can’t remove. You can soak your sponge in a mixture of one part bleach to nine parts water for five minutes.
Microwaving a damp sponge for one minute is another quick and effective method to sanitize it. Just be sure the sponge doesn’t contain metal and is wet to avoid fire hazards.
Some people use vinegar or hydrogen peroxide as natural disinfectants. Have you tried any of these methods, and how did they work for you?
Avoiding Cross-contamination
Never use the same sponge for raw meat juices and other surfaces. This practice can spread harmful bacteria like Salmonella across your kitchen.
Keep separate sponges for dishes, countertops, and cleaning up spills. Labeling them can help you remember which is which.
Think about your last kitchen cleanup—did you switch sponges when handling different messes? This small change can protect your family’s health.
Effective Drying Practices
Effective drying practices are crucial for keeping kitchen sponges fresh. Proper drying prevents bacteria and mold growth, extending the sponge's lifespan. Let's explore simple ways to dry your sponges effectively.
Air Drying Tips
Allow sponges to breathe by placing them in open spaces. Ensure air circulates freely around the sponge. Elevated spots like racks or window sills work best. Keep them away from the sink's edge to avoid water splashes.
Avoiding Moisture Traps
Moisture traps can ruin sponges quickly. Avoid leaving them in enclosed containers. Steer clear of areas that stay damp or accumulate water. Ensure the sponge's surface is exposed to air.
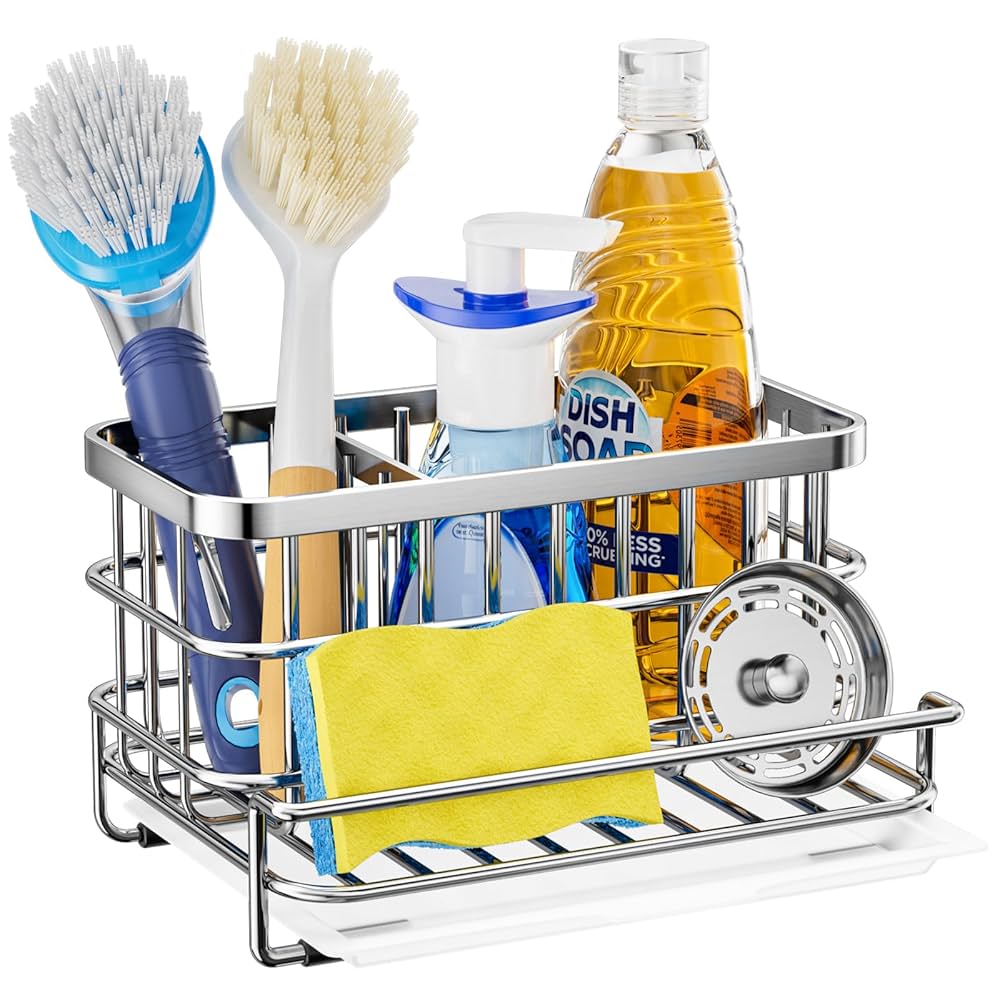
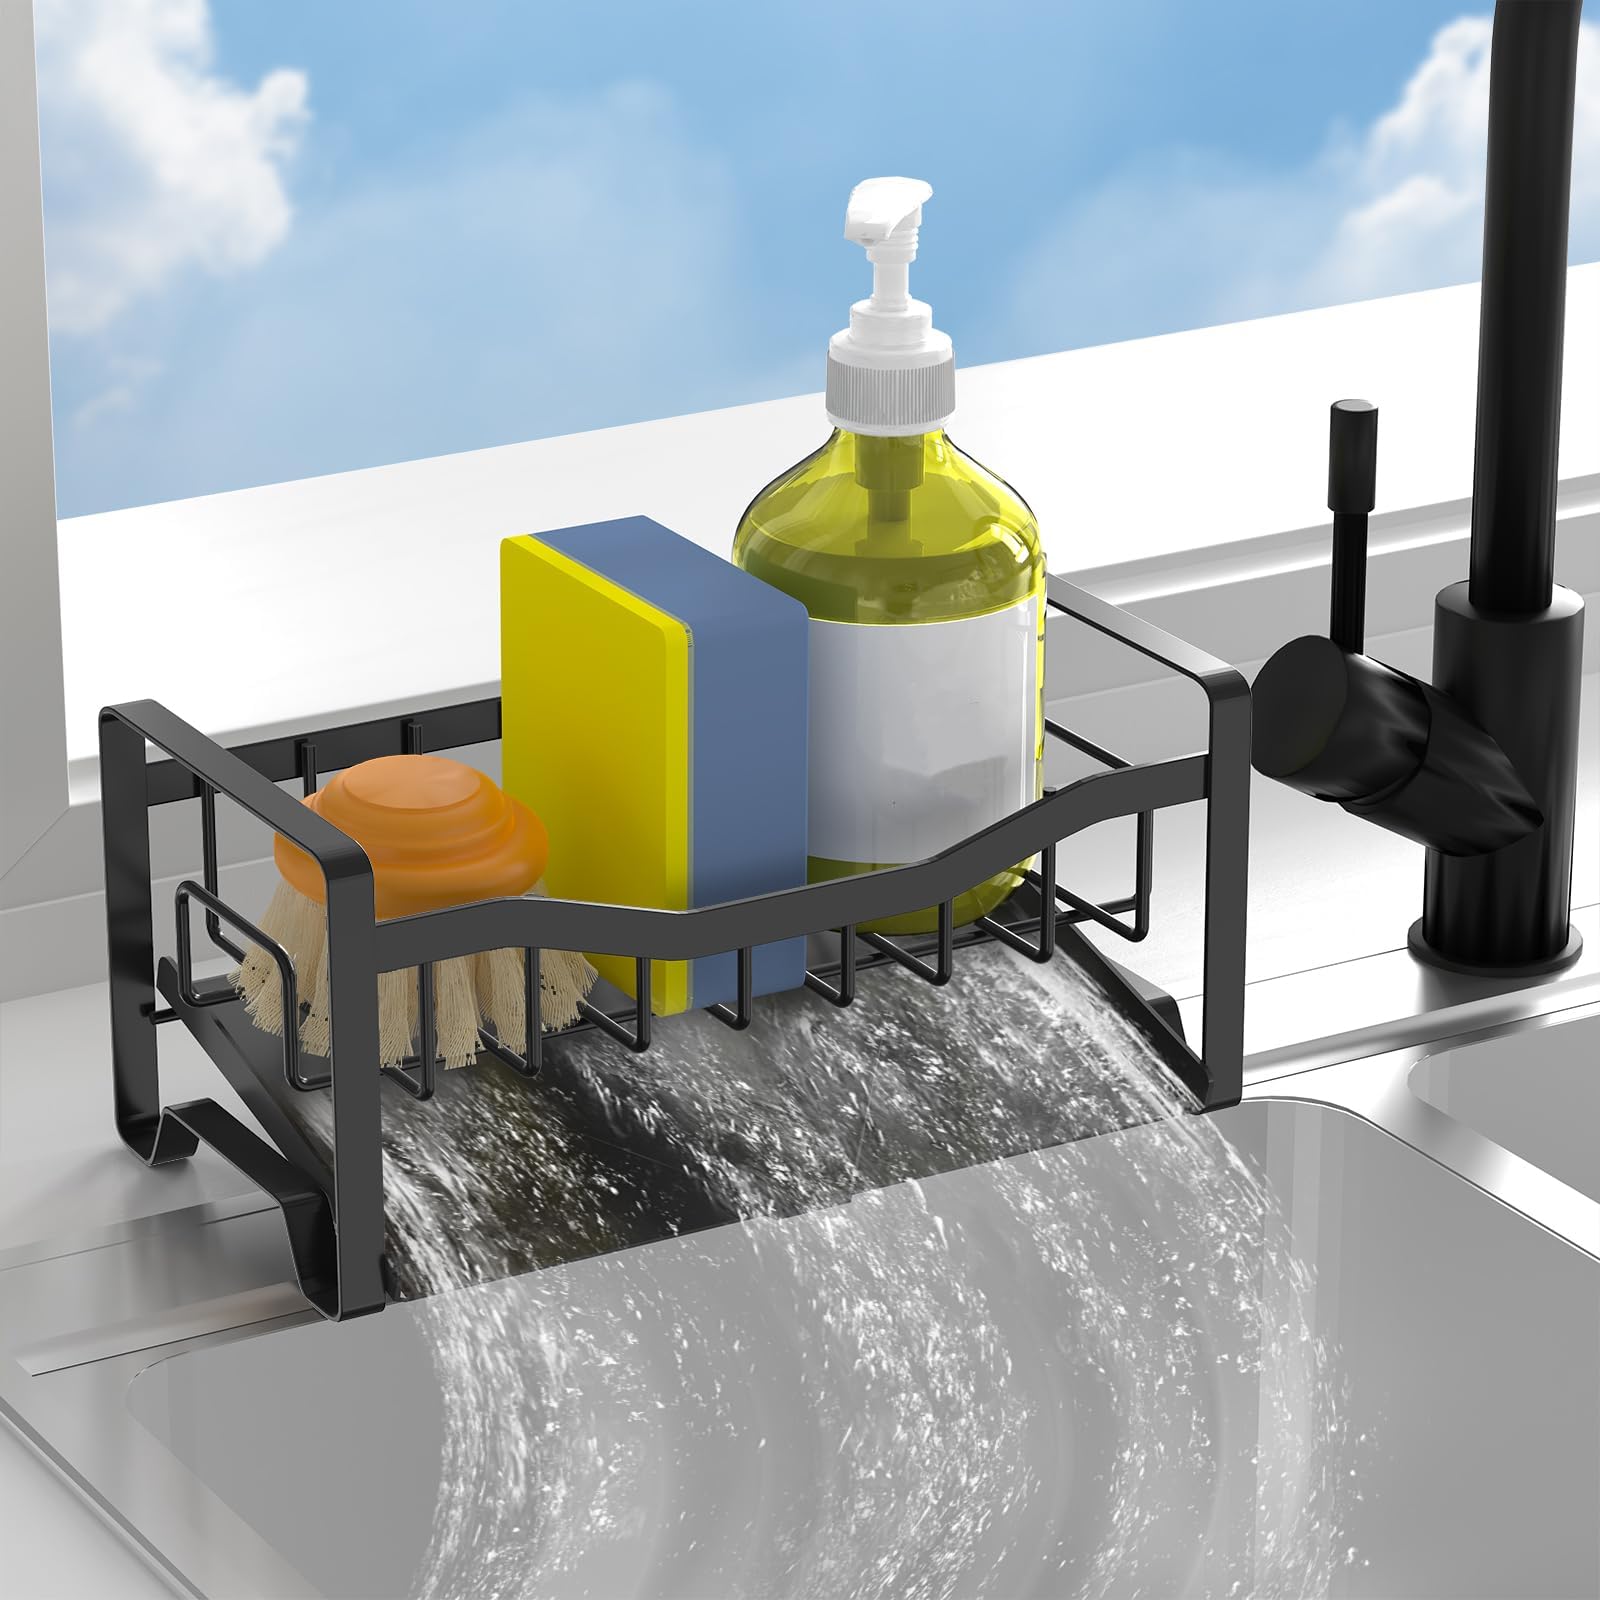
Using Sponge Holders
Sponge holders offer a structured drying solution. Choose holders with drainage holes. This design prevents water from pooling under the sponge. Secure holders to walls or sink edges for optimal drying.
:max_bytes(150000):strip_icc()/spr-the-container-store-bathroom-under-sink-starter-kit-stella-yu-9-b677a23d65be496b89eaa0257dec08de.jpeg)
Credit: www.thespruce.com
Storage Solutions
Finding the right storage solutions for your kitchen sponges can make a big difference in hygiene and longevity. Proper storage keeps sponges dry and clean, preventing bacteria buildup and unpleasant odors. It’s all about choosing spots and tools that encourage quick drying and easy access.
Ideal Locations In The Kitchen
Placing sponges near the sink is convenient, but not all spots are equal. Avoid leaving sponges flat on the countertop or inside the sink where water pools. Instead, choose elevated areas like a sponge holder attached to the sink or a small dish rack nearby.
Think about airflow—places with good ventilation help sponges dry faster. Have you noticed how sponges stored on a windowsill or open shelf tend to stay fresher? Try to keep them away from damp corners or enclosed spaces where moisture lingers.
Using Containers And Racks
Containers and racks designed for sponges can be game changers. Look for holders with drainage holes or slats that let water escape. This stops your sponge from sitting in water and becoming a breeding ground for germs.
Plastic or silicone containers are easy to clean, but metal racks often offer better airflow. You might even repurpose small wire baskets or soap dishes. Remember, the goal is to keep the sponge elevated and dry between uses.
Keeping Sponges Separate
Do you use different sponges for dishes, countertops, and other tasks? Keep each sponge separate to avoid cross-contamination. Use separate holders or compartments for each sponge, so they don’t touch or share the same wet environment.
This simple practice reduces the risk of spreading bacteria around your kitchen. Labeling containers can help family members know which sponge to use for each cleaning task. Small steps like this protect your health and improve kitchen hygiene.
When To Replace Sponges
Knowing when to replace kitchen sponges keeps your kitchen clean and safe. Sponges break down with use and lose their cleaning power. Old sponges also harbor germs that can cause illness. Regular replacement is essential for hygiene and effectiveness.
Signs Of Wear And Tear
- Sponges develop a strong, unpleasant odor.
- They start falling apart or have holes.
- Colors fade or the texture becomes rough.
- They no longer clean dishes or surfaces well.
These signs mean it is time to replace the sponge immediately.
Health Risks Of Old Sponges
Old sponges hold bacteria, mold, and yeast. These germs spread to dishes and countertops.
Using worn sponges can cause food poisoning and infections. Sponges are a perfect home for harmful microbes.
Regular replacement reduces the risk of illness and keeps your kitchen safe.
Eco-friendly Disposal Tips
- Cut sponges into small pieces before discarding.
- Check if your local waste program accepts them for composting.
- Consider recycling options for synthetic sponges if available.
- Use biodegradable sponges for easier disposal.
Proper disposal helps reduce landfill waste and environmental harm.

Credit: www.ebay.com
Credit: www.amazon.com
Frequently Asked Questions
How Should I Store Kitchen Sponges To Stay Dry?
Store kitchen sponges in a well-ventilated holder. Avoid leaving them in damp sinks or closed containers. This prevents bacterial growth and keeps sponges dry and fresh longer.
Can I Store Kitchen Sponges In The Microwave?
Yes, microwaving damp sponges kills bacteria effectively. Heat for 1-2 minutes on high, but ensure the sponge is wet to avoid fire risks.
How Often Should I Replace Kitchen Sponges?
Replace kitchen sponges every 1-2 weeks. Frequent replacement prevents bacteria buildup and maintains kitchen hygiene. If sponges smell bad, replace them immediately.
Is It Safe To Store Sponges Near The Sink?
Avoid storing sponges directly on the sink. Use a sponge holder that drains water to keep sponges dry and reduce bacteria growth.
Conclusion
Properly storing kitchen sponges keeps them clean and lasts longer. Always let sponges dry completely between uses to stop bacteria growth. Place them in a well-ventilated area away from sinks and damp spots. Regularly replace old sponges to maintain kitchen hygiene.
Small steps like these make a big difference in kitchen safety. Keep your sponges fresh and your kitchen healthier every day. Simple care helps prevent germs and bad smells easily. Clean sponges make washing dishes easier and more effective.