
Is your kitchen sink clogged and water won’t drain? You don’t need to call a plumber just yet.
Learning how to use a plunger on your kitchen sink can save you time, money, and frustration. With the right technique, you can clear that blockage quickly and get your sink flowing smoothly again. Keep reading, and you’ll discover simple steps that anyone can follow—even if you’ve never used a plunger before.
Your kitchen will be back to normal in no time!
Tools You Need
A sturdy plunger with a cup that fits your sink drain is essential. A bucket and gloves can also help keep the area clean and safe.
Having the right tools is crucial when you're tackling a clogged kitchen sink. Not only does it make the process more efficient, but it can also prevent damage to your plumbing. Let's dive into the essential tools you'll need to effectively use a plunger on your kitchen sink.
Choosing The Right Plunger
Selecting the proper plunger is the first step to success. For kitchen sinks, a cup plunger is usually the best choice. This type of plunger has a flat rim and is designed to create a good seal over flat surfaces, such as those found in kitchen sinks. When I first unclogged my sink, I made the mistake of using a flange plunger, which is better suited for toilets. It was a learning moment that highlighted the importance of using the right tool for the job.
Additional Supplies
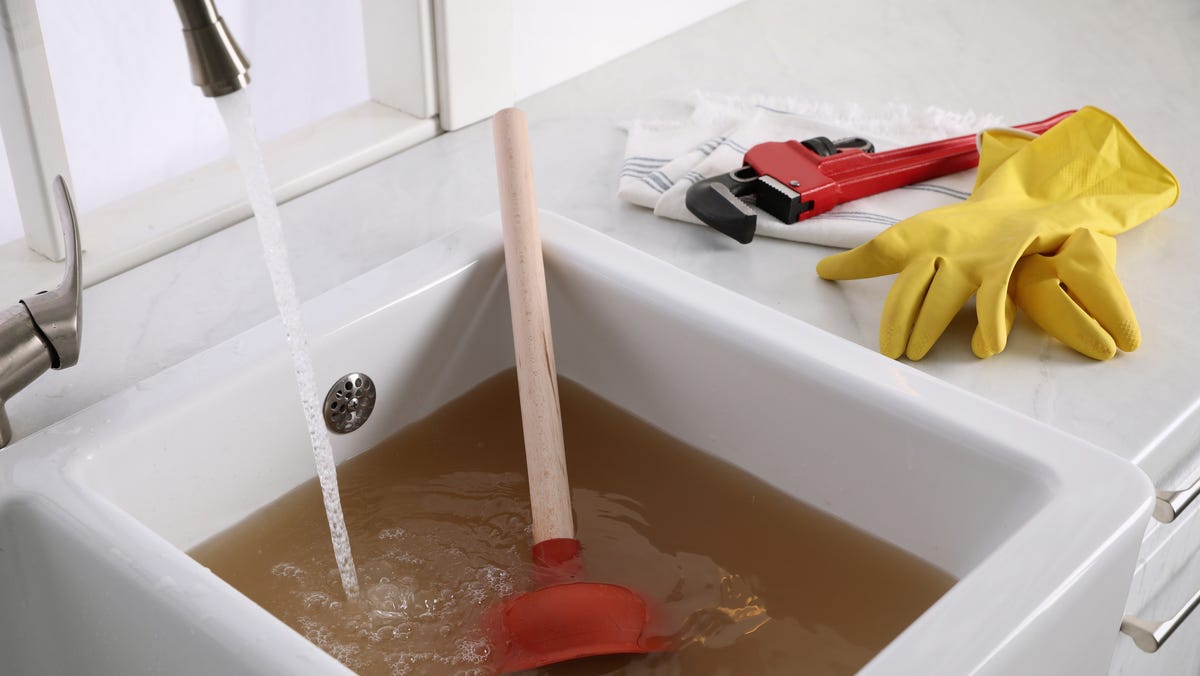
Aside from a plunger, having a few other supplies on hand can make the task easier. Keep a bucket nearby to catch any overflow from the sink. This simple step can save you from a potential mess. A pair of rubber gloves can protect your hands from dirty water and any debris. It's also wise to have a towel or cloth ready to wipe up any spills quickly. Do you have a stubborn clog? Consider using a drain snake or auger as a backup plan. These tools can reach deeper into the pipes, breaking up tougher blockages that a plunger might not handle. By preparing these tools and supplies, you'll be well-equipped to tackle a clogged kitchen sink effectively.

Credit: www.drano.com
Preparing The Sink
Preparing the sink is the first important step before using a plunger. A clean and clear area helps the plunger work better. It also makes the process faster and more effective.
Clearing The Drain Area
Remove any dishes, food scraps, or objects near the drain. This prevents them from blocking the plunger or falling into the drain. Clear the sink surface to have enough space for plunging. Check the drain opening for visible debris and take it out carefully.
Removing Excess Water
Too much water in the sink can reduce the plunger’s suction power. Use a cup or small container to scoop out some water. Leave enough water to cover the plunger cup. This water helps create a tight seal for better plunging.
Plunging Techniques
Mastering the right plunging techniques can make clearing your kitchen sink clog quicker and less frustrating. The secret lies not just in plunging hard but in how you position and move the plunger. Let’s break down the key techniques that help you get the best results.
Creating A Seal
Start by ensuring the plunger cup completely covers the drain opening. Without a tight seal, air will escape and reduce the pressure needed to push the clog through. If your sink has an overflow hole, plug it with a wet cloth to keep the seal airtight.
Check that the rim of the plunger is flat against the sink surface. You might need to adjust the angle slightly to remove any gaps. A strong seal is your foundation for effective plunging.
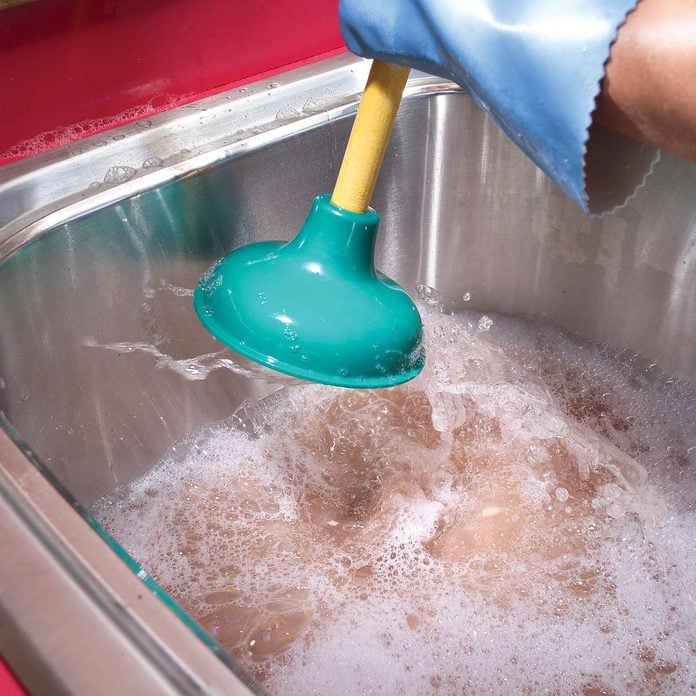
Proper Pumping Motion
Use firm, controlled pushes and pulls rather than quick, jerky motions. The goal is to push water, not just air, down the drain to move the blockage. Slow, steady pumps create consistent pressure that works better than frantic plunging.
Try to keep the plunger submerged in water while you pump. Water transfers the force more effectively than air, so if your sink is too empty, add some water before starting. You’ll feel a difference when the clog begins to loosen.
When To Stop
Listen and watch for signs that the water is draining normally again. If plunging doesn’t clear the clog after about 15 seconds of effort, pause and reassess the situation. Sometimes repeated attempts won’t help if the blockage is too deep or solid.
Don’t keep plunging endlessly—it can damage your pipes or the plunger itself. If you notice no change, it might be time to try a different method or call a professional. How do you decide when enough is enough during a stubborn clog?
Dealing With Stubborn Clogs
Stubborn clogs in your kitchen sink can be frustrating. Sometimes, a regular plunge isn’t enough to clear the blockage. You need extra techniques that work with the plunger to get your sink draining smoothly again.
Using Hot Water
Hot water can help soften grease and food particles stuck in your pipes. Pour a kettle of boiling water slowly down the drain before plunging. This warms up the clog, making it easier to break apart.
After pouring hot water, use your plunger with firm, steady pressure. You might notice the clog loosening quicker than usual. Ever tried plunging cold water first? Hot water often speeds up the process because of its dissolving power.
Combining With Baking Soda And Vinegar
Baking soda and vinegar create a fizzy reaction that can break down tough clogs naturally. Start by pouring half a cup of baking soda into the drain. Follow with half a cup of vinegar and let the mix bubble for 10-15 minutes.
After the fizzing slows, flush the drain with hot water. Then plunge as usual. This combo often helps to dislodge grime that a plunger alone can’t shift. Have you noticed how chemical-free solutions sometimes work better than harsh cleaners?
Preventing Future Clogs
Stopping clogs before they start is your best defense against a backed-up kitchen sink. Preventing future clogs saves you time, frustration, and the hassle of repeated plunging. Let’s look at simple habits and smart choices that keep your drain flowing smoothly.
Regular Maintenance Tips
Regular care can make a big difference in how often you deal with clogs. Try pouring boiling water down the drain once a week to break down grease and soap buildup. This easy step helped me avoid a clog that used to happen every month.
Another helpful tip is to clean the drain stopper frequently. Food particles get stuck there and start to cause blockages. You can remove the stopper and scrub it with a brush and warm soapy water.
Using a sink strainer is a simple way to catch food scraps before they enter the drain. This small tool saved me from plunging several times. Empty the strainer regularly to keep it effective.
What Not To Put Down The Drain
Knowing what to avoid pouring down your kitchen sink can prevent many clogs. Never pour grease, oil, or fat down the drain—they harden and trap debris. Instead, collect them in a container and throw them in the trash.
Be cautious with fibrous vegetables like celery and potato peels. They don’t break down easily and can tangle in your pipes. Coffee grounds are another common culprit; they clump together and slow water flow.
Ask yourself before tossing something down the sink: Will this break down quickly, or could it cause a clog? Keeping these tricky items out of your drain will keep your plumbing happy and your sink clear.

Credit: www.yahoo.com
When To Call A Professional
Knowing when to call a professional plumber can save you time, money, and frustration. While plungers work well for minor clogs, some situations require expert help. Ignoring these signs might make the problem worse or damage your plumbing system.
Signs That A Plunger Isn’t Enough
If you’ve tried plunging your kitchen sink multiple times with no success, it’s a clear signal to stop. Persistent blockages that don’t respond to plunging often indicate deeper issues like pipe damage or severe clog buildup.
Have you noticed slow drainage combined with gurgling sounds or unpleasant odors? These are red flags that a professional should inspect your pipes.
Water Leaks Or Damage Around The Sink
When water starts pooling under your sink or you see stains and warping on cabinets, the problem might be a leak rather than just a clog. Using a plunger won’t fix leaks and could sometimes worsen the situation.
In my experience, calling a plumber early when leaks appear prevented costly water damage and mold growth in my kitchen.
Multiple Drains Are Backed Up
If your kitchen sink isn’t the only drain acting up—maybe the bathroom or laundry sink is slow too—you could have a clog in the main sewer line. This type of blockage is beyond the reach of a standard plunger.
This scenario demands professional tools and expertise to diagnose and fix the problem safely.
Unfamiliar Or Complex Plumbing Systems
Older homes or those with custom plumbing might have traps, vents, or pipes that aren’t straightforward. You might not know where to apply pressure with a plunger or how to avoid damaging delicate parts.
In cases like this, a professional can assess your unique setup and prevent accidental damage.
After Hours Or Emergency Situations
Sometimes clogs happen at inconvenient times and cause flooding or severe backups. If your sink is overflowing or water is backing up into other areas, don’t hesitate to call an emergency plumber.
Waiting could lead to bigger messes and more expensive repairs.
Credit: www.familyhandyman.com
Frequently Asked Questions
How Do I Use A Plunger On A Kitchen Sink?
Place the plunger over the drain to create a seal. Push down and pull up vigorously several times. Repeat until water drains freely, then flush with hot water.
What Type Of Plunger Is Best For Kitchen Sinks?
A cup-shaped plunger without a flange works best. It forms a tight seal over flat sink drains. Avoid toilet plungers with a flange, as they don’t seal kitchen sinks well.
How Long Should I Plunge A Clogged Kitchen Sink?
Plunge for about 1 to 2 minutes at a time. If the clog persists, wait a few minutes before trying again. Avoid excessive force to prevent pipe damage.
Can A Plunger Damage Kitchen Sink Pipes?
When used properly, a plunger won’t damage pipes. Use gentle but firm pressure to avoid pipe or seal damage. Stop if you hear cracking sounds or leaks.
Conclusion
Using a plunger on your kitchen sink is simple and quick. Start with a good seal around the drain. Pump gently at first, then with more force. This helps clear blockages without damage. If water drains slowly, repeat the process a few times.
Keep your plunger clean for the next use. Small problems can often be fixed without a plumber. Regular plunging keeps your sink working well. Remember, patience helps; don’t rush the process. Now, your sink should drain smoothly again. Easy to do and saves money.