
Have you ever wanted to draw a kitchen blender but didn’t know where to start? You’re not alone.
Drawing everyday objects can feel tricky, but with the right steps, you can create a clear and realistic sketch of your blender. Imagine impressing your friends with your art or even designing your own kitchen tools. This guide will break down the process into simple, easy-to-follow steps that anyone can master.
Ready to bring your blender to life on paper? Let’s get started!

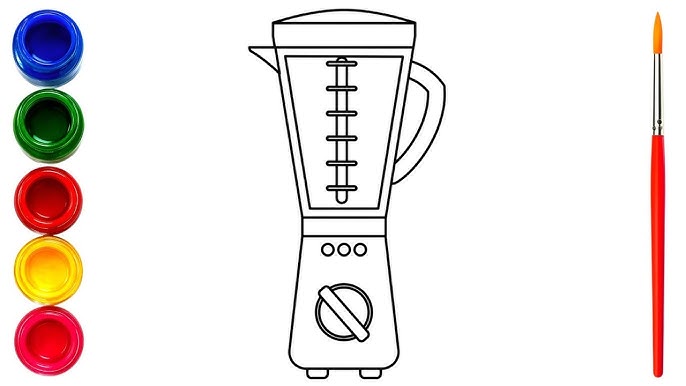
Credit: www.youtube.com
Gather Materials
Before you start drawing your kitchen blender, it's important to gather the right materials. Having the proper tools and paper can make the process smoother and your final drawing more impressive. Think about what you need to create clean lines, add shading, and capture details effectively.
Essential Drawing Tools
Choosing the right tools sets the foundation for your drawing. You’ll want a variety of pencils, like HB for light lines and 2B or 4B for shading and darker details. A good eraser is a must—preferably a kneaded eraser that lets you lift graphite gently without smudging.
Don't forget a sharpener to keep your pencils ready for precise lines. A ruler can help if you want to get the blender’s straight edges perfect. For adding finer details or highlights, consider using a fine-tip pen or white gel pen.
Choosing The Right Paper
Not all paper works well for drawing, especially when you plan to add shading or erase often. Look for smooth, medium-weight paper around 80-100 gsm; it holds pencil marks well without tearing. If you prefer texture, a lightly textured paper can add character but might be harder to erase.
Have you noticed how some papers cause your pencils to smudge or your eraser to leave residue? Testing a small corner with your pencils can save frustration later. Your choice of paper affects how your blender drawing will look and feel, so pick one that matches your style and tools.
Sketch Basic Shapes
Start by drawing simple shapes to form the blender's structure. Basic shapes make the drawing easier to manage. Focus on the main parts: the base and the jar. These shapes act as a guide for adding details later. Use light pencil strokes for easy corrections.
Outline The Blender Base
Begin with a rectangle or a rounded square for the base. This shape supports the whole blender. Keep the lines smooth and even. The base is usually wider at the bottom for stability. Add a small oval or circle on top to mark where the jar will sit. This gives the base a solid foundation.
Draw The Jar Shape
Above the base, sketch a tall rectangle or cylinder for the jar. The jar is usually taller than the base. Make sure the jar’s width matches the top of the base. Round the corners slightly for a realistic look. Add a small circle or oval at the top for the lid. This helps complete the basic blender shape.
Add Details
Focus on small lines and shapes to show buttons and blades clearly. Include shadows and highlights to give your blender a real look. Details make the drawing more interesting and lifelike.
Adding details to your kitchen blender drawing brings it to life. It's the small elements that make your sketch realistic and engaging. Focus on the features like buttons, controls, lid, and handle. Each part adds to the blender's functional look. Pay attention to proportions and placement. This step can transform your basic outline into a detailed masterpiece.
Draw The Buttons And Controls
The buttons and controls are essential parts of a blender. Start by sketching a small rectangle or square on the blender's base. This represents the control panel. Add a few circular or rectangular shapes inside. These are the individual buttons. Ensure they are evenly spaced. Consider including a dial or slider for speed control. Keep the shapes simple and proportionate. This detail shows the blender's functionality.
Include The Lid And Handle
The lid and handle complete your blender's look. Begin by drawing a circular or oval shape at the top. This is the lid. It should fit snugly on the blender's jar. Add a small rectangle or loop on the side. This becomes the handle. Place it on the jar's side, aligning with the lid. It provides grip and usability. Ensure the handle is proportionate to the jar. These details make your blender look ready for use.
Refine Lines
Refining the lines of your kitchen blender drawing gives it a polished and clear look. This step helps remove unwanted marks and sharpens the shape. Clean, defined lines make the blender stand out and look more realistic. Focus on making your drawing neat and easy to understand. Take your time to perfect the details and edges.
Clean Up Sketch Marks
Use an eraser to gently remove extra sketch lines. Lightly erase the rough marks that overlap the main shape. Avoid pressing too hard to prevent damaging the paper. Clean lines make the drawing less cluttered and easier to see. Keep the main outlines visible and clear.
Define Edges Clearly
Trace over the main lines with a darker pencil or pen. Make the edges smooth and continuous. Use steady, confident strokes to avoid shaky lines. Focus on the blender’s outline and important parts like buttons and the jar. Clear edges give the drawing a finished, sharp appearance.
Add Shading And Texture
Adding shading and texture to your kitchen blender drawing brings it to life. It helps your sketch move beyond flat shapes and gives it depth and realism. This part of drawing allows you to capture how light interacts with the blender’s surfaces, making your artwork more engaging and believable.
Create Light And Shadow
Think about where the light source is in your drawing. Light hits certain parts of the blender directly, making those areas brighter. Shadows will form where the light is blocked or less intense.
Use softer pencil strokes or lighter pressure for areas with light. Apply darker, more intense shading for shadows. This contrast creates volume and makes your blender appear three-dimensional.
Ask yourself: which parts of the blender would catch the most light? The top of the lid, the edges of the jar, or the buttons on the base? Adding highlights in those spots will make your drawing pop.
Depict Material Surfaces
Different parts of a kitchen blender have unique textures. The glass jar is smooth and reflective, while the plastic or metal base might have a matte or shiny surface.
Show the glass by adding soft reflections and subtle shading. Use smooth, even strokes to mimic the transparent look. For metal or plastic, try short, controlled lines or gentle gradients to represent their texture.
Think about how your blender feels to the touch. Can you show the cool hardness of glass or the slight roughness of plastic? Capturing these details makes your drawing more authentic and interesting.
Use Color Techniques
Using color techniques can bring your kitchen blender drawing to life. Color adds depth and makes the image more realistic. It helps show light, shadow, and texture clearly. You can create a vibrant or soft look depending on your color choices. Focus on color details to make your blender stand out.
Select A Color Palette
Choose a simple color palette that fits the blender style. Pick 3 to 5 colors that work well together. Use colors for the main body, buttons, and glass jar. Think about common blender colors like silver, white, or black. Add a splash of color for buttons or accents.
- Use light and dark shades of the same color.
- Include neutral tones like gray or beige for balance.
- Select bright colors for a modern, fun look.
Keep the palette consistent for a clean, professional appearance.
Apply Color Gradients
Color gradients create smooth transitions between light and dark areas. They give the blender a 3D feel. Apply gradients to curved parts like the jar and base. Use a darker shade where shadows appear. Use lighter shades where light hits the surface.
- Blend colors gently to avoid harsh lines.
- Focus gradients on edges and rounded shapes.
- Use gradients to show glass reflections on the jar.
Gradients help the blender look shiny and realistic. Practice blending colors softly to improve your drawing.
Final Touches
Adding the final touches to your kitchen blender drawing can truly bring it to life. These details make your sketch stand out and give it a polished, professional look. Paying attention to light, shadows, and background creates depth and context that engage anyone who views your artwork.
Enhance Highlights
Highlights add realism by showing where light hits your blender. Use a white pencil or eraser to gently brighten edges and reflective surfaces like the glass jar and metallic base.
Focus on areas that naturally catch light, such as the top rim, buttons, and the blender's blades inside the jar. These small, bright spots can make your drawing pop.
Ask yourself: where would the light source be in your kitchen? Position your highlights accordingly to keep your blender believable.
Add Background Elements
A simple background can turn a plain sketch into a story. Consider adding a kitchen countertop, a fruit bowl, or a backsplash to give your blender a setting.
Keep background details subtle so they don’t compete with your main subject. Light shading or faint outlines work well to suggest depth without distraction.
Think about your own kitchen—what objects nearby catch your eye? Including those can add a personal touch and make your drawing feel more relatable.

Credit: edufrienz.com
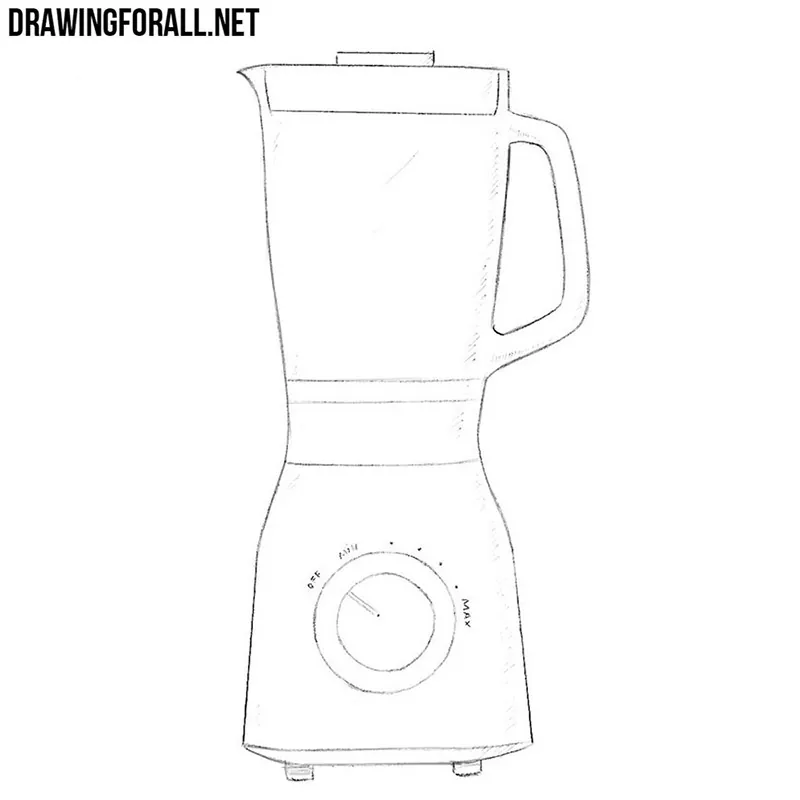
Credit: www.drawingforall.net
Frequently Asked Questions
How Do I Start Drawing A Kitchen Blender?
Begin by sketching the basic shapes like rectangles and cylinders. Focus on the blender's main body and jar outline first. This approach helps create a clear structure before adding details.
What Materials Are Best For Drawing A Blender?
Use pencils for initial sketches and fine liners for outlines. Colored pencils or markers work well for shading and adding realistic colors to your blender drawing.
How Can I Add Realistic Details To My Blender Sketch?
Observe real blenders for details like buttons, blades, and textures. Add shading and highlights to create depth and a three-dimensional look in your drawing.
What Common Mistakes Should I Avoid When Drawing A Blender?
Avoid ignoring proportions and angles; they make the blender look unrealistic. Don’t skip light and shadow, as they are crucial for a natural appearance.
Conclusion
Drawing a kitchen blender can be fun and simple. Start with basic shapes and add details step by step. Practice helps improve your skills every time you draw. Enjoy the process and don’t worry about mistakes. Soon, you will create clear and neat blender sketches.
Keep your pencils ready and try different styles. Drawing everyday objects like blenders makes art more interesting. Stay patient and watch your confidence grow with each drawing. Keep practicing, and your blender drawings will look great!