
Are you tired of your blender looking plain or getting dusty when not in use? What if you could create a stylish, protective cover for your blender using something as simple as kitchen towels?
Making a blender cover yourself is easier than you think, and it can add a personal touch to your kitchen while keeping your appliance clean. You’ll discover step-by-step how to turn ordinary kitchen towels into a practical and charming blender cover.
Ready to give your blender a fresh new look? Let’s get started!
Materials Needed
Gathering the right materials is key to making a durable blender cover. The materials must be easy to clean and flexible enough to fit snugly. Simple kitchen towels and a few basic supplies will help you create a neat cover. Choose towels with the right texture and thickness for the best results.
Choosing Kitchen Towels
Select towels made from cotton or linen for breathability and durability. Plain colors or simple patterns work well and match most kitchens. Avoid towels that are too thin or rough, as they may tear easily. The size should be large enough to cover the blender completely.
Additional Supplies
- Scissors - to cut the towels to size
- Elastic band or ribbon - to secure the cover around the blender
- Needle and thread or fabric glue - for sewing or bonding edges
- Measuring tape - to measure the blender and towel dimensions
- Chalk or fabric marker - to mark cutting lines
Preparing The Towels
Preparing the towels is an important first step in making a blender cover. It ensures the fabric fits well and protects your blender effectively. Taking accurate measurements and cutting the fabric carefully will create a neat and functional cover. This stage sets the foundation for a good outcome.
Measuring The Blender
Start by measuring your blender’s height and width. Use a tape measure for accuracy. Measure from the base to the top of the lid. Note the widest part of the blender, usually near the middle. Add a few extra inches to each measurement. This extra space allows for seams and a comfortable fit.
Cutting The Fabric
Lay the kitchen towel flat on a clean surface. Mark the measurements on the towel using a fabric pen or chalk. Cut the towel carefully along the marked lines. Use sharp scissors to avoid frayed edges. Cut two pieces if you want a lined cover. Keep the cut fabric pieces ready for sewing or assembly.
Sewing The Cover
Sewing the cover is where your kitchen towels truly transform into a functional and stylish blender cover. This step involves stitching the fabric neatly, ensuring durability and a snug fit over your blender. With a few simple sewing techniques, you can create a cover that not only protects your blender but also adds a personalized touch to your kitchen.
Basic Stitching Techniques
Start by using a straight stitch to join the edges of your kitchen towel pieces. This stitch is strong and easy to do, making it perfect for beginners. If you have a sewing machine, it will speed up the process, but hand stitching works well too.
Remember to backstitch at the beginning and end of each seam to prevent unraveling. Keep your stitches evenly spaced, about 1/4 inch apart, for a clean look. If you want extra strength, double stitch along the seams.
Creating Elastic Edges
Elastic edges help your blender cover stay securely in place. Measure the circumference of your blender’s base and cut a piece of elastic slightly shorter to ensure a snug fit.
Fold the edge of your fabric over the elastic and sew it in place using a zigzag stitch. This stretch stitch allows the fabric to flex without breaking the thread. As you sew, gently stretch the elastic so it gathers the fabric evenly.
Have you tried sewing elastic before? It might feel tricky at first, but once you get the hang of stretching the elastic while stitching, it becomes an easy way to add functionality to your cover.
Credit: www.epicurious.com
Adding Decorative Touches
Adding decorative touches to your blender cover made from kitchen towels makes it unique. Simple decorations bring charm and personality. They turn a plain cover into a fun kitchen accessory.
Use easy techniques that anyone can try. Small details can brighten your kitchen space. Choose styles that match your kitchen colors and theme.
Embroidery Ideas
Embroidery adds texture and a handmade feel. Use simple stitches like running stitch or backstitch. Create patterns such as flowers, leaves, or kitchen tools.
Pick thread colors that stand out on your towel fabric. Use an embroidery hoop to keep fabric tight and neat. Practice on scrap fabric before working on the cover.
- Write words like “Blend” or “Fresh” in cursive or block letters.
- Stitch small fruits like strawberries or lemons for a fresh look.
- Add small borders or corners to frame the cover edges.
Using Fabric Paint
Fabric paint allows quick, colorful designs. Choose paints made for fabric to prevent cracking. Use stencils or freehand simple shapes like dots, stripes, or hearts.
Apply paint with brushes or sponges for different effects. Let each layer dry before adding more paint. Heat set the paint with an iron to make it last.
- Use bright colors to brighten dull towels.
- Create patterns like polka dots or chevrons for style.
- Write short phrases or kitchen-related words for a fun touch.
Caring For Your Blender Cover
Use clean kitchen towels to create a simple blender cover that protects from dust and spills. Cut and sew towels to fit snugly over the blender base. This DIY cover keeps your kitchen tidy and your blender safe.
Caring for your blender cover ensures it lasts longer and looks fresh. A homemade cover from kitchen towels is practical and stylish. But, like any fabric item, it needs proper care. Keep it clean and well-maintained to protect your blender and enhance your kitchen's look.
Washing Instructions
Regular washing keeps the cover clean and attractive. Use cold water to prevent shrinking. A gentle cycle is best for machine washing. This protects the fabric from damage. If hand washing, use mild detergent. Rinse thoroughly to remove all soap. Air dry the cover to maintain its shape and color.
Maintenance Tips
Proper storage is crucial. Keep the cover in a dry place when not in use. This prevents mold and mildew. Check for loose threads or fraying edges. Trim them to keep the cover neat. Iron the cover if it wrinkles after washing. Use a low heat setting to avoid damage. Regular care will ensure your blender cover remains a charming kitchen accessory.

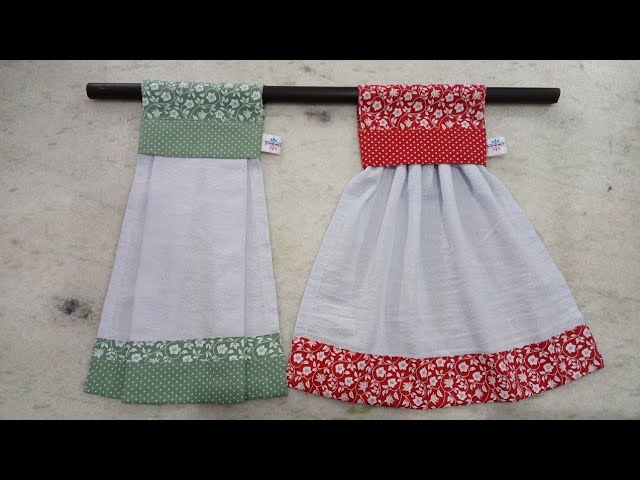
Credit: www.youtube.com

Credit: parade.com
Frequently Asked Questions
What Materials Are Needed To Make A Blender Cover?
You need kitchen towels, scissors, elastic band, needle, and thread. These simple items help create a reusable, protective blender cover.
How Do Kitchen Towels Protect A Blender?
Kitchen towels absorb dust and prevent scratches on your blender. They keep it clean and extend its lifespan by shielding it from dirt.
Can I Customize The Blender Cover Design?
Yes, you can personalize the cover by choosing towel colors and patterns. Adding embellishments or embroidery makes your cover unique and stylish.
Is Making A Blender Cover Cost-effective?
Absolutely. Using kitchen towels is affordable and eco-friendly. It saves money compared to buying store-bought covers and reduces waste.
Conclusion
Making a blender cover from kitchen towels is simple and useful. It helps keep your blender clean and dust-free. You save money by using materials you already have. Plus, it adds a personal touch to your kitchen. Try different towel colors or patterns for style.
This small project takes little time but gives big benefits. Give it a go and enjoy a neat kitchen!