
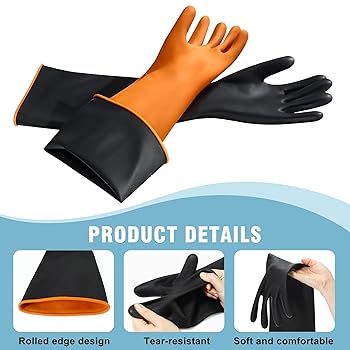
Have you ever noticed a small tear or hole in your kitchen rubber gloves just when you need them the most? It’s frustrating to waste gloves or risk getting your hands wet and dirty.
But what if you could fix those gloves quickly and easily at home? You’ll discover simple and effective ways to repair your kitchen rubber gloves, saving you money and extending their life. Keep reading to learn how to bring your gloves back to perfect working order with just a few easy steps.
Common Glove Damages
Kitchen rubber gloves protect your hands during chores, but over time, they face wear and tear. Recognizing common glove damages helps you decide whether to repair or replace them. Knowing these issues also saves you money and extends the gloves' life.
Tears And Holes
Tears and holes often appear after heavy use or contact with sharp objects. Even small holes can let water in, ruining your work and increasing the risk of skin irritation.
You can patch minor tears with waterproof adhesive or special rubber repair kits. Have you checked your gloves for tiny holes that might be causing leaks?
Worn-out Fingertips
Fingertips wear out faster because they handle most tasks like scrubbing and gripping. Thin or rough fingertips reduce grip and expose your skin to harsh cleaning agents.
Reinforce worn fingertips with a layer of liquid latex or rubber cement. This simple fix restores strength and grip without needing new gloves immediately.
Loose Cuffs
Loose cuffs let water drip inside, defeating the purpose of wearing gloves. They usually stretch out or lose elasticity after frequent use.
You can tighten loose cuffs by sewing in elastic bands or applying fabric glue to hold the shape. Would a snug cuff make your cleaning sessions more comfortable and mess-free?

Credit: www.amazon.com
Tools And Materials Needed
Before you start fixing your kitchen rubber gloves, gathering the right tools and materials is key. Having everything at hand makes the repair smooth and effective. It also helps you avoid frustration when a small tear turns into a bigger problem.
Adhesives And Patches
You’ll need a strong adhesive designed for rubber. Look for products like rubber cement or a specialized glove repair glue. These adhesives create a flexible bond that won’t crack as you move your hands.
Adding a patch can reinforce the damaged area. You can buy rubber repair patches or cut one from an old glove. Patches must be the right size—big enough to cover the tear completely, plus a little extra around the edges.
Cleaning Supplies
Clean surfaces stick better. Use rubbing alcohol or mild soap and water to clean the glove around the damage. Avoid harsh chemicals that might weaken the rubber further.
Make sure the glove is completely dry before applying glue or patches. Moisture can prevent adhesives from working properly and cause the repair to fail quickly.
Protective Gear
Working with adhesives means you should protect your skin. Wearing disposable gloves keeps your hands safe from sticky substances. It also helps you avoid accidentally contaminating the repair area.
Consider using a well-ventilated space or a mask if the glue emits strong fumes. Your health is just as important as getting the repair right.
Preparing Gloves For Repair
Preparing your kitchen rubber gloves for repair is a crucial step that sets the stage for a successful fix. Proper preparation ensures the repair material adheres well and lasts longer. Skipping this phase often leads to patch failures, which can be frustrating and waste both time and effort.
Cleaning And Drying
Start by thoroughly washing your gloves to remove oils, dirt, and residue. Use warm water and mild soap to avoid damaging the rubber. After washing, dry them completely—moisture trapped inside can ruin the repair.
Pay special attention to the damaged area. You might want to gently scrub that spot with a soft brush to remove stubborn grime. Clean gloves give adhesives or patches the best chance to stick properly.
Inspecting Damage
Look closely at the tear or hole to understand its size and type. Is it a small puncture, a long cut, or a worn-out thin spot? This will help you decide how strong or flexible the repair needs to be.
Sometimes damage isn’t visible at first glance. Try gently stretching the glove near the damaged area to reveal hidden cracks or weak points. Knowing the full extent of damage saves you from repeated repairs.
Choosing Repair Method
Think about the repair options available—glue, patches, or even heat sealing. The size and location of the damage influence which method works best. For example, a tiny hole might only need rubber cement, while a large tear could require a patch.
Also consider how you use your gloves. If you handle harsh chemicals often, choose a repair method that maintains chemical resistance. Would you prefer a quick fix or something more durable? Your daily kitchen tasks guide this choice.
Fixing Small Holes
Small holes in kitchen rubber gloves can be fixed quickly with simple materials. Use rubber cement or a patch to seal holes and extend glove life. This easy repair helps keep your hands protected during chores.
Fixing small holes in kitchen rubber gloves can extend their lifespan. Small holes might seem insignificant, but they can cause water leaks. Fixing them is a simple process that requires common household items. Explore these easy methods to repair your gloves effectively.
Using Rubber Cement
Rubber cement is a quick fix for small holes. Clean the glove's surface with soapy water. Dry it completely. Apply a small amount of rubber cement to the hole. Let it dry for several hours. This creates a strong seal, preventing leaks.
Applying Patch Kits
Patch kits are handy for repairing holes. Choose a patch kit designed for rubber. Clean the glove thoroughly and dry it. Cut a small patch from the kit. Apply adhesive to the patch and the glove. Press the patch onto the hole firmly. Allow it to set as directed by the kit instructions.
Heat Sealing Techniques
Heat sealing can mend tiny holes in rubber gloves. Use a low-heat source, like an iron. Place a piece of wax paper over the hole. Gently press the iron over the paper for a few seconds. This melts the rubber slightly, sealing the hole. Ensure not to overheat, as this can damage the glove.
Repairing Large Tears
Large tears in kitchen rubber gloves can stop them from working well. Fixing these tears keeps gloves useful and saves money. Simple repairs help keep water and dirt out. Use easy tools and materials to repair big holes. The repair must be strong and last long. Below are ways to fix large tears effectively.
Layering With Adhesive
Start by cleaning the glove surface around the tear. Use a cloth and rubbing alcohol to remove dirt. Apply a strong adhesive made for rubber. Spread it evenly over the tear and a bit around it. Let the first layer dry completely. Add more layers of adhesive to build strength. Wait for each layer to dry before adding another. This builds a thick patch that seals the tear well.
Reinforcing With Fabric
Cut a piece of thin fabric slightly larger than the tear. Use nylon or similar water-resistant fabric. Apply adhesive to the tear area first. Place the fabric patch over the glue. Press down firmly to remove air bubbles. Add adhesive on top of the patch to seal edges. Let the patch dry fully before using the gloves. This method makes the repair tougher and longer lasting.
Sewing Methods
Choose a strong nylon or polyester thread for sewing. Use a fine needle to avoid making new holes. Stitch around the tear edges carefully to pull them close. Use small, tight stitches for better hold. Tie knots securely at the start and end. After sewing, apply rubber adhesive over the stitches. This protects the thread and prevents water leaks. Sewing adds extra strength to large tears.
Restoring Glove Cuffs
The cuffs of kitchen rubber gloves often loosen or wear out first. Restoring glove cuffs extends glove life and improves comfort. Focus on tightening loose edges, replacing worn elastic bands, and preventing future damage.
Tightening Loose Edges
Loose edges reduce glove fit and allow water inside. Use a needle and strong thread to sew the cuff edges tightly. Stitch small, even loops around the cuff to pull the material snug. Avoid pulling too hard to prevent tearing. This simple fix keeps gloves secure and comfortable.
Replacing Elastic Bands
Elastic bands in glove cuffs lose stretch over time. Remove the old band carefully by cutting or pulling it out. Measure and cut a new elastic band to fit your wrist comfortably. Insert the new band into the cuff’s hem and sew the ends together. Close the hem with tight stitches to hold the elastic firmly. This restores the glove’s tight seal around your wrist.
Preventing Future Wear
Proper glove care helps keep cuffs strong. Rinse gloves with clean water after use to remove harsh chemicals. Avoid stretching cuffs too much when putting gloves on. Store gloves flat or hanging to prevent creases and cracks. Regularly check cuff condition and repair small damages quickly. These habits keep gloves lasting longer and working well.
Maintaining Gloves For Longevity
Maintaining your kitchen rubber gloves properly can significantly extend their life and save you money. Gloves often tear or degrade because of neglect rather than wear and tear alone. By treating your gloves with a bit of care, you can avoid frequent replacements and keep them effective for tougher kitchen tasks.
Proper Cleaning Tips
After each use, rinse your gloves thoroughly with warm water to remove any food residue or cleaning chemicals. Avoid using harsh detergents or bleach, which can weaken the rubber.
Turn the gloves inside out and rinse again to clean the interior. This step prevents bacteria buildup and unpleasant odors.
Let them air dry completely—never store gloves while damp. Moisture trapped inside encourages mold and speeds up rubber degradation.
Storage Recommendations
Store your gloves in a cool, dry place away from direct sunlight. Heat and UV rays cause rubber to crack and lose elasticity.
Keep gloves away from sharp objects or heavy tools that could puncture or tear them. Consider hanging them on a hook or placing them flat in a drawer.
Have you tried using a dedicated glove holder? It keeps your gloves neat and prevents accidental damage.
Avoiding Common Mistakes
Don’t use your kitchen gloves for heavy-duty tasks like scrubbing with steel wool or handling hot pans. This misuse leads to early wear and holes.
Avoid stretching your gloves excessively when putting them on. Overstretching weakens the material and causes micro-tears.
Resist the urge to store gloves near chemicals like oils or solvents, which can break down rubber quickly. Instead, keep them separated to maintain their strength.

Credit: www.yahoo.com

Credit: www.amazon.com
Frequently Asked Questions
How Can I Fix Small Holes In Kitchen Rubber Gloves?
To fix small holes, clean and dry the gloves first. Use rubber adhesive or a patch kit to seal the hole. Allow it to dry fully before use. This prevents leaks and extends glove life.
What Materials Are Best For Repairing Glove Tears?
Use rubber cement or silicone-based adhesives for effective repairs. These materials bond well with rubber gloves, providing flexibility and durability. Avoid superglue as it can cause stiffness and cracking.
Can I Repair Large Tears In Rubber Gloves?
Large tears are difficult to repair effectively. Patching may not restore full function or protection. It's often safer and more practical to replace gloves with significant damage.
How Do I Maintain Repaired Kitchen Rubber Gloves?
After repair, wash gloves gently with mild soap and water. Avoid harsh chemicals or scrubbing. Store them in a cool, dry place away from sunlight to prevent further damage.
Conclusion
Repairing kitchen rubber gloves can save money and reduce waste. Small tears and holes do not always mean you need new gloves. A few simple steps can extend their life. Use patch kits or strong glue for quick fixes. Keep gloves clean and dry to avoid damage.
Regular care helps gloves last longer and stay safe. These tips make your gloves useful again. Try repairing before buying new ones. Save resources and protect your hands with easy repairs. Simple actions can make a big difference in your kitchen routine.