
Are your kitchen appliances clashing and making your space look messy? You’re not alone, and the good news is, you don’t have to replace everything to get that sleek, coordinated look.
What if you could transform mismatched appliances quickly and affordably? Using contact paper might be the simple trick you need. You’ll discover how contact paper can cover up those differences and give your kitchen a fresh, unified style—without breaking the bank.
Keep reading to find out how easy it is to make your kitchen look brand new!
Why Mismatched Appliances Stand Out
Mismatched kitchen appliances grab your attention immediately. They disrupt the visual flow and make the space feel less cohesive. But why do these appliances stand out so much in your kitchen? Understanding this can help you decide how to fix or embrace the look.
Common Causes Of Mismatched Kitchens
One main cause is replacing just one or two appliances instead of all at once. You might upgrade your fridge but keep the older stove and microwave. Budget constraints often lead to this piecemeal approach.
Another reason is moving into a new home with existing appliances that don’t match your style. Sometimes, appliances are gifts or hand-me-downs, which don’t align with your current kitchen design.
Lastly, different brands and finishes—like stainless steel mixed with white or black—create a patchwork effect. These differences make appliances stand out rather than blend in.
Impact On Kitchen Aesthetics
Mismatched appliances break the harmony of your kitchen’s design. Instead of a smooth, unified look, your eyes jump from one appliance to another. This can make the space feel cluttered or less organized.
Have you noticed how a consistent color scheme or finish makes your kitchen feel calmer and more inviting? In contrast, mismatched appliances can distract you while cooking or entertaining. They often highlight the imperfections in your kitchen layout or décor.
On the flip side, some people use mismatched appliances intentionally to create an eclectic style. But if your goal is a sleek, modern kitchen, those mismatches will stand out as flaws rather than features.
Contact Paper As A Covering Option
Using contact paper to cover mismatched kitchen appliances is a smart and budget-friendly way to create a cohesive look. It offers a quick fix that can dramatically change the appearance of your appliances without the need for costly replacements. If you’re wondering how effective this option really is, let’s dive into what types of contact paper are best and what benefits you can expect.
Types Of Contact Paper For Appliances
Not all contact paper is created equal, especially when it comes to kitchen appliances. Here are some popular types you might consider:
- Vinyl Contact Paper:This is the most common choice. It’s waterproof and easy to clean, making it perfect for appliances that might get splashes or stains.
- Heat-Resistant Contact Paper:If your appliances generate heat, like microwaves or toasters, look for contact paper that can withstand higher temperatures without peeling or warping.
- Textured Contact Paper:For a more authentic feel, textured options like faux stainless steel or wood grain can add depth and character to your appliances.
- Matte vs. Glossy:Matte finishes hide fingerprints and smudges better, while glossy finishes offer a sleek, shiny look. Decide based on your kitchen’s style and maintenance preferences.
Choosing the right type depends on your appliance’s use and your kitchen’s overall vibe. Have you checked if the contact paper you want is easy to remove? That’s key for future updates.
Benefits Of Using Contact Paper
Contact paper offers more than just a quick cosmetic fix. One major benefit is affordability. Instead of spending hundreds or thousands on new appliances, a roll of contact paper costs a fraction of that price.
It also allows you to experiment with styles without commitment. If you want to try a bold color or pattern but worry about long-term regret, contact paper lets you test the waters and peel it off whenever you want.
Another advantage is ease of use. You don’t need special skills or tools to apply contact paper. Many people find it a satisfying DIY project that instantly refreshes their kitchen’s look.
Are you ready to give your kitchen a new look without breaking the bank? Contact paper might be the simple solution you didn’t realize you needed.
Preparing Appliances For Application
Getting your kitchen appliances ready for contact paper is crucial to achieving a smooth, lasting finish. Skipping prep can lead to peeling, bubbles, or an uneven look that defeats the purpose of covering mismatched appliances. Taking your time here will save you frustration and make the transformation look professional.
Cleaning And Surface Prep
Start by thoroughly cleaning each appliance. Use a mild detergent and warm water to remove grease, dirt, and fingerprints. Avoid harsh chemicals that could damage the surface or leave residue behind.
After washing, dry the appliances completely with a microfiber cloth. Any moisture left can cause the contact paper to lift later. Run your hand over the surface to feel for rough spots or peeling paint and gently sand these areas smooth if needed.
Have you noticed how even a tiny piece of dust ruins the look when applying a sticker? The same applies here. Use a lint roller or tack cloth to pick up any leftover particles before moving on.
Measuring And Cutting Contact Paper
Measure each appliance carefully, noting the height, width, and any curves or edges. Write down your measurements to avoid mistakes while cutting. Remember to add an extra inch or two for overlap and trimming.
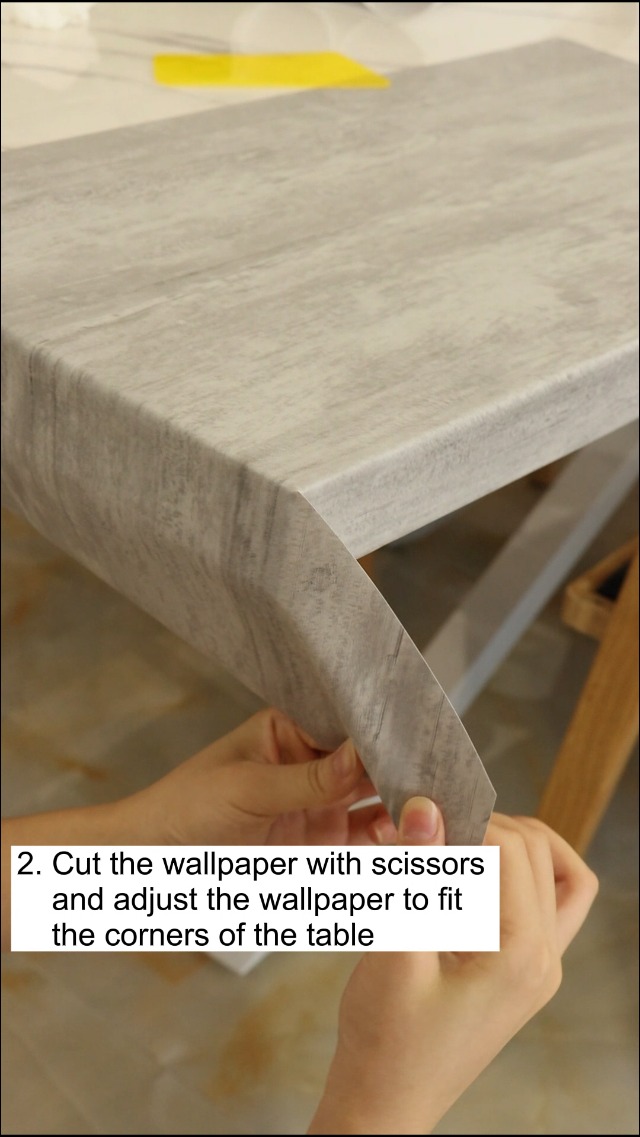
Use a ruler and a sharp utility knife or scissors for precise cuts. Cutting on a flat surface helps maintain clean edges. If the appliance has handles or buttons, plan your cuts to wrap neatly around these features rather than covering them.
Have you ever tried to stretch or reposition contact paper after sticking it? It rarely works well. Cutting your pieces accurately beforehand reduces the need for adjustments and keeps your project stress-free.

Credit: www.amazon.com
Step-by-step Application Guide
Transforming mismatched kitchen appliances with contact paper is a creative solution. It's cost-effective and easy to do with a little patience. This step-by-step guide will help you apply contact paper smoothly. Let's dive into the details and make your kitchen look cohesive.
Applying Contact Paper Smoothly
Start by cleaning the appliance's surface. Remove dirt and grease using a mild cleaner. Dry thoroughly with a soft cloth. Measure the appliance's surface carefully. Cut the contact paper slightly larger than the needed size. This allows for adjustments. Peel back a small section of the backing paper. Align it with the appliance's edge. Press down gently to secure it. Use a squeegee or credit card to smooth it out. Work slowly to avoid mistakes. Keep peeling and smoothing until the entire surface is covered. Trim any excess paper with a sharp utility knife.
Avoiding Air Bubbles And Wrinkles
Air bubbles and wrinkles can ruin the look. To prevent them, work in small sections. Press firmly with a squeegee as you apply. This helps push out air bubbles. If bubbles appear, use a pin to pop them gently. Smooth out the area with the squeegee. For wrinkles, lift the paper slightly. Reapply it carefully. Smooth it out again. Take your time for the best results. Your patience will pay off. A smooth finish enhances the overall appearance. Enjoy your revamped appliances with pride.
Creative Design Ideas
Creative design ideas can transform mismatched kitchen appliances into a stylish, cohesive look. Contact paper offers a simple way to refresh your kitchen without replacing costly appliances. Using design techniques, you can blend different appliances seamlessly. The key is choosing the right patterns, colors, and textures that complement your kitchen’s style.
Patterns And Colors To Match Your Kitchen
Choose patterns that reflect your kitchen’s theme. Geometric shapes add a modern touch. Floral designs bring a soft, cozy feel. Stripes or chevrons create a bold statement.
Colors play a big role in unifying appliances. Neutral tones like gray, white, or beige work well with most kitchens. Bright colors can highlight an appliance as a focal point. Consider matching contact paper color with kitchen walls or cabinets for harmony.
Mixing Textures For Unique Looks
Mixing textures adds depth and interest to your kitchen. Matte finishes offer a sleek, understated look. Glossy contact paper adds shine and catches light.
Try combining smooth and textured surfaces for contrast. For example, a textured metallic paper on a fridge pairs well with smooth matte paper on the microwave. This contrast makes each appliance stand out while still feeling part of the same design.
Maintenance And Durability Tips
Maintaining contact paper on kitchen appliances keeps them looking fresh and neat longer. Proper care prevents peeling, bubbling, and stains. Durability depends on cleaning habits and timely replacement. Small efforts extend the life of your appliance covers.
Cleaning Contact Paper Surfaces
Clean contact paper gently with a soft cloth. Use mild soap and warm water for wiping. Avoid abrasive scrubbers or harsh chemicals that can damage the surface. Dry thoroughly after cleaning to prevent moisture buildup. Regular cleaning stops dirt from settling into the paper.
When To Replace Or Refresh
Replace contact paper if it starts peeling or bubbling. Look for visible tears or worn spots. Refresh edges if they lift up to avoid dirt accumulation. Changing the paper every few years keeps appliances looking newer. Timely replacement ensures a smooth, attractive finish.
Alternatives To Contact Paper
Mismatched kitchen appliances can disrupt your kitchen’s look. Contact paper is one way to hide differences. Still, other options exist to refresh your appliances’ appearance. These alternatives offer different styles and durability levels. They can suit various budgets and skill levels. Explore these choices to find what fits your kitchen best.
Appliance Paints And Sprays
Special paints and sprays designed for appliances provide a smooth finish. They resist heat and moisture, perfect for kitchen use. Spray paints offer even coverage and quick drying times. Appliance paint comes in many colors, allowing custom looks. Surface preparation is key for good results. Clean and sand the appliance before painting. This method gives a long-lasting, professional look.
Magnetic Covers And Panels
Magnetic covers are easy to apply and remove. They fit metal appliances like refrigerators or dishwashers. These covers come in various colors and patterns. You can change them seasonally or whenever desired. Magnetic panels protect your appliance from scratches. They also hide dents or stains effectively. This option is ideal for renters or those who want flexibility.

Credit: www.extraspace.com
Cost And Time Considerations
Changing mismatched kitchen appliances with contact paper saves money and time. It offers a quick update without full replacements. Before starting, consider the budget and time needed for this DIY project. These factors help plan a smooth and satisfying makeover.
Budgeting For A Kitchen Makeover
Contact paper costs less than buying new appliances. A roll usually ranges from $10 to $30, depending on quality and design. You also need tools like scissors and a squeegee, which are affordable and reusable.
Calculate the total area of appliances to cover. This helps estimate how many rolls you need. Remember, buying extra paper prevents running short mid-project.
Compared to appliance replacement, contact paper saves hundreds to thousands of dollars. It is ideal for tight budgets or renters who want a fresh look without permanent changes.
Time Required For Diy Projects
Applying contact paper takes patience and careful work. Small appliances may take 1 to 2 hours to cover completely. Larger items or multiple appliances can require several hours or a weekend.
Preparing surfaces by cleaning and drying is essential for good adhesion. Smooth out air bubbles with a squeegee or credit card. Taking time here avoids peeling later.
Practice on a small piece first to gain confidence. Rushing leads to wrinkles or mistakes that waste material and time.
Frequently Asked Questions
Can Contact Paper Cover Mismatched Kitchen Appliances?
Yes, contact paper can effectively cover mismatched kitchen appliances. It offers an affordable, quick way to unify appliance finishes and improve kitchen aesthetics. Choose durable, heat-resistant paper for long-lasting results and easy cleaning.
Is Contact Paper Heat-resistant For Kitchen Appliances?
Most contact papers are heat-resistant up to a certain temperature, typically around 140°F (60°C). Always check product specifications before applying near heat sources. Use only on appliance surfaces away from direct flames or excessive heat for safety.
How Long Does Contact Paper Last On Appliances?
Contact paper typically lasts 3 to 5 years on kitchen appliances, depending on usage and surface preparation. Proper cleaning and application increase durability. Avoid moisture and heat exposure to extend its lifespan.
Can I Remove Contact Paper Without Damaging Appliances?
Yes, contact paper can be removed without damaging appliance surfaces if done carefully. Peel slowly at a 45-degree angle and use warm soapy water or adhesive remover to clean residue gently.
Conclusion
Covering mismatched kitchen appliances with contact paper offers a simple fix. It changes their look without buying new ones. Choose colors or patterns that match your kitchen style. The process takes little time and cost. Plus, you can remove or change it anytime.
This idea helps create a more unified kitchen space. It’s perfect for renters or those on a budget. Try it to refresh your kitchen’s appearance today. Small changes can make a big difference.