
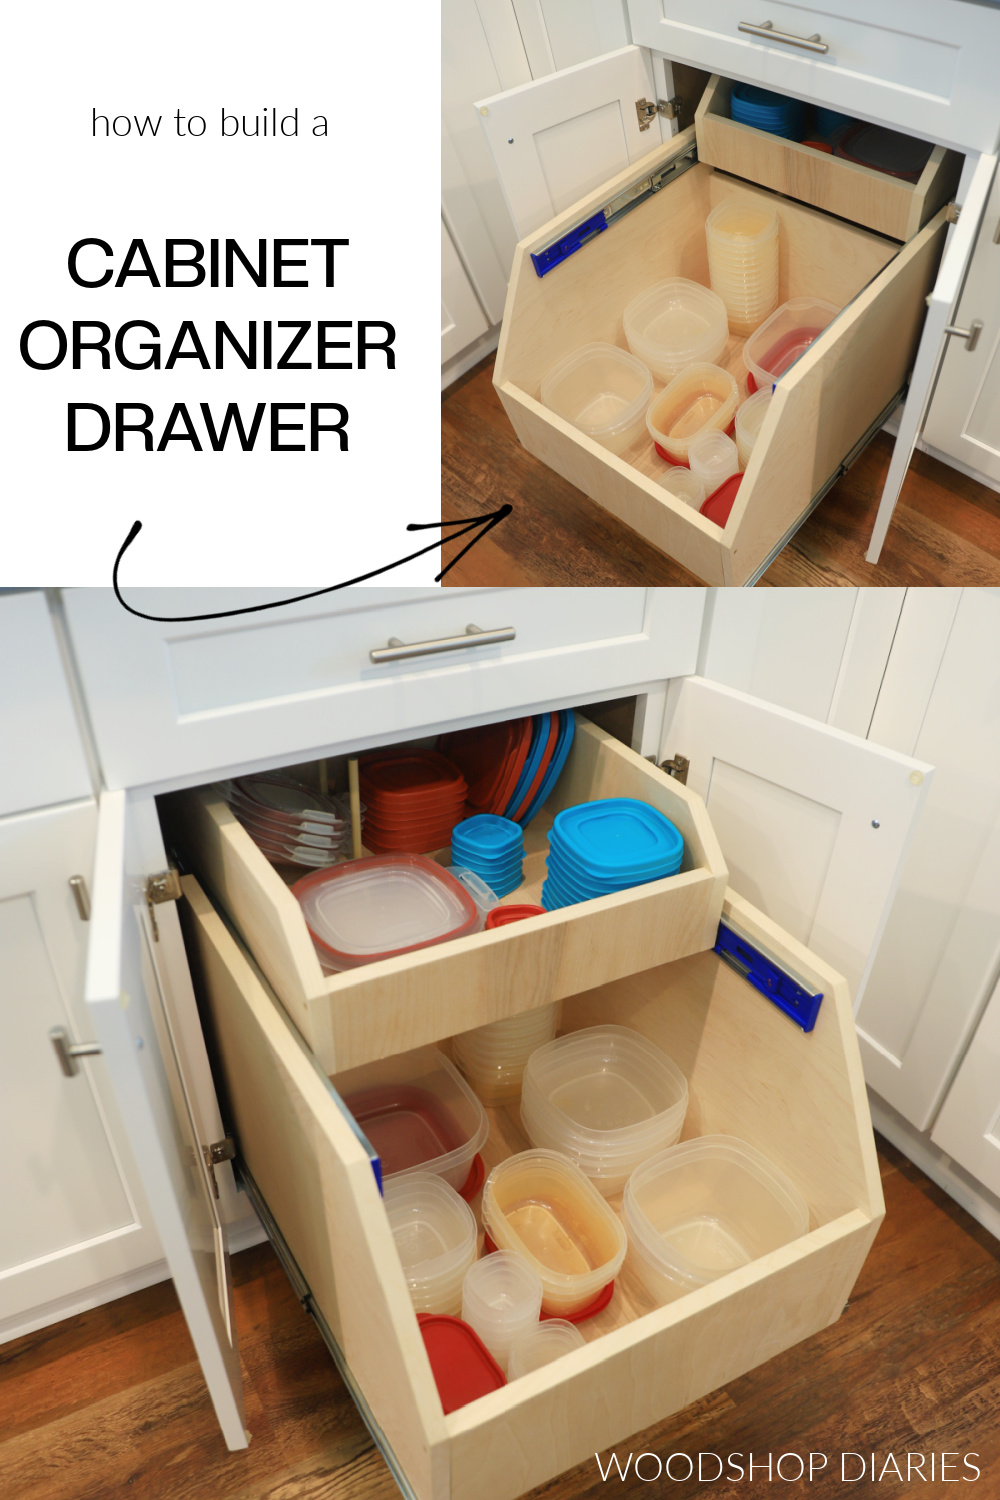
Are you ready to add a custom drawer to your kitchen cabinet but don’t know where to start? Building your own drawer might seem tricky, but with the right steps, you can create a perfect fit that looks great and works smoothly.
Imagine opening a drawer that holds your utensils exactly how you want, making your kitchen more organized and efficient. In this guide, you’ll discover simple, clear instructions to help you build a sturdy drawer, even if you’ve never done it before.
Keep reading, and you’ll be amazed at how easy it is to transform your kitchen space with just a few tools and some basic skills.
Materials And Tools Needed
Getting your materials and tools right is the foundation of a smooth drawer-building process. Without the proper supplies, you risk frustration and a final product that doesn’t fit or function well. Let’s look closely at what you’ll need to build a sturdy and attractive drawer for your kitchen cabinet.
Choosing The Right Wood
Picking the right wood affects both the look and durability of your drawer. Solid hardwoods like maple, oak, or cherry offer excellent strength and a beautiful finish. If you want to save money without sacrificing quality, plywood with a hardwood veneer is a smart alternative.
Softwoods such as pine can work but may dent or scratch easily in a busy kitchen. Think about how much weight your drawer will hold and how often it will be opened. Have you considered the moisture levels in your kitchen? Wood that resists warping in humid conditions will save you headaches later.
Essential Tools For The Job
Having the right tools on hand makes the build faster and more precise. A circular saw or table saw is essential for cutting your wood pieces to size. If you don’t own one, a handsaw can work but expect it to take longer.
You’ll also need a drill with bits for pilot holes and screws, a tape measure for accurate sizing, and a square to keep your corners true. Sandpaper or a power sander smooths edges and surfaces for a professional finish. Don’t forget clamps to hold pieces steady while you work.
Additional Hardware Requirements
Beyond wood and tools, hardware choices impact how your drawer performs. Drawer slides come in various types—side-mount, under-mount, or center-mount. Side-mount slides are easier to install and offer good support, but under-mount slides provide a cleaner look.
You’ll also need screws that match your wood thickness and drawer slides. Consider adding handles or knobs that fit your kitchen’s style. Have you checked that your hardware matches the weight capacity your drawer needs? Skipping this step can cause your drawer to sag or stick.

Credit: www.familyhandyman.com
Planning Your Drawer
Planning your drawer is the first step to a successful kitchen cabinet project. This stage sets the foundation for a drawer that fits perfectly and works smoothly. Careful planning saves time and materials. It also ensures your drawer looks great and lasts long.
Measuring The Cabinet Space
Start by measuring the inside width, height, and depth of your cabinet. Use a tape measure for accuracy. Note any obstacles inside, like pipes or supports. Write down these numbers clearly. This helps avoid mistakes later. Double-check your measurements before moving on.
Designing The Drawer Dimensions
Choose drawer size based on your measurements. Leave space for smooth movement, usually about 1/4 inch on each side. Decide the drawer’s front height to match the cabinet style. Consider the depth to fit your storage needs. Sketch a simple drawing to visualize your design. Keep your design practical and balanced.
Selecting Drawer Joinery Techniques
Pick joinery methods that suit your skills and tools. Common options include:
- Dovetail joints – strong and classic.
- Box joints – easy and sturdy.
- Butt joints with screws – simple and fast.
Choose wood glue for extra strength. Think about the drawer’s load and usage. Good joinery keeps the drawer durable and smooth. Practice your chosen technique on scrap wood first.
Cutting And Preparing Wood Pieces
Cutting and preparing wood pieces is a key step in building a kitchen cabinet drawer. Precise cuts ensure the drawer fits perfectly and works smoothly. Proper preparation improves the drawer’s strength and appearance. Take time to measure carefully, cut straight, and smooth every edge. This creates a solid base for assembling the drawer later.
Marking And Measuring Accurately
Start by measuring the size of your drawer space. Use a tape measure and pencil to mark the wood pieces. Double-check each measurement to avoid mistakes. Mark the lines clearly with a ruler or square tool. Accurate marks guide your saw and keep cuts straight. Take your time. Measuring twice saves you from cutting errors.
Cutting Side Panels And Bottom
Choose the right saw for clean cuts. A circular saw or handsaw works well for straight edges. Follow the marked lines slowly and steadily. Cut the side panels first, then the bottom piece. Keep the wood steady on a flat surface to avoid wobbling. Check each piece after cutting to make sure it matches your measurements. Trim any rough spots carefully.
Sanding And Smoothing Edges
Use sandpaper or a sanding block to smooth all edges. Sanding removes splinters and sharp corners. Move the sandpaper in the direction of the wood grain. Pay close attention to corners and joints. Smooth edges help the drawer slide easily and look neat. Wipe away dust with a clean cloth before assembly.
Assembling The Drawer Box
Assembling the drawer box is a key part of building a kitchen cabinet drawer. It shapes the foundation of your drawer’s strength and durability. Taking your time to fit each piece precisely will save you from future frustration with loose or wobbly drawers.
Joining The Side Panels
Start by aligning the side panels carefully. Make sure the edges meet perfectly at right angles to form a sturdy frame.
You can use wood glue along the edges before fitting them together. This adds extra hold without relying solely on nails or screws.
Clamp the panels in place while the glue dries. This keeps everything tight and prevents gaps that weaken the structure.
Attaching The Drawer Bottom
Next, slide the drawer bottom into the grooves or rabbets cut along the side panels. It should fit snugly without forcing it in.
If your drawer bottom is plywood, ensure it is thick enough to support the weight of your kitchen items.
Leave a small gap at the back to allow wood expansion, especially if you’re working with solid wood. This avoids splitting later on.
Reinforcing With Nails Or Screws
After the glue has set, reinforce the joints with nails or screws to secure the drawer box.
- Use small finishing nails if you want a cleaner look.
- Screws provide stronger support but may require countersinking and filling.
Pre-drill holes to prevent the wood from splitting, especially near the edges.
Ask yourself: Would you rather take a bit more time now to make the drawer last longer or rush and risk repairs later?
Installing Drawer Slides
Attach drawer slides evenly on the cabinet sides for smooth movement. Align slides carefully to avoid sticking or misalignment. Secure with screws and test the drawer’s glide before final assembly.
Installing drawer slides is a crucial step in building a drawer for your kitchen cabinet. It's where functionality meets finesse, ensuring your drawers glide smoothly and effortlessly. Whether you're a seasoned DIY enthusiast or a beginner, understanding the nuances of installing these slides can make a significant difference in your kitchen experience.
Types Of Drawer Slides
Choosing the right type of drawer slide is your first task. Ball-bearing slides offer durability and a smooth glide, perfect for heavy kitchen items. Soft-close slides are ideal if you want to avoid that annoying slamming noise, making your kitchen a more peaceful space. Side-mount slides and undermount slides provide different aesthetics and weight capacities, so consider your needs before picking one.
Mounting Slides On Drawer And Cabinet
Begin by aligning the slides on the drawer side, ensuring they are parallel. Use a measuring tape to maintain consistent spacing from top to bottom. Secure them with screws, tightening just enough to hold, but not too tight to prevent any warping. For the cabinet, measure the space accurately. Position the cabinet slides so they align with the drawer slides. Use a level to ensure they are perfectly horizontal, then secure them with screws. This step is crucial for smooth operation, so take your time.
Testing Slide Movement
Once everything is mounted, it's time to test the movement. Gently slide the drawer in and out. Does it glide smoothly, or is there resistance? If there's any sticking, check the alignment and adjust as needed. A small tweak can make a big difference. Feel the satisfaction as your drawer glides effortlessly. Isn't it rewarding when your effort pays off with perfect functionality? Remember, patience and precision are your best tools for this task.

Credit: www.youtube.com
Adding The Drawer Front
Adding the drawer front is a key step in building a kitchen cabinet drawer. This part gives the drawer its finished look. It also helps the drawer fit well and open smoothly. Taking time to align and attach the drawer front carefully will improve the drawer’s function and appearance.
Aligning The Front Panel
Place the drawer front against the drawer box. Check that the edges line up evenly on all sides. Use clamps to hold the front panel in place. Make sure there is a small gap around the edges for smooth movement. Measure twice to avoid mistakes. Adjust the panel until it sits perfectly straight.
Attaching The Front Securely
Use screws or nails to fix the drawer front to the box. Pre-drill holes to prevent wood from splitting. Drive screws slowly and evenly. Avoid over-tightening, which can damage the wood. Check the front panel again for proper alignment before tightening fully. Secure all corners firmly for lasting strength.
Finishing Touches And Hardware
Sand the drawer front edges for a smooth finish. Choose a stain or paint that matches your kitchen style. Allow paint or stain to dry completely before adding hardware. Attach handles or knobs using screws. Test the drawer’s movement. Adjust hardware if needed to ensure easy opening and closing.
Finishing And Maintenance
Finishing and maintaining your kitchen cabinet drawer is essential for both its appearance and longevity. Proper finishing protects the wood from moisture, stains, and daily wear. Maintenance keeps the drawer functioning smoothly and looking great over time.
Painting Or Staining Options
Choosing between paint and stain depends on the look you want and the type of wood you use. Paint offers a smooth, colorful finish and hides imperfections well. Stain enhances the natural grain of the wood, adding warmth and character.
If you prefer a modern, clean look, go for a semi-gloss or satin paint that is easy to wipe clean. For a rustic or classic feel, oil-based or water-based stains work beautifully. Remember to test your color on a scrap piece of wood before applying it to the drawer.
Sealing For Durability
Sealing your drawer is a step you shouldn’t skip. It locks in the color and protects the wood from spills and humidity. Polyurethane is a popular choice because it creates a hard, durable surface.
Apply thin coats of sealer using a brush or spray, allowing each layer to dry fully before adding the next. Avoid thick layers that can cause bubbling or uneven surfaces. Don’t forget to seal the drawer edges and bottom, as they are vulnerable to damage.
Tips For Long-lasting Drawers
- Use quality hardware:Smooth glides and sturdy handles reduce stress on the drawer and improve usability.
- Keep the slides clean:Dust and debris can make sliding difficult. Wipe them regularly with a dry cloth.
- Avoid overloading:Don’t fill your drawer beyond its weight limit to prevent warping or damage.
- Check for loose screws:Tighten hardware periodically to keep your drawer stable.
Have you ever noticed a drawer sticking or squeaking? Often, simple maintenance like cleaning and tightening can fix the problem before it worsens. Your drawer will not only last longer but also feel more satisfying to use.
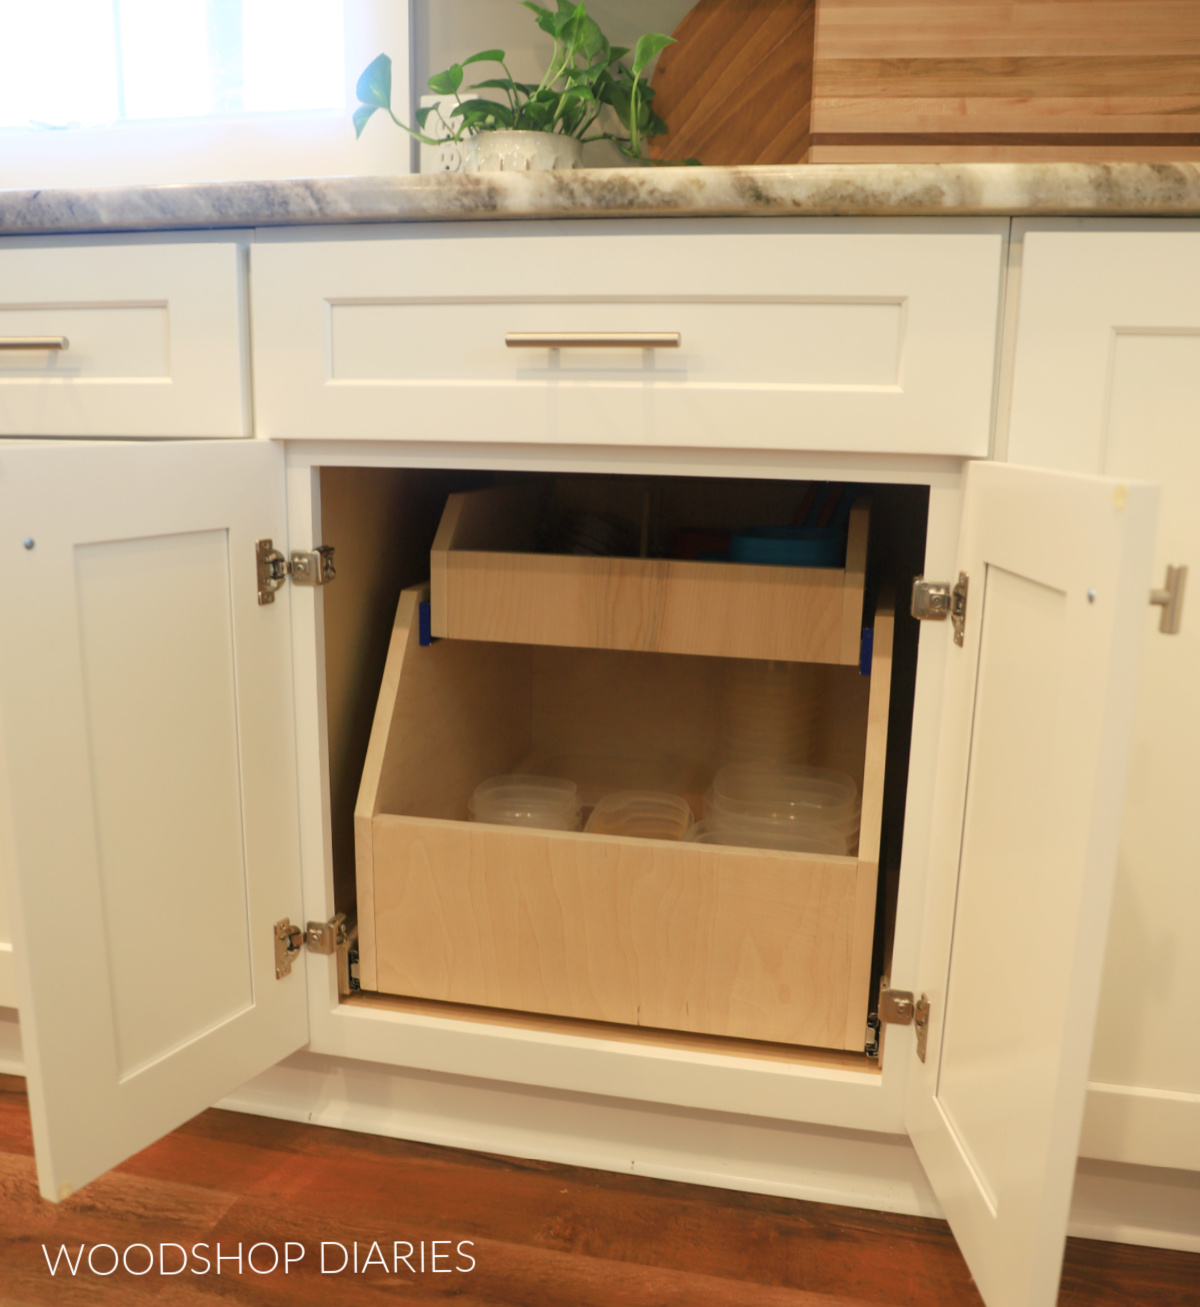
Credit: www.woodshopdiaries.com
Frequently Asked Questions
What Materials Are Best For Kitchen Cabinet Drawers?
Solid wood and plywood are ideal for kitchen cabinet drawers. They offer durability, strength, and a smooth finish. Avoid particleboard as it can warp with moisture. Choose materials that can handle daily use and match your cabinet style for the best results.
How Do I Measure For A Kitchen Cabinet Drawer?
Measure the drawer opening width, height, and depth precisely. Subtract about ¼ inch from width and height for smooth sliding. Ensure depth matches the cabinet interior. Accurate measurements prevent fitting issues and ensure the drawer operates properly.
What Tools Are Needed To Build A Kitchen Drawer?
Essential tools include a saw, drill, measuring tape, square, and clamps. You’ll also need screws, wood glue, and drawer slides. Having the right tools ensures clean cuts and secure assembly, making the building process easier and more efficient.
How Do I Install Drawer Slides Correctly?
Attach slides inside the cabinet and on the drawer sides. Align them evenly for smooth operation. Use a level to ensure proper alignment. Secure with screws, then test the drawer movement. Proper installation prevents sticking and extends drawer life.
Conclusion
Building a drawer for a kitchen cabinet takes patience and care. Follow each step slowly and check your work often. Use the right tools and materials to get good results. A well-made drawer fits smoothly and lasts a long time.
This simple project can improve your kitchen’s look and function. Keep practicing to gain more skill and confidence. Enjoy the satisfaction of creating something useful with your own hands.