

How to Clean Kitchen Aide Coffeemaker. If you love your KitchenAid coffeemaker, you know how important it is to keep it clean. A clean coffeemaker not only brews better-tasting coffee but also lasts longer.
But cleaning it can sometimes feel confusing or time-consuming. Don’t worry—you’re in the right place. In this guide, you’ll discover simple, step-by-step tips to clean your KitchenAid coffeemaker quickly and easily. By following these easy methods, you’ll enjoy fresher coffee every morning and keep your machine running like new.
Ready to get started? Let’s dive in!

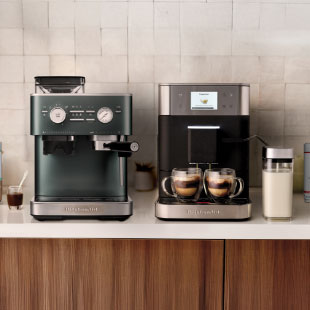
Credit: methodicalcoffee.com
Preparing Your Coffeemaker
Preparing your Kitchen Aid coffeemaker for cleaning makes the process easier and safer. Taking a few simple steps before you start will help keep your machine in good shape. Proper preparation protects the parts and ensures a thorough cleaning.
Gathering Cleaning Supplies
Collect all necessary items before cleaning. This helps avoid interruptions.
- Soft cloth or sponge
- Mild dish soap
- White vinegar or coffee maker cleaner
- Measuring cup
- Clean water
- Small brush or toothbrush
Having these supplies ready speeds up the cleaning process.
Unplugging And Cooling Down
Always unplug the coffeemaker before cleaning. This prevents electrical hazards.
Let the machine cool down completely. Hot parts can cause burns or damage.
Wait at least 30 minutes after the last use. Ensure the device is safe to handle.
Credit: www.kitchenaid.co.uk
Removing And Cleaning Parts
Cleaning your KitchenAid coffeemaker starts with removing its parts carefully. This step helps keep the machine in good shape. It also ensures each piece gets cleaned well. Regular cleaning removes coffee oils and residue that build up over time.
Focus on parts you use daily. These include the carafe and filter basket. Cleaning these parts stops stale coffee taste. It also prevents clogging and improves coffee flavor.
Detaching The Carafe And Filter Basket
First, unplug the coffeemaker for safety. Wait until the machine cools down. Gently lift the carafe from its place. Handle it carefully to avoid spills.
Next, open the top lid to access the filter basket. Slide out the basket slowly. Check for any coffee grounds stuck inside. Set both parts on a clean surface for washing.
Washing Removable Components
Use warm water and mild dish soap. Wash the carafe inside and outside. Pay attention to the spout and handle areas. Rinse thoroughly to remove all soap traces.
Clean the filter basket by rinsing it well. Use a soft brush to remove stuck coffee grounds. Avoid harsh scrubbers that can damage the parts.
Dry all components with a soft towel or air dry them. Ensure they are completely dry before placing back. This prevents mold and maintains machine hygiene.
Descaling The Machine
Descaling your KitchenAid coffeemaker removes mineral build-up inside the machine. This build-up affects the taste of your coffee and the machine’s performance. Regular descaling keeps your coffeemaker clean and working well. It also helps extend the machine’s life.
Choosing The Right Descaling Solution
Select a descaling solution suitable for KitchenAid coffeemakers. Use products labeled safe for coffee machines. Vinegar is a common alternative but may leave a strong smell. Some brands offer special descaling liquids that work fast and clean thoroughly.
Check the product instructions before use. Avoid harsh chemicals that can damage the machine. Using the right solution ensures safe and effective cleaning.
Running The Descale Cycle
Start with an empty water reservoir. Pour the descaling solution into the water tank. Fill the rest with clean water if needed. Turn on the machine and run the descale cycle or a brewing cycle without coffee grounds.
Let the solution work inside the machine. After completion, run clean water through the machine two to three times. This rinses out any leftover solution. Your coffeemaker is now ready for fresh coffee with better taste.
Cleaning The Exterior
Wipe the coffeemaker’s exterior gently with a damp cloth to remove dust and spills. Avoid using harsh cleaners that can damage the surface. Dry it well to keep the finish shiny and clean.
Cleaning the exterior of your Kitchen Aide Coffeemaker keeps it looking new. It prevents dirt buildup and ensures a clean coffee-making environment. Regular maintenance of the outer surfaces is essential. This section will guide you through effective cleaning techniques.
Wiping Down Surfaces
Use a soft, damp cloth for wiping. Avoid abrasive cleaners that might scratch. Focus on areas with visible stains or spills. Gently rub the cloth over the surface. Pay attention to corners and crevices. These spots often collect dust and grime. Ensure the cloth is not too wet. Excess moisture can damage electronic parts.
Maintaining Stainless Steel Finish
The stainless steel finish requires special care. Use a microfiber cloth for best results. Rub in the direction of the grain. This keeps the surface shiny and smooth. For stubborn stains, mix vinegar and water. Lightly dampen the cloth with this solution. Avoid using bleach or harsh chemicals. They can dull the steel finish. Dry the surface immediately after cleaning. This prevents water spots and streaks.
Rinsing And Final Steps
After descaling and cleaning your Kitchen Aid coffeemaker, it’s crucial to remove any leftover cleaning solution. This ensures your next cup of coffee tastes fresh and free from chemical residues. The rinsing and final steps help maintain your machine’s performance and safeguard your coffee’s flavor.
Running Fresh Water Cycles
Fill the water reservoir with fresh, clean water. Run a full brewing cycle without adding coffee grounds to flush out any remaining cleaning solution.
Repeat this rinsing cycle 2 to 3 times to be certain the machine is completely clear. It may seem like extra work, but rinsing thoroughly prevents bitterness and preserves your coffeemaker’s longevity. Have you ever tasted coffee that seemed off right after cleaning? This step fixes that problem.
Reassembling The Coffeemaker
Once rinsed, carefully reassemble all parts of your coffeemaker. This includes placing the filter basket, carafe, and any removable components back in their correct spots.
Check that everything fits snugly and the machine is dry before plugging it back in. Proper reassembly ensures your coffeemaker runs smoothly and avoids leaks. Taking a moment here can save you from frustrating spills or malfunctions later on.
Tips For Regular Maintenance
Keeping your Kitchen Aid coffeemaker in top shape means setting up smart habits for regular upkeep. Small, consistent efforts help avoid bigger problems and keep your coffee tasting fresh. Let’s look at some practical tips that make maintenance easy and effective.
Scheduling Routine Cleanings
Pick a specific day each week or month to clean your coffeemaker. Mark it on your calendar or set a phone reminder to stay consistent. Regular cleaning removes coffee oils and mineral buildup that affect flavor and machine performance.
Use a simple mix of water and white vinegar for a deep clean every few weeks. Run the solution through a brewing cycle, then rinse with fresh water until the vinegar smell disappears. This quick step can save you from costly repairs later.
Have you noticed how skipping cleaning makes your coffee taste bitter or stale? That’s a clear sign your machine needs attention.
Avoiding Common Issues
Protect your coffeemaker by using filtered water to reduce mineral deposits inside the machine. Hard water can cause clogs and damage the heating element over time.
Don’t leave old coffee grounds in the filter basket after brewing. They can mold and create unpleasant odors, which spoil your next cup. Empty and rinse the basket after every use.
Check the water reservoir regularly for cracks or leaks. Addressing small issues early prevents bigger problems that could stop your coffeemaker from working.
- Always unplug your machine before cleaning to avoid electrical hazards.
- Use a soft cloth to wipe down the exterior and avoid abrasive cleaners.
- Replace any worn-out parts, like the water filter or carafe lid, promptly.
What small habit can you start today that will keep your Kitchen Aid coffeemaker running smoothly for years?

Credit: www.kitchenaid.co.uk
Frequently Asked Questions
How Often Should I Clean My Kitchenaid Coffeemaker?
Clean your KitchenAid coffeemaker every 1-3 months. Regular cleaning prevents buildup and ensures better coffee taste. Frequent use requires more frequent cleaning. Follow manufacturer instructions for best results.
What Cleaning Solution Is Best For Kitchenaid Coffeemakers?
Use a mixture of white vinegar and water or a descaling solution. Avoid harsh chemicals. Vinegar effectively removes mineral deposits and keeps your machine running smoothly.
Can I Use Vinegar To Clean My Kitchenaid Coffeemaker?
Yes, vinegar is safe and effective for cleaning. Mix equal parts vinegar and water. Run the mixture through a brewing cycle, then rinse thoroughly with water to remove any vinegar smell.
How Do I Clean Removable Parts Of The Coffeemaker?
Remove the filter basket, carafe, and water reservoir. Wash them with warm, soapy water. Rinse and dry completely before reassembling. Regular cleaning prevents mold and residue buildup.
Conclusion
Keeping your KitchenAid coffeemaker clean helps it work well and last longer. Regular cleaning removes old coffee oils and buildup. Use simple steps with vinegar and water for best results. Don’t forget to rinse the machine thoroughly after cleaning. Clean parts often, like the filter basket and carafe.
A clean coffeemaker makes better-tasting coffee every time. Small efforts keep your coffee fresh and your machine healthy. Start a routine to enjoy great coffee daily. Easy care saves time and money in the long run.