
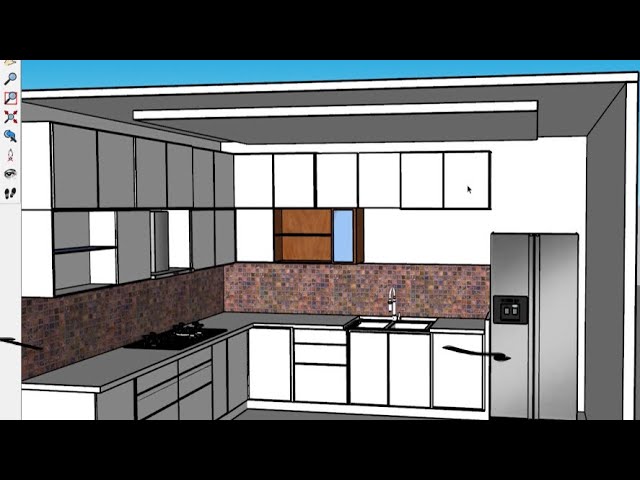
Have you ever wanted to bring your kitchen ideas to life on paper? Learning how to draw a 3D kitchen can turn your vision into a clear, detailed image that anyone can understand.
Whether you’re planning a renovation or just love design, this skill helps you see every corner, cabinet, and countertop before making any changes. By the end of this article, you’ll know simple steps to create your own realistic 3D kitchen drawing—no fancy tools or experience needed.
Ready to unlock your creativity and design the kitchen of your dreams? Let’s get started!

Credit: www.freepik.com
Materials And Tools Needed
Drawing a 3D kitchen requires the right materials and tools to bring your vision to life. Whether you prefer traditional sketching or digital design, having the proper supplies makes a huge difference. Let’s look at what you need to get started and how to choose tools that fit your style and goals.
Essential Drawing Supplies
Start with quality pencils ranging from HB to 6B for varied shading and detail. A sharpener and erasers—both kneaded and rubber—help you refine your lines and correct mistakes easily.
Paper choice matters too. Thick sketch pads or marker paper provide a smooth surface that holds ink and graphite well without smudging.
To add depth, include rulers and a set square for precise lines and angles. A blending stump or tortillon can soften edges and create realistic shadows.
- Graphite pencils (HB, 2B, 4B, 6B)
- Erasers (kneaded and rubber)
- Sharpener
- Sketchpad or marker paper
- Ruler and set square
- Blending stump or tortillon
Have you noticed how using the right pencil hardness changes your drawing’s texture? Experiment with these tools to see what works best for your kitchen design.
Recommended Software For Digital Sketching
If you prefer digital drawing, software choice impacts your workflow and results. Programs like SketchUp offer intuitive 3D modeling tailored for architectural spaces like kitchens.
Adobe Photoshop and Procreate provide flexible sketching and shading tools, especially if you want to add color and texture manually. Both support layers, which help organize your work step-by-step.
For beginners, TinkerCAD is user-friendly and web-based, making it easy to jump right into 3D design without installing complex software.
- SketchUp:Best for precise 3D architectural models
- Adobe Photoshop:Great for detailed digital painting and editing
- Procreate:Ideal for sketching on tablets with natural brush effects
- TinkerCAD:Simple and accessible for beginners
What digital tools have you tried so far? Sometimes switching software can unlock new creative possibilities you hadn’t imagined.

Credit: apps.apple.com
Basic Principles Of 3d Drawing
Drawing a 3D kitchen demands more than just sketching walls and appliances. You need to grasp the basic principles that make your drawing pop off the page. These fundamentals help you turn flat sketches into realistic scenes that anyone can step into with their eyes.
Understanding Perspective
Perspective is the trick your brain plays to make objects look three-dimensional on a flat surface. It controls how things appear smaller as they get farther away from you.
Start by deciding where your viewpoint is. Are you looking straight into the kitchen, or from a corner? This choice changes everything about how your drawing will look.
Try drawing simple cubes or boxes first. Notice how their edges converge depending on your viewpoint. This exercise builds a solid foundation for your kitchen sketch.
Mastering Vanishing Points
Vanishing points are where parallel lines seem to meet at the horizon. Understanding where to place them is crucial for a believable 3D kitchen.
You can have one, two, or even three vanishing points in your drawing, but most kitchens work well with two-point perspective. This means lines for walls and cabinets will angle toward two different points on the horizon line.
Place your vanishing points far apart to avoid distortion, especially if your kitchen has wide-open spaces. This small detail can make a big difference.
Creating Depth And Dimension
Depth is what separates your drawing from looking flat or cartoonish. Use overlapping objects and shading to create layers in your kitchen.
- Draw a countertop that overlaps the cabinets behind it.
- Add shadows under shelves and appliances to suggest light direction.
- Vary the thickness of lines; thicker lines can bring objects closer to the viewer.
Think about how your eyes focus on different parts of a kitchen. Does the stove catch your attention first? Use color and detail to guide the viewer’s eye and enhance the sense of space.
Planning Your Kitchen Layout
Designing a kitchen layout involves arranging cabinets, appliances, and workspaces for easy use. Drawing a 3D kitchen helps visualize space, making planning clear and simple. This approach guides better decisions before building or remodeling.
Planning a 3D kitchen layout requires thoughtful organization. A well-planned layout ensures efficiency and ease of movement. Visualizing your kitchen in 3D can be both exciting and challenging. Let's explore the essential steps for planning your kitchen layout.
Sketching The Floor Plan
Start with a simple sketch of your kitchen. Use graph paper or a digital tool. Draw the room's outline, including walls and windows. Mark where doors and entryways are located. This basic floor plan is your foundation.
Positioning Key Elements
Identify where to place essential elements. Consider the sink, stove, and refrigerator first. These create the kitchen work triangle. Ensure the path between them is clear. This setup improves workflow and accessibility.
Balancing Space And Functionality
Think about how you will use the space. Leave enough room for movement and safety. Ensure storage areas are within reach. Balance aesthetics with functionality. A well-planned layout enhances the cooking experience. Use these guidelines to create an efficient and inviting kitchen layout.
Drawing The Kitchen Structure
Drawing the kitchen structure is the foundation of your 3D kitchen design. It sets the stage for every element that follows, ensuring your space feels realistic and functional. Focusing on clear lines and accurate proportions will help you create a believable kitchen that invites creativity.
Outlining Walls And Floors
Start by sketching the main walls of your kitchen. Use straight lines to form the boundaries, paying close attention to the room’s dimensions. This step defines the space you’re working with, so don’t rush it.
Next, add the floor plane using perspective lines. This helps create depth and gives your drawing a three-dimensional feel. Imagine standing in the kitchen—where would the floor meet the walls? Drawing it correctly makes all the difference.
Adding Windows And Doors
Windows and doors are essential for realism and natural light in your kitchen. Position them carefully on the walls you’ve outlined, considering how they affect the room’s flow.
Think about the size and style of each opening. A large window can brighten the space, while a sliding door might open to a patio. Sketch these details lightly, so you can adjust as needed without cluttering your drawing.
Incorporating Cabinets And Counters
Cabinets and counters bring life to your kitchen design. Begin by marking their placement along the walls, keeping standard heights and depths in mind to maintain accuracy.
Draw the basic shapes first—rectangles for base cabinets and taller rectangles for wall cabinets. Don’t worry about details yet; focus on getting their position and scale right.
Remember, your kitchen’s usability depends on these elements. Ask yourself: does the layout allow enough workspace? Is there enough room to move around comfortably?
Adding Details And Textures
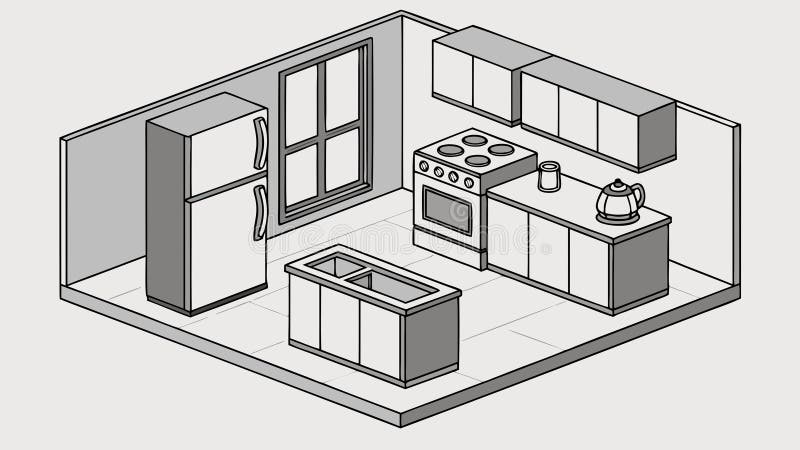
Adding details and textures brings your 3D kitchen drawing to life. It creates depth and realism. Without details, the drawing looks flat and dull. Textures give surfaces a tactile feel. They help viewers imagine how materials would look in real life. Details like appliances and fixtures add functionality to the space. Lighting and shadows enhance the mood and dimension. This section guides you through these essential steps.
Designing Appliances And Fixtures
Start by sketching key kitchen appliances. Include the refrigerator, stove, oven, and sink. Keep shapes simple but accurate. Use clean lines to define edges. Add buttons, handles, and display panels for realism. Fixtures like faucets and cabinet knobs need attention. Small details make the kitchen feel complete. Place appliances logically to reflect real kitchen layouts.
Applying Surface Textures
Textures represent different materials. Use patterns and shading to show wood, metal, or tile. For wooden cabinets, draw fine lines to mimic grain. Stainless steel appliances need smooth, shiny effects. Tiles can have small square patterns or grout lines. Use crosshatching or stippling for rough surfaces. Avoid overdoing textures; keep it balanced for clarity.
Including Lighting And Shadows
Lighting defines the space and highlights details. Decide on a light source direction first. Shade areas opposite the light to create shadows. Soft shadows add natural feel, while sharp shadows show bright light. Use gradients to blend light smoothly. Reflections on shiny surfaces add realism. Proper lighting makes your 3D kitchen more dynamic and believable.
Credit: www.dreamstime.com
Final Touches And Refinements
Final touches and refinements bring your 3D kitchen drawing to life. They help transform a basic sketch into a convincing space that feels real and inviting. Paying attention to small details can make a big difference in how viewers perceive your work.
Enhancing Depth With Highlights
Adding highlights creates a sense of light interacting with surfaces. Use a lighter shade or a white pencil to emphasize edges where light naturally hits, such as countertop corners or cabinet handles.
Think about where your light source is coming from. Consistent highlights across the drawing boost realism and make objects pop out visually.
Try subtle touches first—you can always add more if needed. Have you noticed how a simple shine on a faucet instantly makes it appear metallic and solid?
Correcting Proportions
Check your lines and shapes for any awkward sizes or angles. Sometimes, a cabinet might look too tall or a countertop too narrow, which breaks the illusion of depth.
Use a ruler or grid to measure distances between elements and ensure everything aligns properly. Adjusting proportions now saves you from a distorted final image.
Ask yourself if each part fits naturally within the overall space. Does the fridge look too big compared to the sink? Fixing these details sharpens your drawing’s accuracy.
Preparing For Presentation
Clean up any stray marks or smudges to make your drawing look polished. Use an eraser gently to remove guidelines without damaging your paper.
Consider adding a simple border or title to frame your work professionally. This small step can increase its impact when you share or display your drawing.
Finally, take a moment to step back and view your kitchen from different angles. Does it feel balanced and inviting? Your drawing should invite viewers to imagine stepping inside.
Frequently Asked Questions
How Do I Start Drawing A 3d Kitchen?
Begin by sketching the kitchen layout using basic shapes. Use perspective lines to create depth and dimension. Focus on the main elements like cabinets and appliances first.
What Tools Help Create A 3d Kitchen Drawing?
Use pencils, rulers, and erasers for precision. Digital tools like drawing tablets and software can enhance accuracy and ease perspective adjustments.
How To Add Realistic Depth To A 3d Kitchen Sketch?
Apply vanishing points and horizon lines to guide your perspective. Use shading and light direction to emphasize depth and create a three-dimensional effect.
Can Beginners Easily Draw A 3d Kitchen?
Yes, with basic knowledge of perspective and practice, beginners can draw simple 3D kitchens. Start with simple shapes and gradually add details.
Conclusion
Drawing a 3D kitchen can be fun and simple. Start with basic shapes and add details step by step. Use light and shadows to give depth to your drawing. Practice often to improve your skills and confidence. Soon, your drawings will look more real and lively.
Keep trying, and enjoy the creative process. Drawing a 3D kitchen helps you see spaces in a new way. Try different styles and have fun with your ideas. Your art will grow with each sketch you make.