
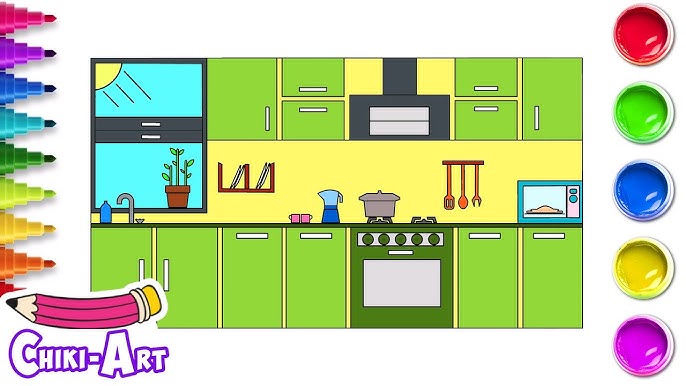
Do you want to learn how to draw a kitchen easily, without feeling overwhelmed? You’re in the right place.
This step-by-step guide breaks down the process into simple, clear actions anyone can follow. Whether you’re a beginner or just looking to improve your drawing skills, you’ll find helpful tips and tricks that make drawing your dream kitchen fun and stress-free.
Keep reading, and you’ll be surprised at how quickly you can create a kitchen drawing that looks great and feels just right.
Gathering Your Materials
Before you start drawing your kitchen, gathering the right materials is crucial. Having everything ready sets a smooth pace for your creative process and helps you focus on your drawing. Think about what tools and paper will make your work easier and more enjoyable.
Essential Drawing Tools
Choose pencils with different hardness levels. Soft pencils (like 2B or 4B) create darker lines, while hard pencils (H or 2H) are perfect for light sketches and details.
Don’t forget an eraser that works well without damaging the paper. A kneaded eraser is great for lifting graphite gently. Also, include a sharpener to keep your pencils precise.
Adding a ruler or a straightedge can make drawing cabinets and countertops easier. You might want to try a set of colored pencils or markers if you plan to add color later.
Choosing The Right Paper
Pick a paper that matches your drawing style. Smooth paper works best for detailed line work, while textured paper adds character to shaded areas.
Consider the size of your paper. Larger sheets give you more space to sketch the kitchen layout clearly. A standard sketchbook can be handy if you like to keep your drawings organized in one place.
Have you ever struggled with paper that tears or wrinkles easily? Thicker paper, like 80-100 lb (120-150 gsm), offers durability and can handle erasing and layering without damage.

Credit: www.youtube.com
Planning Your Kitchen Layout
Planning your kitchen layout is the foundation of drawing a kitchen that feels both realistic and functional. Before you start sketching, think about how the space flows and how each element fits together. This stage helps you avoid common mistakes and creates a clear roadmap for your drawing.
Basic Kitchen Shapes
Most kitchens fall into a few simple shapes that help organize the space efficiently. The common shapes are:
- Single Wall:All appliances and cabinets line up on one wall, perfect for small spaces.
- Galley:Two parallel walls with a walkway in between, ideal for narrow kitchens.
- L-Shaped:Cabinets and appliances form an L, offering open space and easy corner use.
- U-Shaped:Three walls of cabinets create a cozy, enclosed workspace.
- Island:Adds a central workspace, often in larger kitchens, offering extra storage and seating.
Choosing one of these shapes early will guide where you place counters, appliances, and walkways in your drawing. Have you thought about which shape fits your kitchen idea best?
Deciding On Perspective
Perspective changes how your kitchen looks on paper and how viewers experience your drawing. You can choose:
- One-Point Perspective:All lines recede to a single point, great for straight-on views.
- Two-Point Perspective:Uses two vanishing points, ideal for corner views and more dynamic angles.
- Bird’s-Eye View:A top-down look that shows layout clearly but less depth.
Choosing the right perspective helps you capture space and depth accurately. Think about the mood you want—do you want the kitchen to feel inviting and open or compact and cozy? Your perspective choice answers that question visually.
Sketching The Basic Structure
Begin by drawing simple shapes to outline the kitchen’s main areas. Focus on walls, counters, and appliance spaces for clear structure. This foundation helps keep the drawing organized and easy to build upon.
Sketching the basic structure of a kitchen sets the foundation for your drawing. This stage involves outlining the main elements such as walls, floors, cabinets, and counters. These components help define the space and give your drawing a realistic look. By mastering these steps, you can create a simple yet effective kitchen sketch. Let's delve into each part of this basic structure.
Drawing Walls And Floor
Start by sketching the kitchen's walls. Use light lines to frame the space. Ensure the lines are straight and proportional. This creates a realistic room outline. Next, draw the floor. Use parallel lines to suggest tiles or wood planks. These lines add depth and texture to your sketch. Keep the spacing even to maintain balance.
Adding Cabinets And Counters
Begin with the cabinets. Draw rectangular shapes along the walls. These represent the cabinets' frames. Make sure they are aligned with the walls. For counters, sketch horizontal lines above the cabinets. These lines should be parallel and even. Add small rectangles to suggest drawers or doors. This adds detail and realism.

Credit: www.youtube.com
Adding Appliances And Fixtures
Adding appliances and fixtures brings life to your kitchen drawing. These elements make your sketch look real and practical. Focus on simple shapes to represent each item clearly. Keep proportions right to fit the kitchen space well. This section helps you draw common kitchen features with ease.
Sketching The Stove And Refrigerator
Start with the stove by drawing a rectangle for the base. Add small circles on top for burners. Include knobs or buttons on the front side. For the refrigerator, draw a tall rectangle next to the stove. Divide it into two sections for the freezer and fridge doors. Use simple lines to show handles and door edges. Keep details minimal but clear.
Including The Sink And Lighting
Draw a rectangle or oval shape for the sink basin. Add a small circle or oval for the faucet. Place the sink within the countertop area. For lighting, sketch simple ceiling lights or hanging lamps above the workspace. Use small circles or rectangles to represent bulbs or fixtures. These touches make the kitchen look complete and functional.
Detailing And Enhancing The Drawing
Detailing and enhancing your kitchen drawing transforms a simple sketch into a lively, realistic scene. This step invites you to think beyond outlines and shapes. It’s about bringing texture, depth, and personality to your work.
Adding Texture And Patterns
Textures make surfaces feel tangible. Think about the roughness of a wooden countertop or the smooth shine of ceramic tiles. You can add texture by using small, repetitive lines or dots in areas like cabinets or flooring.
Patterns can add style and character. Try sketching a tiled backsplash with a simple checkerboard or geometric design. Even a subtle grain on a wooden table can make a huge difference.
- Use short, curved strokes for wood grain.
- Draw small circles or ovals to suggest stone surfaces.
- Repeat shapes carefully to mimic tile or fabric patterns.
Have you ever noticed how a plain wall becomes interesting just by adding a wallpaper pattern? Your drawing can do the same. Don’t be afraid to experiment with different textures to see what fits your kitchen best.
Using Shadows And Highlights
Shadows and highlights create depth and realism. Place shadows where objects block light, like under shelves or behind appliances. This makes your drawing feel three-dimensional.
Highlights show where light hits directly. Add these on edges or shiny surfaces like metal faucets or glass jars. Using a white pencil or eraser can help create bright spots that catch the eye.
- Observe your own kitchen or photos to understand light direction.
- Use softer shading for smooth surfaces and rougher shading for textured areas.
- Blend shadows gently to avoid harsh lines unless you want a dramatic effect.
Think about how shadows change throughout the day in your kitchen. Can you capture that natural light feeling? Playing with light can turn your drawing from flat to fascinating.
Coloring And Finishing Touches
Coloring and finishing touches bring your kitchen drawing to life. They add depth and personality to your artwork. This stage transforms simple sketches into vivid, inviting spaces. Use colors and details to highlight features and create mood.
Choosing A Color Palette
Select colors that match the kitchen style you want. Soft, light shades create a calm, spacious feel. Bright, bold colors add energy and warmth. Use a limited palette to keep the design clean and balanced. Consider these tips:
- Pick 2-3 main colors for cabinets, walls, and floors.
- Add 1-2 accent colors for details like handles and appliances.
- Use neutral tones to balance strong colors.
- Test colors on a separate sheet before applying.
Think about lighting effects. Natural light can change color appearance. Shade areas to show light direction and shadows. This makes the kitchen look more real.
Final Refinements And Cleanup
After coloring, check your drawing for any rough lines or smudges. Clean edges improve overall neatness. Erase extra pencil marks gently without damaging the paper.
Add small details like texture on countertops or wood grain on cabinets. These little touches enhance realism. Use a fine-tipped pen or pencil for precision.
Look at your work from a distance. It helps spot areas needing improvement. Adjust contrast and shading to create balance. Finish by signing your artwork in a corner.
Tips For Improving Your Kitchen Drawing
Improving your kitchen drawing takes more than just following steps; it requires sharpening your skills and expanding your understanding of kitchen layouts and details. Focusing on specific practices can help you create drawings that look professional and feel realistic. The tips below will guide you on how to enhance your kitchen sketches with practical exercises and observational skills.
Practicing Regularly
Drawing a kitchen frequently builds your confidence and sharpens your hand-eye coordination. Set aside time each day or week to sketch different kitchen elements like cabinets, appliances, or countertops. Even quick, rough sketches help you notice shapes and proportions better.
Try varying your practice by drawing kitchens from different angles or with different styles. This variety will keep your skills flexible and improve your ability to visualize complex spaces. Ask yourself: What details am I missing each time I draw? Focus on those in your next session.
Studying Real Kitchens
Observing real kitchens gives you valuable insight into how spaces function and look in reality. Visit friends, browse kitchen showrooms, or look through magazines to study layouts, materials, and lighting. Notice how elements like the sink placement or cabinet heights affect the overall design.
Take photos or sketch small sections while you observe to capture details you might forget later. This hands-on approach helps you understand practical aspects that improve the realism of your drawings. What small features can you spot that add character to a kitchen?

Credit: www.youtube.com
Frequently Asked Questions
How Do I Start Drawing A Kitchen Layout?
Begin by sketching the kitchen’s basic shape and walls. Next, add major elements like counters, cabinets, and appliances. Use simple shapes and keep proportions accurate. This step-by-step approach helps create a clear and organized kitchen layout.
What Tools Are Best For Drawing A Kitchen?
Use pencils, erasers, rulers, and graph paper for precision. Digital tools like drawing tablets or software can also help. Choose tools that make it easy to adjust lines and details. This ensures a neat and accurate kitchen drawing.
How To Add Kitchen Appliances Accurately?
Measure appliance sizes before drawing. Sketch each appliance to scale in its correct position. Include details like fridge doors and stove burners. Accurate appliance placement makes your kitchen drawing realistic and functional.
Can Beginners Easily Draw A Kitchen Step By Step?
Yes, beginners can follow simple steps to draw a kitchen. Start with basic shapes, add details gradually, and practice regularly. Step-by-step guidance simplifies the process and builds confidence in drawing kitchens.
Conclusion
Drawing a kitchen can be simple and fun. Follow each step with care and patience. Practice helps improve your skills every time. Use basic shapes to build your drawing. Don’t rush; take your time to add details. Enjoy the process of creating your own kitchen design.
Soon, you will see your drawing come alive. Keep practicing, and drawing will get easier. Try different styles and find what you like best. Drawing kitchens is a great way to express creativity. Keep your tools ready and start your next drawing soon!