
Are you ready to bring your kitchen ideas to life? Learning how to draw a kitchen island can be the first step toward creating a space that is both functional and stylish.
Whether you want a cozy breakfast spot or extra storage, designing your kitchen island on paper helps you visualize exactly what you need. In this guide, you’ll discover simple steps to sketch a kitchen island that fits your space perfectly.
Keep reading, and soon you’ll have a clear plan to transform your kitchen into the heart of your home.
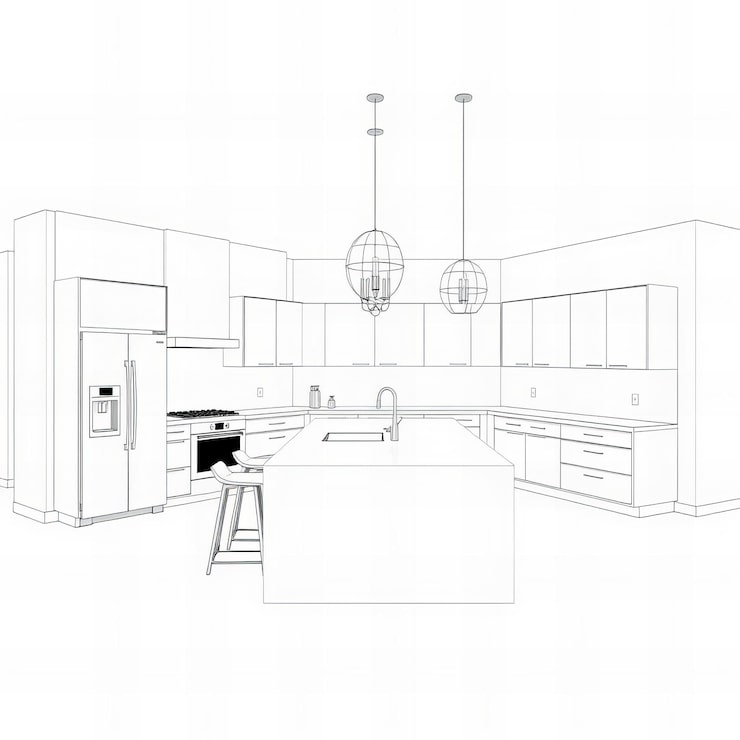
Credit: www.dreamstime.com
Choosing The Right Kitchen Island Style
Choosing the right kitchen island style shapes your kitchen’s look and function. It blends with your space and lifestyle. The style sets the tone for cooking, dining, and gathering. Picking a style means balancing design and practicality. Consider your kitchen size, shape, and how you use it daily. The right island style adds charm and boosts efficiency. Understanding popular designs, matching your layout, and selecting materials help make the best choice.
Popular Kitchen Island Designs
Kitchen islands come in many styles. Some common designs include:
- Traditional:Classic shapes with detailed woodwork.
- Modern:Clean lines and simple forms.
- Rustic:Natural wood and rough textures.
- Multi-level:Different heights for cooking and dining.
- Portable:Small and movable islands.
Each design suits different tastes and kitchen uses. Choose one that fits your style and needs.
Matching Your Kitchen Layout
Your kitchen shape affects the island size and style. Small kitchens need compact islands or none at all. Open kitchens can have larger, more detailed islands. Measure your space carefully. Leave enough room for walking and cooking. Consider how the island will affect traffic flow. Align the island with counters and appliances. The island should feel like part of the kitchen, not an obstacle.
Selecting Materials And Finishes
Materials impact the island’s look and durability. Popular choices include:
- Wood – warm and classic.
- Marble – elegant and smooth.
- Granite – strong and shiny.
- Stainless steel – modern and easy to clean.
- Laminate – budget-friendly and versatile.
Finishes affect color and texture. Matte finishes hide scratches better. Glossy surfaces reflect light and brighten the room. Choose materials that match your kitchen’s style and your daily use. Durable materials last longer and need less care.

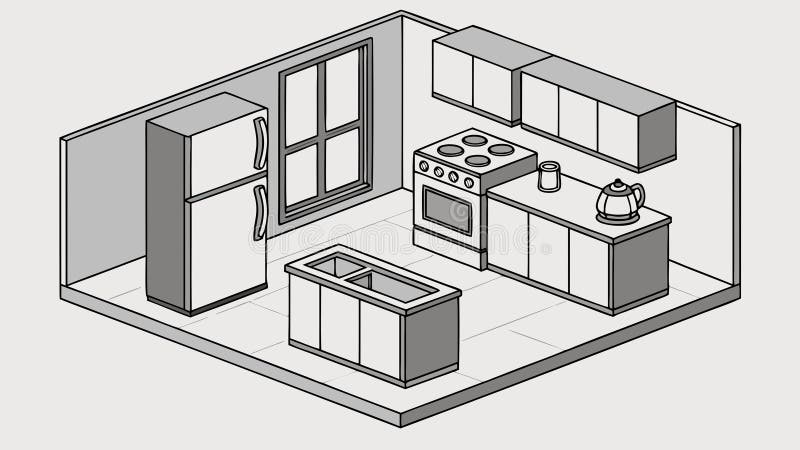
Credit: www.freepik.com
Planning The Kitchen Island Dimensions
Planning the kitchen island dimensions is a key step in creating a functional space. This process ensures the island fits well and supports your cooking and social needs. Consider the size of your kitchen and how the island will interact with other areas. Thoughtful measurements help avoid overcrowding and maintain smooth movement.
Measuring Your Space
Start by measuring the total kitchen area carefully. Note the length and width of the room. Identify where the island will sit. Mark any doors, windows, or appliances nearby. This helps prevent conflicts with existing features. Use a tape measure or laser tool for accuracy. Record these numbers for reference.
Determining Ideal Height And Width
Choose a height that matches your countertop or seating needs. Standard kitchen islands range from 36 to 42 inches tall. Width depends on the island’s purpose. For food prep, a wider surface is helpful. For dining, allow space for stools. Keep the island balanced with the rest of the kitchen.
Allowing For Traffic Flow
Leave enough space around the island for easy movement. Experts recommend at least 36 to 48 inches of clearance. This space allows multiple people to pass comfortably. Avoid tight spots near major appliances or cabinets. Clear paths make cooking and cleaning easier. Plan walkways that connect key kitchen zones smoothly.
Sketching The Basic Shape
Sketching the basic shape of a kitchen island is essential. It helps in visualizing the final design. Start with a simple outline to establish its presence. Focus on the main features and dimensions. This will form the foundation of your kitchen island drawing.
Drawing The Island Outline
Begin by drawing a rectangle. This represents the top view of your island. Ensure the proportions match your kitchen space. Consider the overall flow and accessibility. Keep it centered in the kitchen layout for balance.
Adding Countertop Details
Next, add the countertop details. Sketch lines to indicate edges and overhangs. This adds depth to your drawing. Consider rounded or beveled edges for style. These small details enhance the visual appeal.
Incorporating Storage Elements
Think about practical storage solutions. Sketch cabinet doors or drawer outlines. These provide essential storage space. Include open shelving for easy access items. Balance functionality with aesthetic design.

Credit: postdigitalarchitecture.com
Adding Functional Features
Adding functional features to your kitchen island increases its usability and style. These features make the island a central spot for cooking, dining, and socializing. Thoughtful design helps the island serve multiple purposes without clutter.
Including Seating Areas
Seating areas turn a kitchen island into a place for casual meals and gatherings. Choose stools or chairs that fit the island’s height and style. Leave enough space for people to sit comfortably without feeling cramped.
- Allow at least 24 inches per person for seating width
- Maintain a 12-inch overhang for legroom
- Choose durable, easy-to-clean materials
Designing Built-in Appliances
Built-in appliances save space and create a seamless look. Popular choices include microwaves, dishwashers, and wine coolers. Plan the layout to keep appliances accessible but out of the way.
- Measure appliance dimensions carefully
- Consider ventilation needs for certain appliances
- Ensure power outlets and plumbing are nearby
Planning Lighting Options
Good lighting enhances both function and ambiance around the island. Pendant lights add style and focus light where needed. Under-counter LED strips provide soft, practical illumination.
- Use adjustable fixtures to control brightness
- Place lights evenly to avoid shadows
- Match lighting style with kitchen decor
Enhancing The Design With Style
Enhancing the design of a kitchen island adds personality and charm. It turns a simple piece into a focal point. Style creates a welcoming and functional space. Thoughtful choices reflect your taste and boost the kitchen's appeal.
Using Color And Texture
Color brings life to your kitchen island. Choose shades that match or contrast with cabinets and walls. Light colors make the space feel bigger. Dark colors add depth and warmth.
Texture adds interest and variety. Mix smooth and rough surfaces for balance. Think about materials like wood, stone, or metal. Each texture creates a unique look and feel.
Incorporating Decorative Elements
Decorative touches personalize the kitchen island. Use stylish handles or knobs on drawers. Add open shelves with plants or cookbooks. Pendant lights above the island can serve as art.
Small details create charm. Consider decorative trim or molding. These elements make the island stand out without overwhelming.
Balancing Form And Function
Design must support daily kitchen tasks. Ensure the island has enough storage and workspace. Avoid clutter by keeping surfaces clear.
Shape and size matter. A well-proportioned island fits the room and traffic flow. Rounded edges improve safety and comfort.
Balance style with practicality for a beautiful, useful kitchen island.
Finalizing The Drawing
Finalizing your kitchen island drawing brings all elements together. This stage ensures the design looks accurate and ready for use. Focus on details that improve clarity and visual appeal. Small touches make a big difference in the final look.
Reviewing Proportions And Details
Check the size of the island compared to the kitchen space. Make sure the dimensions fit well and look balanced. Look closely at the details like drawers, shelves, and countertop edges. Adjust anything that seems off or uneven. Correct proportions help the design feel realistic and practical.
Adding Shadows And Depth
Use light shading to show how light hits the island. Shadows add a sense of depth and form. Shade under the countertop, around legs, and near cabinet edges. This makes the drawing more three-dimensional and lively. Keep shadows soft and consistent for a natural look.
Preparing For Presentation Or Build
Clean up any stray lines or smudges in the drawing. Make sure all parts are clearly visible and labeled if needed. Create a neat final version for sharing or building. Save or print the drawing in a high-quality format. This step helps communicate your design clearly to others.
Frequently Asked Questions
What Materials Are Best For Drawing A Kitchen Island?
Use pencils for sketching and fine liners for outlines. Colored pencils or markers help add realistic textures and colors. Choose materials that allow easy corrections and layering to create depth in your kitchen island drawing.
How Do I Start Drawing A Kitchen Island Step-by-step?
Begin with a basic rectangular shape for the island's base. Add details like countertop, drawers, and stools. Use light lines first, then refine with darker outlines and shading for a 3D effect.
What Perspective Should I Use To Draw A Kitchen Island?
Use a two-point perspective for a realistic look. This shows the island’s depth and dimensions clearly. It helps illustrate the island’s placement within the kitchen space accurately.
How Can I Add Realistic Shadows To My Kitchen Island Drawing?
Identify your light source first. Shade opposite sides of the island darker to create depth. Use gradual shading to mimic natural shadows, enhancing the island’s three-dimensional appearance.
Conclusion
Drawing a kitchen island can be simple and fun. Start with basic shapes and add details slowly. Think about size and space in your kitchen. Sketch shelves, drawers, or seating areas clearly. Use light lines first, then darken the final parts.
Keep practicing to improve your drawing skills. A well-drawn kitchen island adds charm to your plans. Try different styles and find what suits you best. Enjoy the process and watch your ideas come to life. Drawing helps you plan and create your dream kitchen.