

Have you ever wanted to create a simple yet eye-catching drawing that stands out? Learning how to draw a kitchen sponge is easier than you think—and it’s a fun way to boost your drawing skills.
Whether you’re a beginner or just looking for a quick sketch idea, this guide will show you step-by-step how to bring this everyday object to life on paper. Keep reading, and you’ll be surprised at how quickly your kitchen sponge sketch comes together!
Materials Needed
Gathering the right materials sets the foundation for a smooth drawing experience. You want tools that help you capture the texture and shape of a kitchen sponge clearly. Having everything ready before you start saves you from interruptions and lets your creativity flow.
Drawing Tools
- Pencils:Use a range of pencils from 2H to 6B for sketching and shading. Hard pencils (2H) help with light outlines, while soft pencils (4B-6B) create rich shadows.
- Eraser:A kneaded eraser is perfect for lifting graphite gently without damaging the paper. It also helps create highlights on the sponge surface.
- Sharpener:Keep your pencils sharp to capture fine details like the sponge’s porous texture.
Paper Choices
- Textured Drawing Paper:Choose paper with a slight texture (tooth) to enhance the sponge’s rough surface appearance.
- Size and Weight:A4 or larger works well, with at least 80gsm weight to handle erasing and shading without tearing.
Coloring Supplies
- Colored Pencils or Markers:If you want to add color, yellow and green shades capture the typical kitchen sponge look. Experiment with layering colors for depth.
- Blending Tools:A blending stump or cotton swab can smooth out pencil strokes and create a soft gradient.
Have you ever noticed how a simple kitchen sponge has so many tiny holes and subtle color changes? Capturing those details requires the right combination of tools. What materials do you already have on hand that could work for this drawing? Sometimes, using what’s nearby sparks unexpected creativity.

Credit: www.vecteezy.com
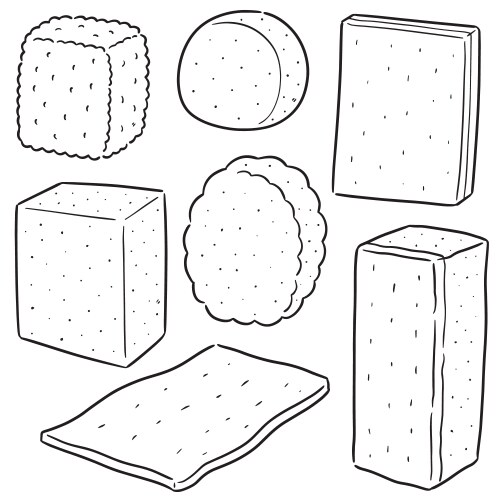
Basic Shapes To Start
Starting your kitchen sponge drawing with simple shapes helps create a solid base. Basic shapes make it easier to get the right proportions. They guide your hand and simplify complex details.
Begin with shapes that represent the sponge’s form. These shapes act like building blocks for your sketch. Keep your lines light. You will add details later.
Using A Rectangle For The Sponge Body
The kitchen sponge mainly looks like a rectangle. Draw a soft rectangle with rounded corners. This shape shows the sponge’s front face and thickness.
Keep the rectangle a bit wider than tall. This shape captures the sponge’s flat and broad look.
Adding A Slight Curve For Realism
Natural sponges are not perfectly straight. Slightly curve the edges of your rectangle. This gives the sponge a more natural, soft look.
Curves make the sponge appear less stiff and more realistic.
Sketching The Abrasive Side With A Smaller Rectangle
Most kitchen sponges have a rough side. Draw a smaller rectangle on top or one side of the main shape. This shows the scrubbing layer.
Use a different line style to separate this abrasive part from the soft sponge body.
Marking The Sponge Texture With Light Dots And Lines
Inside the main rectangle, add small dots and short lines. These represent the sponge holes and texture. Keep them light and random.
This step adds depth and makes your drawing look more detailed.
Drawing The Sponge Body
Drawing the sponge body is the foundation of your kitchen sponge sketch. Focus on capturing its basic shape before adding details. The sponge body is simple but has subtle curves that give it a soft look.
Start with basic shapes to make the drawing easier. Refine the lines as you go to create a natural form. Keep your strokes light so you can adjust them later.
Sketching The Rectangular Shape
Begin by drawing a rectangle for the sponge’s main body. Use light lines to keep it adjustable. The rectangle should be wider than tall, matching a typical kitchen sponge.
Keep the corners sharp at this stage. This makes it easier to modify the edges next. Check the proportions to ensure the shape looks balanced.
Adding Rounded Edges
Soften the rectangle by rounding its corners. This creates the sponge’s gentle curves and makes it look realistic. Use smooth, curved lines instead of sharp angles.
Focus on making each corner evenly rounded. Avoid making the curves too big or too small. This step adds a natural, soft feel to your sponge drawing.
Credit: www.vectorstock.com
Creating The Sponge Texture
Begin by sketching small, uneven circles and dots to mimic the sponge’s porous surface. Vary the shapes and sizes to create a natural, textured look that feels soft and spongy. Use light shading to add depth and highlight the sponge’s unique pattern.
Creating the texture of a kitchen sponge is crucial in drawing. The texture adds realism and character. It's about capturing the tiny details that make a sponge unique. Let's explore how to achieve this texture effectively.
Drawing Small Holes
Start by sketching tiny circles across the sponge surface. Vary their sizes for a natural look. Avoid patterns; randomness is key. Use a sharp pencil for precision. Focus on the sponge's edges and center. This adds authenticity.
Using Shading For Depth
Shade around the holes to create depth. Lightly darken one side of each hole. This gives a 3D effect. Use softer pencils for smoother shading. Blend gently with a fingertip or a blending tool. Highlight the top edge for contrast. This enhances the sponge's lifelike appearance.
Adding Details And Highlights
Adding details and highlights brings your kitchen sponge drawing to life. It creates depth and texture. This step makes the sponge look real and tactile. Small touches improve the overall look. Focus on the sponge layers and wet areas for a natural effect.
Defining The Sponge Layers
Start by outlining the sponge’s two main parts: the soft foam and the rough scrubber. Use short, uneven lines to show the foam’s porous texture. Draw tiny holes and dots scattered randomly. For the scrubber, add a rough, fibrous pattern with short strokes. This contrast highlights the sponge’s dual nature.
Keep the layers distinct but connected. Use slightly darker lines between the foam and scrubber. This separation adds clarity and realism. Avoid making the lines too harsh. Soft edges work better for a natural look.
Highlighting Wet Areas
Wet spots on the sponge appear shinier and smoother. Use lighter shades and small white highlights to show moisture. Place these highlights where light naturally hits the sponge. Common areas include the edges and raised parts of the foam.
Draw tiny water droplets or streaks for extra detail. Use a soft brush or light pencil strokes to blend highlights gently. This technique creates a fresh, damp appearance. It also makes the sponge feel ready for cleaning.

Credit: www.shutterstock.com
Coloring Your Drawing
Coloring your kitchen sponge drawing brings it to life. This step adds depth and realism. Use colors that show the sponge’s unique texture and wetness. Proper coloring highlights the sponge’s soft and rough parts.
Choosing Sponge Colors
Pick colors that match real kitchen sponges. Typically, sponges have a yellow or orange soft side. The scrubbing side often appears green or blue. Choose bright and natural shades to keep it simple and clear.
Use these colors as a base:
- Light yellow for the soft sponge area
- Dark green or blue for the scrubber part
- Light brown or beige for shadows and dirt marks
Blending Techniques
Blending colors creates smooth transitions in your drawing. It makes the sponge look soft and real. Use gentle strokes to mix colors without harsh lines.
Try these techniques:
- Layer light colors first, then add darker shades
- Use a blending tool or finger to soften edges
- Apply small circular motions for even color spread
Focus on the edges where colors meet. Blend carefully to show sponge texture and depth.
Final Touches
After sketching the basic shape and adding color to your kitchen sponge drawing, the final touches bring your artwork to life. These small adjustments make a big difference in how realistic and appealing your sponge looks. Paying close attention now will help your drawing stand out.
Refining Lines
Look closely at the edges of your sponge. Are the lines too harsh or too soft? Use a fine-tipped pencil or pen to sharpen the outline where needed, especially around the sponge’s corners and the scrubbing side.
Don’t be afraid to erase stray marks. Cleaning up the lines creates a polished look that feels intentional. Adding subtle texture lines can also suggest the sponge’s porous surface, making it more believable.
Think about which parts of your sponge should appear closer to the viewer. Darkening those lines slightly can create a sense of depth. Have you noticed how small details can completely change the feel of your drawing?
Adding Background Elements
Adding a simple background can ground your sponge and make the scene more interesting. Consider placing it next to a sink or on a countertop to give it context.
You don’t need to draw everything in detail. Suggest shapes and shadows to hint at the environment. This keeps the focus on your sponge while still telling a story.
Try sketching a few drops of water or bubbles nearby. These small additions can imply recent use, adding life and realism to your image. What background details would make your kitchen sponge drawing feel like a snapshot from a real kitchen?
Frequently Asked Questions
How Do I Start Drawing A Kitchen Sponge?
Begin by sketching a simple rectangular shape with slightly rounded edges. This forms the sponge’s basic outline. Use light pencil strokes to adjust proportions easily.
What Details Make A Kitchen Sponge Look Realistic?
Add texture by drawing small pores and a rough surface. Include a scrubber side with a different pattern or shading to enhance realism.
Which Drawing Tools Work Best For A Kitchen Sponge?
Use pencils for sketching and shading. Colored pencils or markers help add vibrant yellow and green colors typical of kitchen sponges.
How Can I Shade The Sponge For Depth?
Apply light shading on one side to show light direction. Use darker tones for the scrubber area to create contrast and depth.
Conclusion
Drawing a kitchen sponge can be simple and fun. Follow the steps with patience and care. Use basic shapes and add details bit by bit. Practice helps improve your drawing skills every time. Enjoy the process and do not rush.
Soon, your sponge will look just right. Keep your lines light at first, then darken them. Try different colors to make it lively. Drawing everyday objects builds confidence and creativity. Give yourself time and keep practicing regularly. You will see progress with each new sketch.
Drawing a kitchen sponge is a great start.