
Are you ready to bring your dream kitchen to life on paper? Knowing how to draw a kitchen can help you plan the perfect space that fits your style and needs.
Whether you want to redesign your current kitchen or just enjoy a creative project, this guide will walk you through simple steps to create a clear and useful kitchen drawing. By the end, you’ll have the confidence to sketch your ideas and see your ideal kitchen take shape right before your eyes.
Keep reading, and let’s get started!
Planning Your Kitchen Layout
Planning your kitchen layout sets the foundation for a smooth drawing process. It helps organize ideas clearly. A well-planned layout makes the kitchen functional and visually pleasing. Focus on style, space, and flow for better results. Consider how you use the kitchen daily. This will guide the design choices.
Choosing The Right Kitchen Style
Selecting a kitchen style shapes the entire design. Options range from modern, traditional, to farmhouse. Each style has unique elements and colors. Match the style to your home's overall look. Keep in mind the materials and finishes typical for the style. This creates a cohesive and inviting atmosphere.
Measuring Your Space Accurately
Accurate measurements avoid mistakes in your drawing. Measure the length, width, and height of the kitchen. Note the position of doors, windows, and utilities. Use a tape measure or laser tool for precision. Record all data clearly on paper or digital notes. This information helps create a realistic layout.
Selecting Functional Zones
Divide the kitchen into key zones for smooth workflow. The main zones include cooking, cleaning, storage, and preparation. Place the stove, sink, and fridge in a triangle for ease. Allocate space for counters and cabinets near these zones. Good zoning improves efficiency and comfort while cooking.

Credit: www.youtube.com
Gathering Essential Drawing Tools
Before you start drawing your kitchen, gathering the right tools can make a huge difference in your experience and the final result. Having the proper supplies helps you focus on your design instead of struggling with your materials. Whether you prefer traditional sketching or digital design, preparing your workspace is the first step to success.
Recommended Sketching Supplies
Start with quality paper that can handle erasing and shading, such as smooth sketch pads or heavyweight drawing paper. A set of pencils with varying hardness (like 2H, HB, and 2B) allows you to create light outlines and dark details easily.
- Erasers:Use a kneaded eraser for gentle corrections and a precision eraser for small details.
- Rulers and T-squares:Straight edges are crucial for drawing countertops, cabinets, and appliances with clean lines.
- Colored pencils or markers:Add color to your kitchen design to visualize materials and finishes better.
I once tried sketching a kitchen with just a regular pencil and scrap paper, and it became frustrating fast. After upgrading to a proper sketchbook and tools, the process felt smoother and more enjoyable.
Using Digital Design Software
Digital tools can speed up your kitchen drawing and make edits simpler. Software like SketchUp, AutoCAD, or even free options like Sweet Home 3D offer precise measurements and 3D views.
- Tablets and Styluses:Devices like iPads with Apple Pencil give you natural drawing control and portability.
- Layers and Undo Features:These make experimenting with layouts and colors less stressful since you can easily reverse mistakes.
- Templates and Symbols:Many programs include kitchen elements like sinks, stoves, and cabinets to drag and drop into your design.
Have you thought about how much time you could save by switching from paper to digital? If precision and quick changes matter to you, digital design might be your best friend.
Creating The Basic Floor Plan
Begin by sketching the room’s outline to set the kitchen’s shape and size. Mark doors, windows, and major appliances to create a clear, simple floor plan. This basic layout guides the placement of cabinets and counters for efficient use.
Creating the Basic Floor Plan Designing a kitchen begins with the basic floor plan. This blueprint serves as the foundation. It helps visualize the kitchen's layout and functionality. A well-thought-out plan ensures efficient space use. It also simplifies the drawing process for beginners. Let's explore essential elements for creating a kitchen floor plan.
Drawing Walls And Entry Points
Start by sketching the kitchen's walls. Use a ruler for straight lines. Clearly define each wall's length and height. Next, mark entry points. These include doors leading to other rooms. Ensure they are accurately positioned. Entry points impact kitchen flow and accessibility.
Positioning Windows And Doors
Decide where windows will be. Consider natural light and ventilation. Place windows on exterior walls. Ensure they don't block cabinet installation. Next, position interior doors. Think about how they open. Avoid placing them near cooking areas. Proper placement enhances kitchen safety and usability.
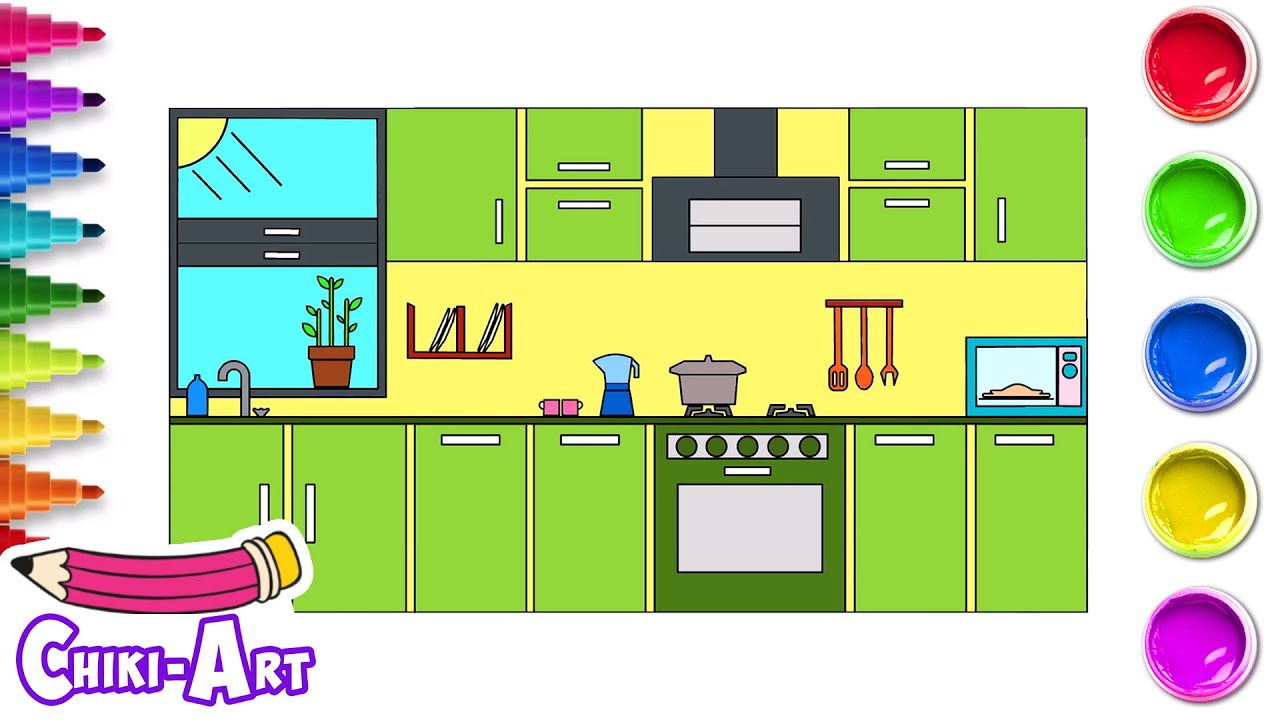
Sketching Cabinets And Storage
Sketching cabinets and storage is a crucial part of drawing your kitchen layout. Cabinets not only define the style but also maximize the functionality of your space. Paying attention to the details here can make your kitchen both beautiful and practical.
Designing Base And Wall Cabinets
Start with the base cabinets—they form the foundation of your kitchen workspace. Sketch these as rectangles along your kitchen’s floor plan, keeping in mind standard heights and depths. You can customize the size depending on how much countertop space you want.
Wall cabinets should be drawn above the base cabinets, usually mounted at a consistent height. Think about what you’ll store: heavier items are better in base cabinets, while daily-use dishes fit well in wall cabinets. Are you leaving enough space between them for comfortable use?
Don’t forget to add cabinet doors, handles, and drawers in your sketch to give a realistic feel. Adding these small details helps you visualize how the kitchen will function during daily use.
Adding Pantry And Shelving Units
Consider where to place pantry units for dry goods and larger storage needs. Sketch tall pantry cabinets near the refrigerator or cooking area for easy access. If space is limited, open shelving can be a great alternative, offering quick reach to frequently used items.
When drawing shelves, decide on their height and spacing based on what you plan to store—cookbooks, spices, or decorative pieces. Adding adjustable shelves in your sketch can show flexibility for future needs.
Think about balance between closed cabinets and open shelving to avoid a cluttered look. How can you arrange these elements to keep your kitchen organized yet inviting?
Placing Appliances And Fixtures
Placing appliances and fixtures in your kitchen drawing shapes the room's flow and usability. Proper placement makes cooking easier and keeps the space organized. Think about daily tasks and how to reduce unnecessary movement. Each appliance and fixture has a role in the kitchen’s function and style.
Locating The Sink, Stove, And Refrigerator
The sink, stove, and refrigerator form the kitchen work triangle. This triangle reduces walking distance during meal prep. Place these three in a way that creates a smooth workflow.
- The sink should be near water lines and offer enough counter space on both sides.
- The stove needs ventilation above and some space for cooking tools close by.
- Position the refrigerator so it is easy to open and access ingredients quickly.
Keep these three points balanced and not too far apart. Avoid placing them in a straight line to prevent long walks. This setup saves time and effort in the kitchen.
Incorporating Lighting And Ventilation
Good lighting brightens the kitchen and helps you see clearly. Use a mix of overhead, task, and natural light. Place fixtures above work areas like the stove and sink.
Ventilation removes cooking smells and smoke. Install a range hood above the stove. Position windows or vents to allow fresh air in.
- Use bright, energy-saving bulbs for better visibility.
- Consider under-cabinet lights for counters.
- Ensure vents lead outside, not into other rooms.
Proper lighting and ventilation make the kitchen safe and comfortable. They improve air quality and reduce moisture buildup.
Adding Details For Realism
Adding details brings life to your kitchen drawing. It transforms simple shapes into a believable space. Small touches create texture and depth. These details help viewers connect with the scene. Focus on areas that naturally catch the eye.
Drawing Countertops And Backsplashes
Start by showing different materials on countertops. Use light shading or lines to suggest texture. Granite, wood, or tile each have unique patterns. Draw small grains or veins for realism.
Backsplashes add color and interest behind counters. Sketch tiles with consistent shapes and spacing. Include grout lines to separate tiles clearly. Use subtle shading to show light reflecting off surfaces.
Including Hardware And Accessories
Draw cabinet handles and knobs with simple shapes. Round or rectangular hardware adds character. Place them evenly on doors and drawers.
Accessories make kitchens feel lived-in. Add items like a fruit bowl, cutting board, or kettle. These objects break empty spaces and add warmth. Use light shadows under these items to ground them.
Applying Colors And Textures
Adding colors and textures to your kitchen drawing brings the space to life. It helps viewers imagine how the kitchen would feel and function in real life. Choosing the right colors and simulating materials effectively can make your drawing stand out and communicate your vision clearly.
Choosing Color Schemes
Start by picking a color scheme that reflects the mood you want for the kitchen. Warm tones like reds and oranges create a cozy atmosphere, while cool blues and greens give a fresh, calming effect.
Think about the balance between light and dark colors to add depth. Using contrasting colors for cabinets and walls can highlight important features.
Ask yourself: What feeling should this kitchen evoke? Should it feel bright and energetic or calm and inviting? Your color choices should answer that question.
Simulating Materials And Finishes
Textures make your drawing tactile and realistic. Try to mimic the look of wood grain, smooth tiles, or shiny metal surfaces using shading and brush strokes.
Use different techniques to show finishes: matte surfaces absorb light, while glossy finishes reflect it. Adding subtle highlights and shadows can simulate these effects.
Consider the materials typical in kitchens, such as stainless steel appliances, ceramic tiles, or wooden countertops. Representing these accurately helps viewers connect with the space instantly.

Credit: www.youtube.com
Reviewing And Refining Your Design
Reviewing and refining your kitchen design is a crucial phase that shapes how your space will function and feel. It’s the moment to step back, look closely, and question every element. This process helps catch mistakes early and ensures your kitchen will be both beautiful and practical.
Checking Scale And Proportions
Start by comparing your drawing to real-life measurements. Are the cabinets, appliances, and countertops sized correctly? Even small discrepancies can make a big difference when you start building or remodeling.
Use a ruler or digital tools to measure every element against standard dimensions. For instance, a kitchen island too large could block movement, while a sink that's too small might not be comfortable to use. Have you double-checked door and drawer clearances?
Think about how each piece fits together visually. Does the fridge look balanced next to the cabinets? Sometimes adjusting proportions slightly enhances both aesthetics and usability.
Making Adjustments For Functionality
Functionality is the heart of kitchen design. Walk through your drawing mentally and ask: Will this layout support your daily routines? Can you move easily between the sink, stove, and refrigerator?
Look for pinch points or areas that feel cramped. Maybe you need to shift the oven or add extra counter space near the prep area. Practical tweaks like these prevent frustration later on.
Consider adding storage solutions where they’re most needed. Open shelving might work better in some spots, while deep drawers help keep utensils organized. Are you designing a kitchen that truly works for you?

Credit: www.youtube.com
Frequently Asked Questions
How Do I Start Drawing A Kitchen Layout?
Begin with a rough sketch of your kitchen’s shape and dimensions. Mark key areas like counters, appliances, and cabinets. This helps create an accurate and functional layout for your drawing.
What Tools Are Best For Drawing Kitchen Designs?
Use pencils for sketching, rulers for straight lines, and erasers for adjustments. Digital tools like design software can enhance precision and allow easy modifications.
How To Make A Kitchen Drawing Look Realistic?
Add details like textures, shadows, and lighting effects. Include appliances, utensils, and furniture to give depth and realism to your kitchen drawing.
Which Perspective Is Ideal For Kitchen Drawings?
Use a two-point perspective to show depth and dimension. It provides a balanced view of both walls and the room’s overall space.
Conclusion
Drawing a kitchen can be a fun and simple task. Start with basic shapes and add details step by step. Use light lines first to adjust your work. Focus on important parts like cabinets, appliances, and countertops. Take your time and enjoy the process.
Practice helps improve your drawing skills. Soon, you will create clear and neat kitchen designs. Keep experimenting with different styles and ideas. Drawing your kitchen can make your space feel more personal and real. Give it a try, and watch your skills grow!