

Are you ready to bring your kitchen design ideas to life with ease? Learning how to draw kitchen cabinets in SketchUp can transform your vision into a clear, detailed 3D model.
Whether you’re a beginner or looking to sharpen your skills, this guide will walk you through simple steps that anyone can follow. Imagine being able to see exactly how your cabinets will look before you build them—saving you time, money, and frustration.
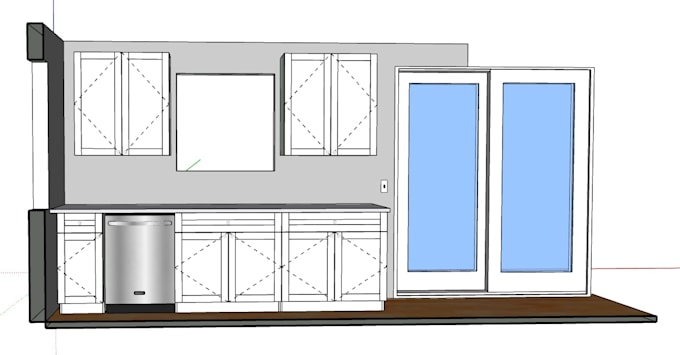
Keep reading to discover how you can create professional-looking kitchen cabinets in SketchUp, even if you’ve never used the software before. Your dream kitchen is just a few clicks away!
Credit: www.fiverr.com
Setting Up Sketchup For Cabinet Design
Setting up SketchUp correctly is essential before drawing kitchen cabinets. A proper setup ensures accurate designs and smooth workflow. SketchUp offers options to customize your workspace for cabinet design. These settings help maintain correct scale and detail. Follow these steps to prepare your SketchUp environment for cabinet drawing.
Choosing The Right Template
Start by selecting a template suited for architectural work. SketchUp has templates with pre-set units and scales. Choose one labeled “Architectural” or “Woodworking” for cabinets. This ensures you work in feet and inches or millimeters. Using the right template saves time and avoids resizing later.
Templates designed for cabinet design also include appropriate styles. These styles display edges and faces clearly. This clarity helps when modeling small cabinet details. Avoid templates meant for other purposes like 3D printing or landscaping.
Adjusting Units And Measurements
Set your units to match your project requirements. Cabinets often use inches or millimeters. Go to the “Window” menu, then “Model Info,” and select “Units.” Choose between decimal, architectural, or engineering units. For kitchen cabinets, architectural units are common.
Adjust precision to two decimal places for accuracy. This helps when measuring cabinet parts and gaps. Also, set the length snapping to a small increment. This setting makes drawing edges and corners easier. Accurate units and snapping keep your model precise and clean.

Credit: www.cabinetplans.io
Creating The Cabinet Base
Start by drawing a simple rectangle to form the cabinet base's footprint. Pull the shape upward to create the cabinet’s height, setting a solid foundation. This base acts as the main support for your kitchen cabinet design.
Creating the base of your kitchen cabinet in SketchUp is foundational. This step sets the structure for the entire cabinet design. It's crucial to get it right for stability and function.
Drawing The Cabinet Frame
Begin by selecting the rectangle tool. Draw a rectangle on the ground plane. This rectangle will be the footprint of your cabinet. Use the push/pull tool to extrude the rectangle upwards. This action will form the basic frame of your cabinet. Ensure the height matches your design requirements. Next, use the line tool to divide the frame into sections. These sections represent the sides and back of the cabinet. This step helps in visualizing the internal structure. It also aids in further detailing.
Adding The Bottom Panel
Select the rectangle tool again. Draw a rectangle inside the base of the frame. This rectangle represents the bottom panel of your cabinet. Use the push/pull tool to extrude this panel slightly upwards. Doing so gives the panel thickness. Ensure the panel fits snugly within the frame. This ensures a solid base. Double-check the measurements using the tape measure tool. Accurate dimensions are key to a functional design.
Designing Cabinet Doors And Drawers
Designing cabinet doors and drawers shapes the look and function of your kitchen cabinets. Precise design creates a realistic model and smooth workflow. Focus on clean lines and proper proportions for better results.
Sketching Door Panels
Start by drawing the outer frame of the door using the rectangle tool. Keep the dimensions accurate to fit the cabinet opening. Use the push/pull tool to give the door thickness.
Create door panels by drawing smaller rectangles inside the frame. Use the offset tool to maintain equal spacing. Push these panels inward slightly to add depth and detail.
Group the door components. Grouping helps to move and edit the door easily later. Use layers to organize different door styles for quick access.
Modeling Drawer Boxes
Draw the drawer box base inside the cabinet space with the rectangle tool. Pull it out slightly to show thickness. Make sure to leave enough space for drawer slides.
Use the line tool to create internal dividers if needed. These add realism and help with cabinet organization in the model.
Group the drawer box. This keeps parts together when moving or adjusting. Add drawer fronts by drawing a rectangle on the box face and pushing it outward slightly.
Adding Shelves And Interior Details
Adding shelves and interior details brings realism to kitchen cabinet designs in SketchUp. These elements help visualize storage space and functionality. Precise placement and modeling of shelves and supports improve your cabinet’s overall look.
Positioning Shelves
Begin by measuring the cabinet’s interior height. Divide the space evenly to decide shelf placement. Use the Tape Measure tool to mark shelf heights inside the cabinet. Draw a rectangle on each mark to create shelf surfaces. Make sure shelves fit well without overlapping doors or drawers.
Group the shelf geometry to keep it organized. Adjust shelf thickness to match your cabinet style. Use the Push/Pull tool to set the shelf depth. Shelves should align perfectly with the cabinet walls for a clean look.
Including Dividers And Supports
Dividers add structure and separate storage areas inside cabinets. Draw thin vertical planes where dividers are needed. Use the Offset tool to create supports along shelf edges. Supports keep shelves stable and add design detail.
Create small blocks or strips as supports beneath shelves. Place supports evenly for balance and realism. Group dividers and supports separately to edit them easily later. Use the Move tool to fine-tune their position. Adding these details enhances cabinet strength and appearance.
Applying Materials And Textures
Applying materials and textures in SketchUp brings your kitchen cabinet designs to life. It adds realism and helps you visualize how different finishes will look in your space. This step transforms simple shapes into inviting, tactile surfaces that can influence your entire kitchen’s mood.
Selecting Wood Finishes
Start by choosing the right wood finish that matches your kitchen’s style. SketchUp offers a variety of wood textures from light maple to dark walnut. You can easily browse through the Materials panel and pick one that fits your vision.
Think about the atmosphere you want to create. Do you prefer a warm, rustic feel or a sleek modern look? Matching wood grain direction to your cabinet doors also enhances realism, so pay attention to the orientation of the textures.
Customizing Colors And Patterns
SketchUp lets you tweak colors and patterns to suit your exact taste. After applying a basic material, you can adjust its hue, saturation, and brightness to create something unique.
Try experimenting with subtle pattern overlays or combining different textures on cabinet faces and frames. This customization can help you highlight certain design elements or create contrast that makes your cabinets stand out.
Have you ever thought about how a slightly different shade could change the entire kitchen vibe? Use SketchUp’s color tools to test various options without any extra cost or effort.

Credit: www.youtube.com
Incorporating Hardware Elements
Incorporating hardware elements into your SketchUp kitchen cabinet design adds realism and detail. Handles, knobs, hinges, and slides are essential parts of functional cabinets. These small features improve the look and usability of your model. Including them makes your design more complete and practical.
Modeling Handles And Knobs
Start by choosing the shape of the handle or knob. Use simple geometric shapes like cylinders, rectangles, or circles. Draw the base shape on the cabinet door face. Then, use the Push/Pull tool to give it depth.
Group the handle or knob as a separate component. This allows easy placement and editing. Resize or rotate the hardware to fit the cabinet properly. Use the Move tool to position it in the correct spot. Consider the style of your kitchen for appropriate hardware design.
Placing Hinges And Slides
Hinges and slides need precise placement for cabinet doors to open correctly. Model hinges using small rectangles or cylinders. Place them on the cabinet door edges and frame. Use the Offset tool to align them evenly from the edges.
Slides can be modeled as thin rectangular bars. Attach them inside the cabinet for drawers. Group these components for better control. Check alignment by opening and closing doors in SketchUp. Adjust placement to ensure smooth operation in your design.
Finalizing The Cabinet Model
Finalizing the cabinet model is a key step in your SketchUp project. This phase ensures your design is accurate, neat, and ready for use. Careful checks and organization help avoid mistakes later. Taking time now makes the whole process smoother.
Checking Dimensions And Alignment
Start by measuring every part of your cabinet. Check the height, width, and depth carefully. Use SketchUp's tape measure tool for precision. Make sure doors and shelves align perfectly. Poor alignment can cause issues when building.
Look at the model from different angles. This helps spot any gaps or overlaps. Fix any small errors before moving forward. Confirm all parts fit within the kitchen space. Correct dimensions keep your design realistic.
Grouping And Organizing Components
Group similar parts to keep your model tidy. For example, group all doors separately from shelves. This makes editing easier and faster. Use SketchUp's grouping feature to lock parts together. It prevents accidental moves or changes.
Create layers or tags to label each group clearly. This helps find parts quickly in complex models. Organizing components reduces clutter and confusion. It improves your workflow and saves time.
Exporting And Sharing Your Design
Exporting and sharing your kitchen cabinet design in SketchUp is a crucial step to bring your vision to life. Whether you're collaborating with clients, contractors, or simply saving your work for future use, knowing how to properly export your files makes all the difference.
Saving In Various File Formats
SketchUp lets you save your project in several file formats. Choosing the right one depends on what you plan to do next.
- .SKPis the native SketchUp file format. It keeps all your layers and components intact, perfect for continuing work later or sharing with other SketchUp users.
- .PDFis great for sharing static images of your design. It’s easy for clients or contractors to view without needing special software.
- .DWGor .DXFformats are widely used in CAD programs. Exporting to these is useful if your design needs precise measurements for construction or manufacturing.
- .OBJand .3DSare popular for 3D modeling and rendering in other software, especially if you want to create realistic presentations.
Think about who will use your file and for what purpose before choosing the format. Have you ever had to send a file only to find the recipient couldn’t open it? Avoid that by confirming file compatibility early.
Preparing For Presentation Or Construction
Before sharing your design, tidy it up for the audience. For presentations, add scenes to guide viewers through your kitchen layout smoothly.
- Use stylesto enhance visual appeal. Try different edge settings or shadows to highlight your cabinet details.
- Label key components with text or dimensions. This helps contractors understand exactly what you designed without guesswork.
- Group related parts and use layers to control visibility. This keeps your model organized and easier to navigate.
If you’re preparing for construction, double-check measurements and materials. Export detailed plans with dimension lines included. Sharing these clear instructions reduces errors on site and saves time.
Have you considered how your design looks to someone unfamiliar with SketchUp? Taking a moment to simplify and clarify can make your project run smoother from start to finish.
Frequently Asked Questions
How Do I Start Drawing Kitchen Cabinets In Sketchup?
Begin by setting accurate dimensions for your kitchen space. Use the rectangle tool to outline cabinet bases. Then, extrude shapes to add depth. This method ensures your cabinets fit perfectly in your design.
What Are Essential Sketchup Tools For Cabinet Design?
Key tools include the Rectangle, Push/Pull, Move, and Offset tools. They help create shapes, add thickness, and adjust cabinet parts easily. Mastering these tools speeds up your drawing process.
Can I Customize Cabinet Styles In Sketchup?
Yes, you can customize styles by adjusting dimensions, adding doors, and choosing materials. Use textures and colors to reflect different finishes. This flexibility allows for personalized kitchen designs.
How Do I Ensure Cabinet Measurements Are Accurate?
Use the Tape Measure tool to set guides and verify dimensions. Input exact sizes when drawing shapes. This practice prevents errors and ensures your cabinets fit perfectly in real space.
Conclusion
Drawing kitchen cabinets in SketchUp becomes easier with practice. Start simple, then add details step by step. Use the right tools for accurate shapes and measurements. Keep your design clean and organized for better results. SketchUp lets you see your ideas in 3D, making changes fast.
Try different styles and colors to find what fits best. With patience, your kitchen design will look professional. Enjoy creating your space and keep experimenting. Your skills will grow with every project you complete.