
Are you ready to give your kitchen a quick, stylish upgrade? Installing kitchen drawer pulls is one of the easiest and most effective ways to refresh your space without spending a fortune.
Whether you’re replacing old handles or adding new ones, this simple project can transform the look and feel of your cabinets instantly. In this guide, you’ll discover step-by-step instructions that make the process smooth and stress-free. By the time you finish, your kitchen will look polished and personalized—just the way you want it.
Keep reading, and let’s get those drawers pulling their weight in style!

Credit: atelierdeluxe.online
Choosing The Right Drawer Pulls
Choosing the right drawer pulls makes a big difference in your kitchen’s look and feel. The right pulls improve function and match your kitchen style. Think about materials, finishes, and size before buying. This helps avoid mistakes and extra work.
Materials And Finishes
Drawer pulls come in many materials. Popular choices include:
- Stainless steel – durable and easy to clean
- Brass – warm and classic look
- Chrome – shiny and modern
- Bronze – rustic and vintage feel
- Plastic or resin – budget-friendly and colorful
Finishes affect the pull’s look and how it wears over time. Matte finishes hide fingerprints better. Glossy finishes add shine but show smudges. Choose a finish that fits your kitchen’s style and maintenance needs.
Styles To Match Your Kitchen
Drawer pulls come in many shapes and styles. Some common styles include:
- Bar pulls – simple and modern
- Cup pulls – classic and easy to grip
- Knobs – small and versatile
- Ring pulls – vintage and decorative
Pick a style that matches your cabinets and overall kitchen design. Modern kitchens suit sleek bars. Traditional kitchens look great with cup pulls or knobs. The style should blend with your kitchen theme.
Measuring For Fit
Measure your drawers before buying pulls. Check the distance between screw holes. This is the center-to-center measurement.
Common sizes are 3 inches, 3.5 inches, and 5 inches. Match the pull size to your drawer size. Large drawers need bigger pulls for balance. Small drawers look better with smaller pulls.
Measure carefully to avoid drilling new holes. Use a ruler or tape measure for accuracy. Proper fit saves time and keeps your drawers looking neat.

Credit: www.familyhandyman.com
Tools And Materials Needed
Before you start installing kitchen drawer pulls, gathering the right tools and materials can make your project smoother and more enjoyable. Having everything at hand saves time and helps you avoid frustrating trips back and forth to the hardware store. Ready to see what you’ll need to transform your drawers?
Essential Tools
- Drill:A cordless drill is perfect for creating holes quickly and accurately.
- Drill Bits:Choose the right size to match your drawer pull screws—usually 3/16" or 1/8".
- Measuring Tape:Precise measurements prevent misaligned pulls.
- Center Punch:This helps mark exact drilling spots and keeps the drill bit from slipping.
- Screwdriver:A Phillips head screwdriver works best for tightening the screws securely.
- Level:Ensures your pulls are perfectly straight across all drawers.
When I first installed drawer pulls, I underestimated the importance of a center punch. The drill bit slipped, and my holes weren’t straight. Using a center punch makes a huge difference and saves you from misaligned pulls that look unprofessional.
Additional Supplies
- Drawer Pulls:Choose styles that match your kitchen’s look and are comfortable to grip.
- Screws:Often come with pulls, but verify they fit your drawer thickness.
- Painter’s Tape:Stick it on the drawer front to mark drill spots clearly and protect the surface.
- Wood Filler:Handy to fix any accidental holes or mistakes during installation.
- Fine Sandpaper:Smooths out any rough edges after drilling.
Have you ever thought about how tape can protect your drawer surface? Applying painter’s tape before drilling keeps the wood from chipping. It’s a simple trick but one that preserves the finish and gives a cleaner result.
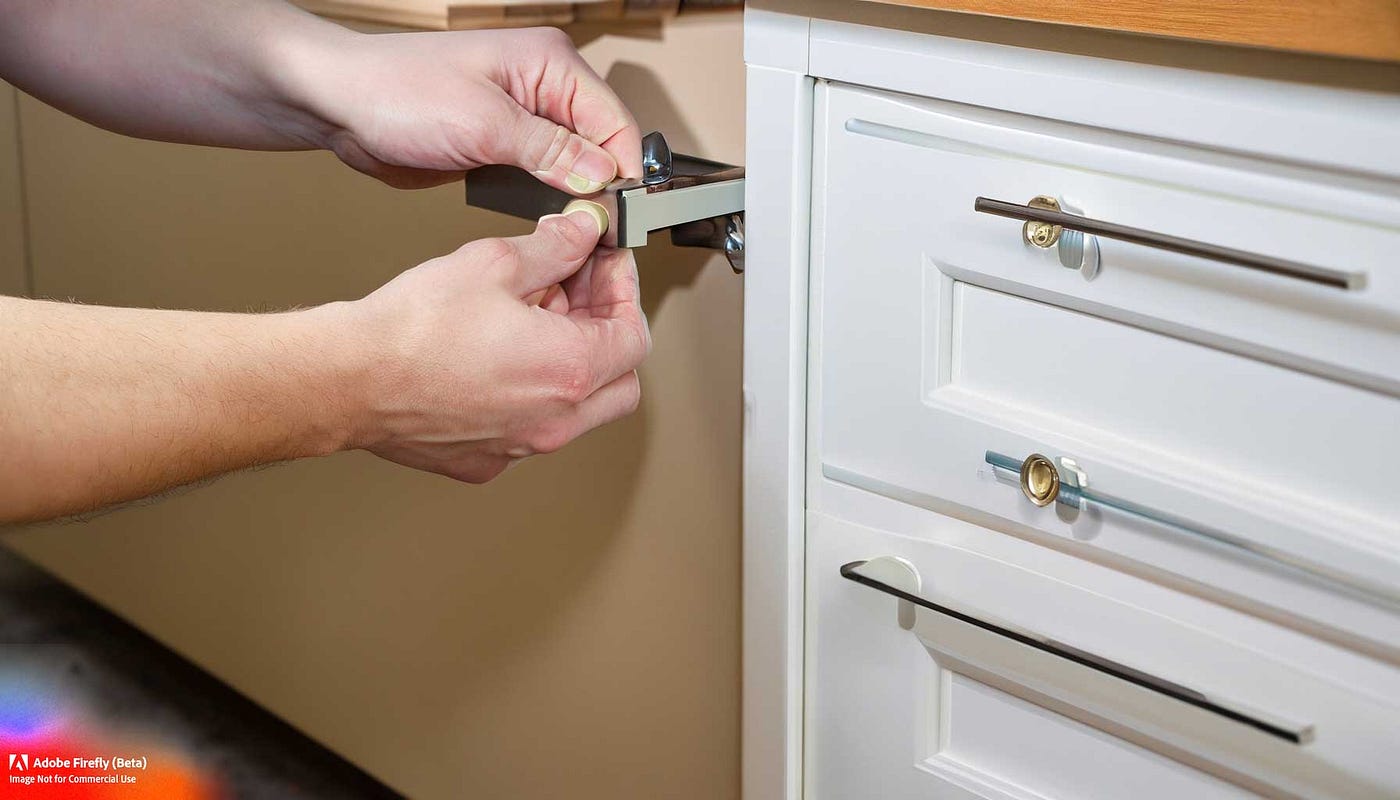
Preparing The Drawers
Clear the drawer surface and remove any old pulls. Measure and mark spots carefully for new handles. Double-check measurements to ensure proper alignment.
Preparing the Drawers Before you get started on installing those shiny new kitchen drawer pulls, it's crucial to prepare your drawers for a smooth installation process. This step might seem mundane, but it sets the foundation for the perfect look and functionality. A little prep work ensures that your new hardware not only looks great but also operates flawlessly.
Removing Old Pulls
Begin by removing the existing pulls from your drawers. Use a screwdriver to carefully unscrew each pull, ensuring you don’t strip the screws. Keep the old screws and pulls aside; they might come in handy for future projects or replacements.
Cleaning And Inspecting
Once the old pulls are removed, take this opportunity to clean the drawer surfaces. Use a mild detergent and a soft cloth to wipe away any dust and grime, paying special attention to the spots around the old pull holes. Inspect the drawers for any damage or wear that might interfere with the new pulls. Are there any cracks or splinters that need attention? Addressing these issues now will save you headaches later on. Engaging in these preparatory steps not only ensures a seamless installation but also extends the life of your kitchen drawers. Have you ever skipped this step and regretted it later? Taking a few extra minutes now can make all the difference in the end result.
Credit: medium.com
Marking Drill Points
Marking drill points is a crucial step in installing kitchen drawer pulls. Accurate markings ensure the pulls fit perfectly and look balanced. Mistakes here can cause uneven holes and damage your drawers.
Take your time to mark carefully. The right position helps the drawer pulls function well and enhances your kitchen’s appearance.
Using A Template
A template makes marking drill points easier and more precise. Most drawer pulls come with a paper or plastic template. Place the template on the drawer front. Align it properly with the drawer edges.
Use a pencil to mark the drill holes through the template. This method reduces guesswork and keeps all handles uniform. Templates work well for drawers of the same size and style.
Ensuring Symmetry
Symmetry is key to a neat, professional look. Measure the drawer front carefully before marking. Find the center point by measuring the width and height.
Mark equal distances from the center for each drill point. Use a ruler or tape measure for accuracy. Double-check measurements before drilling to avoid mistakes.
Consistent spacing and alignment make all drawer pulls look balanced. This simple step improves the overall kitchen design and feel.
Drilling Holes Safely
Drilling holes safely is key to installing kitchen drawer pulls without damage. Proper care protects your tools, cabinets, and hands. It helps create clean, precise holes for a strong hold. Taking the right steps reduces mistakes and frustration during installation.
Selecting The Right Drill Bit
Use a drill bit that matches the size of your drawer pull screws. A bit too large will make holes loose. A bit too small will crack the wood. For most kitchen pulls, a 3/16 inch bit works well. Choose a high-quality bit for smooth drilling. A sharp bit cuts cleanly and reduces splintering.
Tips For Accurate Drilling
- Mark hole positions clearly with a pencil or tape.
- Use a center punch or nail to make a small dent. This stops the drill from slipping.
- Clamp the drawer front to keep it steady.
- Start drilling slowly and increase speed gently.
- Keep the drill straight and steady for even holes.
- Drill just deep enough for the screws to fit securely.
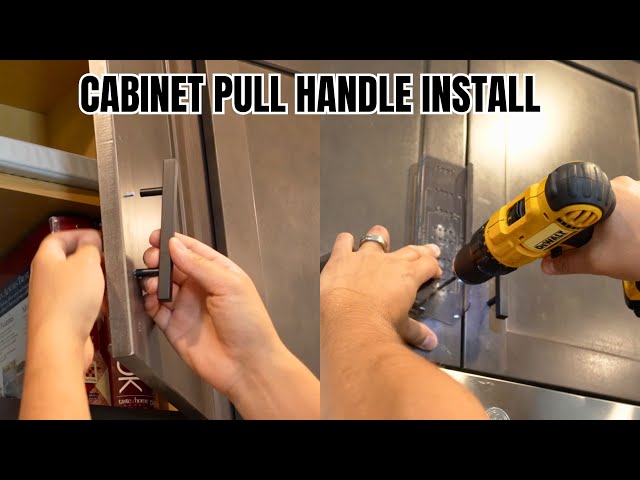
Attaching The Drawer Pulls
Attaching the drawer pulls is a crucial step that transforms your kitchen drawers from plain to polished. It requires attention to detail and a steady hand to ensure the pulls sit perfectly straight and secure. Missing this step can lead to loose handles or crooked pulls, which quickly become frustrating during everyday use.
Aligning And Securing Screws
Start by holding the drawer pull in place and lining up the screw holes carefully. Use a pencil to mark where the screws will go if you haven't pre-drilled holes. This prevents misalignment and saves you from unnecessary patchwork later.
Next, insert the screws through the back of the drawer front and into the pull. Tighten the screws slowly using a screwdriver—too much force can strip the wood or damage the pull. If you feel resistance, back off slightly and try again to avoid over-tightening.
Tip: If your drawer fronts are thin, consider using shorter screws to prevent them from poking through inside the drawer. Your goal is a firm, snug fit that doesn’t wiggle when pulled.
Checking Stability
Once the screws are secured, give the pull a gentle tug to test its strength. Does it feel solid, or does it move slightly? A loose pull can be tightened, but if it still shifts, you might need to add a small washer or use a longer screw for better grip.
Open and close the drawer a few times to check the pull’s comfort and functionality. Is the pull easy to grasp, or does it feel awkward? Adjust placement slightly if needed before finalizing.
Have you ever installed a pull only to find it uncomfortable to use? Taking a moment now to test can save you time and frustration down the road.
Final Touches And Maintenance
After installing your kitchen drawer pulls, the final touches and regular maintenance keep them looking great and working well. Taking care of them extends their life and keeps your kitchen stylish. Simple steps help maintain their shine and function.
Cleaning The Pulls
Clean drawer pulls regularly to avoid dirt buildup. Use a soft cloth and mild soap mixed with water. Gently wipe the pulls to remove grease and fingerprints. Avoid harsh chemicals that can damage the finish.
For metal pulls, a small amount of metal polish can restore shine. Wipe off any excess polish with a dry cloth. Dry the pulls well after cleaning to prevent water spots and rust.
Preventing Wear And Tear
Protect your drawer pulls from scratches and damage by handling them carefully. Avoid using sharp objects near the pulls. Tighten screws periodically to keep the pulls secure and prevent wobbling.
Consider using drawer liners to reduce impact on the pulls when opening and closing. Check for loose or damaged pulls and replace them promptly to avoid further issues. Regular attention keeps your kitchen looking fresh and neat.
Frequently Asked Questions
How Do I Measure For Kitchen Drawer Pulls?
Measure the distance between existing holes or decide pull spacing. Use a ruler or tape for accurate placement. Mark drill spots precisely to ensure alignment and avoid mistakes. Proper measuring ensures pulls fit well and look balanced.
What Tools Are Needed To Install Drawer Pulls?
You need a drill, screwdriver, tape measure, pencil, and level. These tools help mark, drill, and secure the pulls accurately. Using the right tools ensures a smooth and professional installation.
Can I Install Kitchen Drawer Pulls Without Drilling?
Yes, you can use adhesive or magnetic pulls for no-drill options. However, they may not be as secure or durable as screwed-in pulls. Drilling ensures a stronger, longer-lasting attachment.
How Do I Align Kitchen Drawer Pulls Evenly?
Use a measuring tape and level to mark equal distances on drawers. Double-check marks before drilling to keep pulls straight and uniform. Consistent alignment enhances the kitchen’s overall look.
Conclusion
Installing kitchen drawer pulls can be simple and quick. Measure carefully and mark the spots before drilling. Use the right tools to avoid mistakes. Tighten screws firmly but do not overtighten. Choose pulls that match your kitchen style and needs.
Small updates can make a big difference in your space. Enjoy your new drawer pulls and the fresh look they bring. Keep practicing to improve your DIY skills. Your kitchen will feel more organized and stylish.