

Are you tired of dealing with that stubborn coupling in your kitchen blend that just won’t come off? You’re not alone.
Removing coupling can be tricky, but with the right steps, you can get it done quickly and without damage. In this guide, you’ll learn simple, effective methods to remove coupling from your kitchen blend, saving you time and frustration. Keep reading, and you’ll master the process like a pro!
Causes Of Coupling In Kitchen Blends
Clumping in kitchen blends happens when particles stick together. This creates lumps that make the blend hard to use. Understanding what causes these clumps helps keep the blend smooth and ready for cooking. Several factors play a role in causing coupling in kitchen blends.
Common Ingredients That Cause Clumping
Some ingredients naturally tend to stick together. Sugar and salt often absorb moisture, leading to lumps. Powders like flour or baking soda can also clump easily. Spices with fine particles, such as cinnamon or chili powder, may form lumps too. Ingredients that contain oils can bind particles and cause clumping.
Impact Of Moisture And Storage
Moisture is a major cause of clumping in kitchen blends. Even small amounts of water can make powders stick together. Storing blends in humid places increases the chance of lumps. Using airtight containers helps reduce moisture exposure. Proper storage keeps blends dry and loose for longer use.

Credit: www.youtube.com
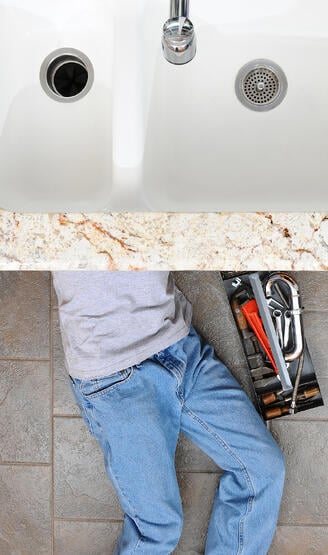
Tools Needed For Removing Coupling
Removing coupling from your kitchen blend can be tricky without the right tools. Having the proper equipment not only makes the job easier but also helps protect your kitchen appliances. Let’s look at what you need to tackle this task effectively.
Essential Kitchen Equipment
- Screwdriver:A basic flathead or Phillips screwdriver is often required to open the blender base and access the coupling.
- Wrench or Pliers:These help you grip and turn the coupling if it’s stuck or tightly fastened.
- Cleaning Brush:A small brush with stiff bristles can remove any food residue around the coupling area, making it easier to detach.
- Cloth or Towel:Use this to protect your hands and provide a better grip while handling slippery parts.
Do you have these tools handy in your kitchen drawer? If not, a quick trip to the hardware store could save you frustration later.
Optional Tools For Tough Clumps
- Rubber Mallet:For stubborn couplings, a gentle tap can loosen the parts without causing damage.
- Lubricant Spray:Food-safe lubricant can ease the process of loosening rusted or stuck couplings.
- Heat Source:Applying a little warmth with a hairdryer may expand metal parts, making them easier to separate.
Have you ever struggled with a coupling that just wouldn’t budge? Sometimes these extra tools make all the difference between success and a frustrating repair session.
Step-by-step Removal Process
Removing a coupling from a kitchen blender can seem daunting. With the right approach, it becomes manageable. Follow this step-by-step removal process to ensure success.
Initial Inspection And Preparation
Begin by unplugging the blender for safety. Examine the blender base to locate the coupling. Ensure the workspace is clear. Gather necessary tools such as pliers and a wrench.
Breaking Up Small Clumps
Use a damp cloth to wipe away any debris. This helps see the coupling clearly. If food particles are stuck, gently scrape them off. Make sure the coupling is clean and visible.
Dealing With Stubborn Coupling
Use pliers to grip the coupling firmly. Twist counterclockwise to loosen it. If it resists, apply a small amount of lubricant. Let it sit for a few minutes. Try twisting again. If it remains stuck, a wrench might be needed. Apply gentle pressure to avoid damage.
Preventing Future Clumping
Preventing future clumping in your kitchen blend saves you time and frustration. Clumps don’t just affect texture; they can change the flavor and consistency of your dishes. Taking simple steps now helps keep your blend smooth and ready to use whenever you need it.
Proper Storage Techniques
How you store your kitchen blend plays a huge role in preventing clumping. Moisture is the main culprit that causes ingredients to stick together.
Keep your blend in an airtight container to block out humidity. Glass jars with tight seals or heavy-duty plastic containers work best.
Store the container in a cool, dry place away from heat sources like stoves or direct sunlight. Even slight temperature changes can cause condensation inside the container.
Have you noticed how a pinch of salt hardens when left open? That’s a sign your kitchen blend is absorbing moisture. Avoid opening the container frequently or for long periods.
Using Additives To Avoid Coupling
Adding a small amount of anti-caking agents can help keep your blend free-flowing. These additives absorb moisture and reduce clumping.
Common natural additives include rice grains, dry silica gel packets (food safe), or powdered cornstarch. Place a few grains of rice or a small packet inside your container to soak up excess humidity.
Be cautious with additives if you’re using the blend in sensitive recipes. Start with a tiny amount and test how it affects the flavor and texture.
Have you ever tried adding a pinch of baking soda or powdered sugar to your mix? Sometimes a little experimentation reveals what works best for your specific blend.
Tips For Maintaining Blend Quality
Maintaining the quality of your kitchen blend is essential to avoid coupling issues that affect texture and taste. Paying close attention to how you mix and balance ingredients can make a noticeable difference. Here are some practical tips to keep your blend smooth and consistent every time.
Regular Mixing And Monitoring
Mix your blend regularly to prevent ingredients from separating or settling unevenly. Checking the blend's texture and consistency often helps you catch problems early. Have you noticed how even a quick stir can restore uniformity and improve the final outcome?
Keep an eye on the blend as it rests. Sometimes, ingredients separate slowly over time, causing lumps or uneven patches. Monitoring your blend means you can adjust before issues become noticeable in the dish.
Adjusting Blend Ratios
Changing the ratio of ingredients can solve coupling problems effectively. If your blend feels too thick or clumpy, try adding a little more liquid or oil. On the other hand, too much liquid can make it runny and lose its binding power.
Experiment with small adjustments and test the results. You might find that a slight increase in one ingredient improves the texture dramatically. What small change could make your blend work better today?
Credit: www.diychatroom.com
Credit: www.expresssewer.com
Frequently Asked Questions
How Do I Remove Coupling From A Kitchen Blender?
To remove coupling, unplug the blender first. Hold the blender base firmly. Twist the coupling counterclockwise to unlock it. Pull it out gently. Clean and inspect before reassembling.
What Tools Are Needed To Remove Blender Coupling?
Usually, no tools are needed. Hands are enough for most blender couplings. If stuck, use a rubber grip or a small wrench carefully. Avoid damaging the coupling or blender parts.
Can I Clean The Blender Coupling Separately?
Yes, you can clean it separately. Remove the coupling carefully. Wash with warm soapy water. Dry it thoroughly before reinstalling. Regular cleaning prevents buildup and ensures smooth operation.
Why Is The Blender Coupling Stuck?
Coupling can get stuck due to food residue or wear. Hardened debris or rust may cause tightness. Regular cleaning and lubrication can prevent sticking and prolong coupling life.
Conclusion
Removing coupling from your kitchen blend is simpler than it seems. Follow the right steps carefully and stay patient. Clean the parts gently and avoid harsh tools. Regular maintenance helps keep your blender working well. Small efforts save time and money later.
Your kitchen blend will stay fresh and ready for use. Keep your blender in good shape for tasty meals every day. Simple care makes a big difference. You can do this easily with the right approach.