
How to Repair Steam Damage on Kitchen Cabinets: Have you noticed steam damage ruining the look of your kitchen cabinets? That swelling, peeling, or discoloration can make your beautiful kitchen feel worn out and tired.
But don’t worry—you don’t need to replace your cabinets or hire expensive professionals. You can fix this damage yourself with simple steps that bring back their original charm. Keep reading, and you’ll discover easy, effective ways to repair your steam-damaged cabinets and make your kitchen look fresh again.
Your cabinets deserve a second chance, and you’re just a few steps away from giving it to them.
.png?width=345&height=308&name=Replace%20you%20Kitchen%20Cabinets%20(5).png)
Credit: www.jsbhomesolutions.com
Identify Steam Damage Signs
Identifying steam damage on kitchen cabinets early helps prevent costly repairs. Steam affects wood and finishes in specific ways. Knowing the common signs allows quick action to save your cabinets. Look closely for changes in texture, color, and structure. These clues reveal the extent of steam exposure and damage.
Warping And Bubbling
Steam causes wood to swell and lose shape. Cabinets may look twisted or bent. Surfaces might bubble, lifting the veneer or paint. Warping affects door alignment and gaps between panels. Bubbling feels uneven under touch and spoils smooth finishes.
Discoloration And Stains
Steam leaves water marks or dark spots on wood. Colors fade or become blotchy in patches. Stains often appear near sinks, dishwashers, or stovetops. These areas hold moisture longer, damaging the finish. Discoloration signals moisture trapped inside the cabinet surface.
Softening And Peeling
Wood feels soft or spongy from repeated steam exposure. Finishes may peel or flake off easily. Soft areas weaken cabinet strength and durability. Peeling paint or laminate exposes wood to further damage. This damage often grows worse over time without repair.

Credit: www.reddit.com
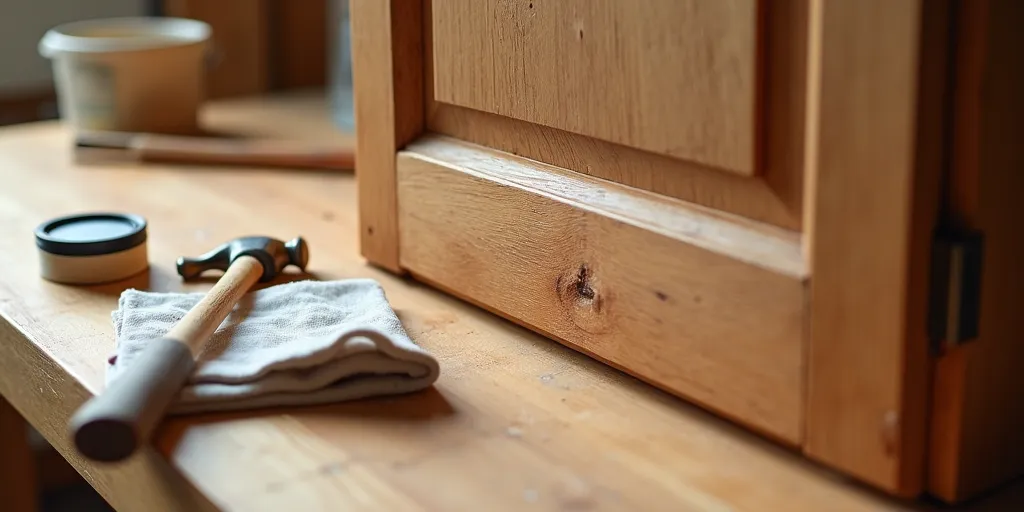
Gather Essential Tools
Preparing to fix steam damage on kitchen cabinets requires gathering the right tools. Having everything ready saves time and ensures a smooth repair process. The essential tools fall into three main categories: cleaning supplies, sanding materials, and wood fillers with sealants.
Cleaning Supplies
Cleaning is the first step before any repair. Dirt and grime must be removed to see the damage clearly. Use mild soap and warm water to clean the surface. Soft cloths or sponges work best to avoid scratching the wood. For tougher stains, a gentle wood cleaner helps without harming the finish.
Sanding Materials
Sanding smooths out damaged areas and prepares the wood for filling. Use fine-grit sandpaper to gently remove rough spots. A sanding block or sponge provides better control and even pressure. Avoid heavy sanding to prevent further damage to the cabinet surface.
Wood Fillers And Sealants
Wood fillers repair cracks, chips, and dents caused by steam. Choose a filler that matches your cabinet’s wood color. Apply it with a putty knife and let it dry completely. Sealants protect the wood from future moisture damage. Use a clear or tinted sealant that suits your cabinet finish for the best results.
Prepare The Cabinet Surface
Preparing the cabinet surface is a key step before fixing steam damage. It ensures the repair materials stick well and the finish looks smooth. Taking time here prevents more problems later.
Clean The Affected Area
Start by wiping the damaged area with a soft cloth and mild soap. Remove all grease, dirt, and dust. Avoid harsh cleaners that can further damage the wood. Cleaning creates a fresh base for repairs.
Remove Loose Material
Gently scrape away any peeling paint or loose wood fibers. Use a plastic scraper or fine sandpaper. Do this carefully to avoid making the damage worse. Clear edges help the patching material stay put.
Dry The Surface Thoroughly
Make sure the cabinet surface is completely dry before moving on. Use a fan or let it air dry for several hours. Moisture can stop fillers or paint from adhering properly. Dry surfaces give the best results.
Fix Minor Surface Damage
Fixing minor surface damage on your kitchen cabinets after steam exposure is easier than you might think. Small bubbles, peeling, or rough spots can ruin the look of your cabinetry, but with a bit of care, you can restore them to near-perfect condition. The key is to smooth out imperfections and fill in any gaps before refinishing.
Sanding Smooth
Start by gently sanding the damaged area using fine-grit sandpaper. This removes any loose or bubbled paint and smooths the surface for the next steps. Take your time here—if you sand too aggressively, you might damage the wood underneath.
Use a sanding block or a piece of wood wrapped with sandpaper for better control. After sanding, wipe the area clean with a damp cloth to remove dust. Do you notice the surface feeling even and ready for repair? That’s a good sign you’re on the right track.
Applying Wood Filler
Next, apply wood filler to any cracks, dents, or holes left by steam damage. Choose a filler that matches your cabinet’s wood tone for the best results. Using a putty knife, press the filler firmly into the damaged spots and smooth it out.
Don’t worry if it looks uneven at this stage—that’s normal. Let the filler dry completely, which usually takes a few hours. Have you ever tried filling cracks without smoothing? It makes a huge difference in how seamless the finish will be.
Sanding After Filling
Once the wood filler is dry, sand the area again with fine-grit sandpaper. This step ensures the surface is perfectly level and ready for painting or staining. Pay special attention to blending the repaired spot with the surrounding wood.
After sanding, clean the dust off with a damp cloth. Now, your cabinets are ready for the finishing touches that will bring them back to life. Imagine the satisfaction of seeing those minor damages disappear with just a little effort!
Restore Cabinet Finish
Restoring the finish on your kitchen cabinets after steam damage can bring them back to life and protect them from future harm. The goal is to make the cabinet surface look as close to the original as possible while adding a layer of protection. It’s not just about aesthetics; a well-restored finish helps seal the wood and prevents further moisture issues.
Choose Matching Stain Or Paint
Start by identifying the color and type of finish your cabinets originally had. You might have a stained wood look or painted surface, so choose a product that matches closely. Bring a small chip or sample to a hardware store for a perfect color match, or test stains and paints on a hidden area of the cabinet.
Don’t rush this step. Getting the right shade can be tricky, and a mismatch will stand out more than the damage did. Have you ever noticed how a slight difference in color can make a repair look obvious? Avoid that by taking your time here.
Apply Stain Or Paint
Once you have the right stain or paint, apply it carefully with a brush or cloth. Use thin, even layers to avoid drips or blotches. If staining, wipe off excess quickly to maintain an even tone.
Allow each layer to dry fully before adding another. This builds a smooth, rich finish. Think about how patience in this step can make your cabinets look professionally restored, not just patched up.
Seal With Protective Coat
After staining or painting, protect your work with a clear topcoat like polyurethane or varnish. This seals the finish and guards against future steam and water damage. Choose a finish—matte, satin, or glossy—that matches your original cabinet look.
Apply multiple thin coats, letting each dry completely. This durable layer will keep your cabinets looking fresh and shielded for years. What’s your plan to keep your kitchen cabinets safe from moisture going forward?
Handle Severe Damage
Severe steam damage can cause swelling and peeling on kitchen cabinets. Gently sanding and applying wood filler helps restore smooth surfaces. Sealing with a protective finish prevents further harm and keeps cabinets looking fresh.
Steam damage on kitchen cabinets can often creep up on you, leaving behind unsightly marks and weakened structures. When the damage is severe, it's important to tackle it head-on to ensure your kitchen remains both functional and beautiful. Think of this as an opportunity to refresh your space, turning a potential disaster into a rewarding DIY project. Remember, the process may seem daunting, but with the right steps, you can restore your cabinets to their former glory.
Remove Damaged Panels
Begin by carefully examining the extent of the damage. Use a screwdriver to remove the screws that hold the damaged panels in place. If the panels are severely warped, you might need a pry bar to gently lift them out. Take care to avoid further damage to the surrounding areas. Keep all screws and hardware in a small container so they don’t get lost. This will make reassembly much smoother later on.
Replace With New Wood
Once the damaged panels are removed, measure the spaces for new wood. Visit your local hardware store to find a suitable replacement that matches your existing cabinet style. Choose a high-quality wood that can withstand moisture better. Consider oak or maple for their durability and aesthetic appeal. Cut the new wood to fit the exact measurements of the removed panels.
Refinish Replacement
Before attaching the new panels, it’s essential to refinish them to match the rest of your kitchen cabinets. Sand the surface of the new wood lightly to create a smooth base for staining or painting. Apply a coat of primer if you plan to paint, or start with a stain for a natural wood finish. Ensure you apply at least two coats of finish, allowing ample drying time between each. Finally, attach the refinished panels back onto the cabinet using the screws you saved earlier. This final step brings your cabinets back to life, leaving you with a kitchen that looks as good as new. Have you ever considered how a simple repair can rejuvenate your entire kitchen?
Prevent Future Steam Damage
Preventing steam damage helps keep kitchen cabinets strong and looking good. Steam from cooking can cause wood to warp or peel. Taking steps to stop steam buildup protects cabinets and saves repair costs. Small changes make a big difference over time.
Improve Kitchen Ventilation
Good airflow reduces moisture in the kitchen. Use exhaust fans during and after cooking. Open windows when possible to let fresh air in. A range hood with a vent helps remove steam fast. Keep vents clean for best performance.
Use Protective Barriers
Apply water-resistant finishes on cabinet surfaces. Use clear sealants or varnishes designed for wood. Place heat shields behind stoves to block steam. Use cabinet liners inside to protect shelves. These barriers stop moisture from reaching the wood.
Regular Maintenance Tips
- Wipe cabinets dry after cooking to remove moisture.
- Check for any signs of peeling or swelling monthly.
- Touch up scratches or chips with wood finish or paint.
- Clean vents and fans regularly to keep airflow strong.
- Keep kitchen humidity low using a dehumidifier if needed.

Credit: www.reddit.com
Frequently Asked Questions
How Do I Fix Steam Damage On Kitchen Cabinets?
Start by drying the cabinet completely. Lightly sand the damaged area to remove swelling. Apply wood filler if needed. Finish with stain or paint matching the original cabinet color.
Can Steam Damage Cause Permanent Cabinet Warping?
Yes, prolonged steam exposure can warp wood cabinets permanently. Quick repair minimizes damage. Severe warping may require cabinet replacement.
What Materials Are Needed For Steam Damage Repair?
You need sandpaper, wood filler, putty knife, stain or paint, and a sealant. These materials help restore and protect cabinets effectively.
How Long Does It Take To Repair Steam Damage?
Minor repairs take a few hours to a day. Larger damage may require drying time and multiple coats, extending repair to several days.
Conclusion
Repairing steam damage on kitchen cabinets can save money and time. Small fixes often stop the damage from getting worse. Use gentle cleaning and simple tools for best results. Take care to dry cabinets quickly after cooking. Regular checks help catch problems early.
Keep your kitchen looking fresh and neat with these tips. You can protect your cabinets and keep them strong. A little effort goes a long way in home care.