
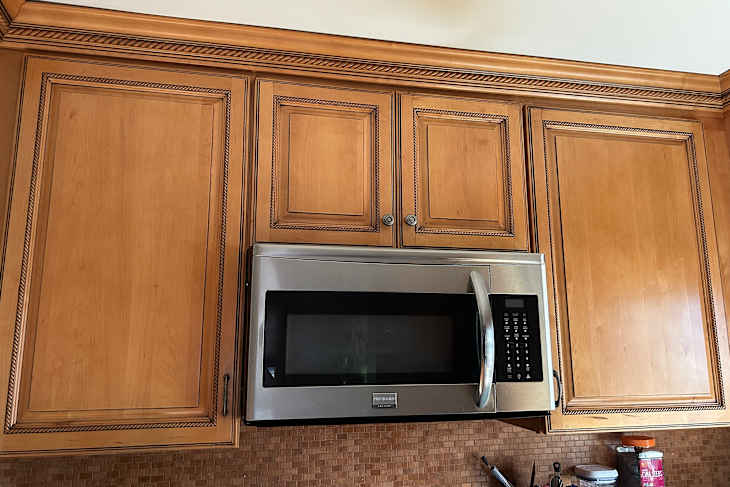
Are your kitchen cabinets looking dull or sticky from everyday cooking messes? You don’t have to replace them or use harsh chemicals to bring back their shine.
With Murphy’s Oil Soap, you can easily clean your cabinets and make them look fresh and inviting again. You’ll discover simple, step-by-step tips to get the best results without damaging your wood surfaces. Keep reading to unlock the secret to a cleaner, brighter kitchen that you’ll love spending time in.

Credit: currently.att.yahoo.com
Benefits Of Murphy's Oil Soap
Murphy's Oil Soap offers many benefits for cleaning kitchen cabinets. It cleans gently yet effectively. This soap helps maintain the wood's natural look and feel. Using it regularly keeps cabinets bright and fresh. The product is safe for most wood surfaces and easy to use. It removes dirt and grime without harsh chemicals.
Natural Ingredients And Safety
Murphy's Oil Soap is made from natural vegetable oils. It contains no harsh chemicals or synthetic fragrances. This makes it safe for your family and pets. It won’t damage wood finishes or cause discoloration. The soap is biodegradable, so it’s better for the environment. It offers a gentle cleaning option for sensitive surfaces.
Suitable Surfaces For Use
This soap works well on all types of wood cabinets. It is also safe for sealed and finished wood. You can use it on laminate and veneer surfaces. Avoid using it on unsealed or waxed wood. Murphy’s Oil Soap can clean other surfaces like hardwood floors and furniture. This versatility makes it a handy cleaning product.
Effectiveness In Removing Grease And Grime
Murphy's Oil Soap cuts through grease and grime easily. It lifts away sticky residue without scrubbing hard. The soap cleans deep into wood pores to remove dirt. It leaves cabinets looking clean without a sticky feel. Using it prevents buildup and keeps cabinets fresh longer. It works well even on old, tough stains.
Preparing Cabinets For Cleaning
Preparing your kitchen cabinets for cleaning with Murphy's Oil Soap sets the foundation for a successful and thorough refresh. Taking a few moments to get everything ready can save you time and prevent damage to your cabinets. It’s about creating the right environment to let Murphy’s Oil Soap work its magic effectively.
Removing Items And Dusting
Start by clearing out all items from your cabinets. This helps you access every surface and prevents any cleaning solution from getting on your dishes or food.
Next, dust off the cabinet surfaces using a dry microfiber cloth or a soft brush. Dust can turn into grime when mixed with cleaning solutions, so removing it first ensures a cleaner finish.
Checking Cabinet Material
Not all cabinets are created equal, and knowing your cabinet material is crucial before applying Murphy’s Oil Soap. This soap works great on wood but might not be suitable for laminate or painted surfaces.
Look for manufacturer labels or test a small hidden area. Have you ever tried cleaning without this check and ended up with unexpected damage? A quick test saves you from costly mistakes.
Gathering Necessary Supplies
Before you start, gather everything you need so you won’t have to stop midway. You’ll want Murphy’s Oil Soap, warm water, a bucket, soft cloths, and a sponge.
Consider using gloves to protect your hands and old towels to catch any drips. Having all supplies ready makes the cleaning process smoother and faster.
Step-by-step Cleaning Process
Cleaning your kitchen cabinets with Murphy’s Oil Soap can bring out their natural shine without harsh chemicals. The process is straightforward, but getting each step right ensures the best results and protects your cabinet surfaces. Let’s walk through how to prepare and apply the soap, clean effectively, and finish with a polished look.
Diluting Murphy's Oil Soap Correctly
Start by mixing Murphy’s Oil Soap with warm water to create the cleaning solution. Use about 1/4 cup of soap for every gallon of water. This dilution is key—it’s strong enough to clean but gentle enough to protect the finish on your cabinets.
Using too much soap can leave a sticky residue, while too little won’t clean well. Have you noticed how some cleaning products leave your cabinets feeling sticky? Proper dilution prevents that problem entirely.
Applying Solution To Cabinets
Use a soft cloth or sponge dipped in the soap solution to apply it to your cabinets. Work on small sections at a time to avoid the solution drying before you wipe. Avoid soaking the wood, as too much moisture can damage the finish.
If you have stubborn grease spots, gently press the cloth on the area for a few seconds before wiping to loosen the grime. This simple pause can save you scrubbing effort later.
Wiping And Scrubbing Techniques
Wipe your cabinets with gentle, circular motions to lift dirt and grime. For textured or carved areas, use a soft-bristled toothbrush to reach crevices without scratching. Resist the urge to scrub harshly; Murphy’s Oil Soap works best with patience.
Have you tried scrubbing so hard that you ended up damaging the surface? Gentle cleaning paired with the right soap protects your cabinets and maintains their beauty over time.
Drying And Polishing Cabinets
After cleaning, dry your cabinets immediately with a clean, dry cloth. This step prevents water spots and potential damage from lingering moisture. Once dry, buff your cabinets with a fresh cloth to bring out a natural shine.
Polishing doesn’t require extra products—Murphy’s Oil Soap leaves a subtle sheen if you dry and buff carefully. Have you noticed how a quick buff can make your cabinets look like new?

Credit: currently.att.yahoo.com
Tips For Stubborn Stains And Build-up
Dealing with stubborn stains and build-up on kitchen cabinets can be challenging. Murphy's Oil Soap is effective but needs a little technique for tough spots. Here are some tips to tackle those persistent stains without harming your cabinets.
Using Soft Brushes Or Cloths
Gently scrub the stain with a soft brush. It helps lift dirt without scratching surfaces. Opt for soft cloths to rub the oil soap into the stain. This method is gentle yet effective.
Repeating Cleaning If Necessary
Some stains need more than one cleaning. Reapply Murphy's Oil Soap and repeat the process. Persistence can dissolve build-up that’s been there for a long time.
Avoiding Damage To Finish
Test the soap on a hidden spot first. Ensure it doesn’t damage the finish. Use minimal water with the soap. Excess moisture can harm wood surfaces. Dry cabinets thoroughly after cleaning to protect them.
Maintenance And Care After Cleaning
Cleaning your kitchen cabinets with Murphy's Oil Soap is a great start, but maintaining that fresh look requires ongoing care. Proper maintenance extends the life of your cabinets and keeps them looking their best. Let’s explore how to care for your cabinets after cleaning to prevent grime buildup and preserve their finish.
Regular Dusting And Wiping
Dust and dirt settle quickly on kitchen cabinets, especially near cooking areas. You should dust your cabinets at least once a week using a soft cloth or microfiber duster to prevent particles from scratching the finish.
After dusting, wipe down the surfaces with a damp cloth slightly moistened with Murphy’s Oil Soap solution. This removes light grease and fingerprints without damaging the wood. Avoid soaking the wood—just a gentle wipe is enough.
Preventing Future Stains
Grease and stains can become stubborn if left unattended. To prevent this, wipe spills immediately, especially around handles and edges where grime tends to accumulate.
You might consider placing liners inside your cabinets to protect the interior surfaces from spills and stains. Also, avoid using harsh chemicals or abrasive pads during cleaning, as they can strip the finish Murphy's Oil Soap works hard to protect.
When To Schedule Deep Cleaning
Even with regular upkeep, your cabinets will benefit from a thorough deep cleaning every few months. Look for signs like persistent grease buildup, sticky handles, or dullness in the wood finish as cues to schedule this.
Deep cleaning with Murphy's Oil Soap involves applying the soap generously, letting it sit for a few minutes, then gently scrubbing with a soft brush before wiping clean. This removes embedded dirt and refreshes the wood’s natural shine.
Common Mistakes To Avoid
Cleaning your kitchen cabinets with Murphy’s Oil Soap can bring back their shine and freshness, but it’s easy to slip up if you’re not careful. Avoiding common mistakes helps protect your cabinets and ensures the cleaning process is effective. Let’s look at some pitfalls that can turn a simple task into a frustrating chore.
Using Too Much Soap
More soap doesn’t mean cleaner cabinets. Using too much Murphy’s Oil Soap can leave a sticky residue that attracts dirt quickly.
I once used a heavy dose of soap, thinking it would work better. Instead, my cabinets looked dull and felt tacky until I wiped them down again with plain water.
Stick to the recommended amount—usually a few drops mixed in water. This keeps the finish intact and your cabinets looking fresh.
Ignoring Manufacturer Instructions
Every cabinet material has specific care guidelines. Ignoring manufacturer instructions can cause damage or void warranties.
Some cabinets have finishes that don’t react well to oil-based cleaners like Murphy’s Oil Soap. Before you start, check labels or contact the manufacturer to confirm it’s safe.
Have you ever cleaned something only to find out later it was the wrong product? Avoid that hassle by doing a quick check first.
Over-wetting Cabinets
Too much water is a hidden enemy when cleaning wood cabinets. Over-wetting can cause swelling, warping, or peeling of the finish.
When I first cleaned my cabinets, I used a soaked cloth and noticed the wood started to feel soft after a few hours. Since then, I always wring out the cloth well before wiping.
Use a damp, not dripping, cloth and dry the surfaces immediately. This simple habit preserves your cabinets’ condition for years.

Credit: currently.att.yahoo.com
Frequently Asked Questions
How Effective Is Murphy's Oil Soap For Kitchen Cabinets?
Murphy's Oil Soap gently cleans wood without damaging the finish. It removes grease, dirt, and grime effectively. This soap restores shine and maintains cabinet durability. It is safe for most wood types and leaves a fresh, natural scent.
Can Murphy's Oil Soap Damage Cabinet Finishes?
No, Murphy's Oil Soap is safe for sealed wood cabinets. It cleans without stripping protective coatings or causing discoloration. Always dilute the soap as directed for best results. Test a small area first to ensure compatibility with your cabinet finish.
How Do I Properly Use Murphy's Oil Soap On Cabinets?
Dilute 1/4 cup of Murphy's Oil Soap in a gallon of warm water. Use a soft cloth or sponge to gently wipe cabinets. Avoid soaking the wood; use a damp cloth, then dry immediately. Repeat as needed for tough stains.
Is Murphy's Oil Soap Safe For Painted Kitchen Cabinets?
Yes, Murphy's Oil Soap is generally safe for painted surfaces. It cleans without harsh chemicals that can strip paint. However, test a small hidden spot first. Use a gentle touch to avoid damaging delicate paint finishes.
Conclusion
Cleaning kitchen cabinets with Murphy’s Oil Soap is simple and effective. The soap removes dirt and grease without harming wood. Use a soft cloth and warm water for best results. Regular cleaning keeps cabinets looking fresh and new. Avoid harsh chemicals that can damage finishes.
A clean kitchen feels more inviting and organized. Try this easy method to maintain your cabinets today.