
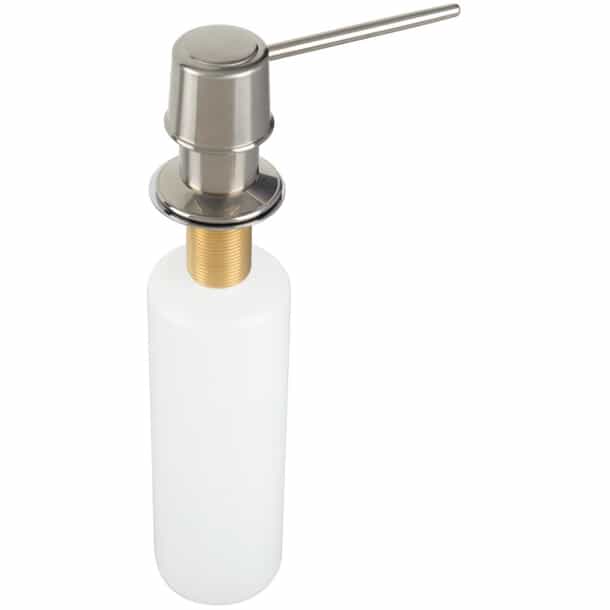
Is your kitchen sink soap dispenser not working like it used to? Maybe it’s clogged, leaking, or just won’t pump soap properly.
You don’t have to replace it or call a plumber right away. With a few simple steps, you can fix your soap dispenser yourself and save time and money. Keep reading, and you’ll learn easy, effective tips to get your dispenser back in perfect shape—no special tools or skills needed.
Ready to make your kitchen routine smoother? Let’s dive in!
Common Soap Dispenser Issues
Soap dispensers in the kitchen sink make handwashing and dishwashing more convenient. But like any small appliance, they can run into issues that disrupt your routine. Knowing the common problems can save you time and frustration before you reach for a replacement.
Leaking Problems
Leaks are one of the most frequent issues with kitchen sink soap dispensers. A loose connection or worn-out gasket often causes soap to drip around the base or under the sink.
Check if the dispenser head is screwed on tightly. Sometimes, simply tightening the pump assembly stops the leak. If the leak persists, inspect the rubber seal inside the dispenser neck—replacing this small part usually fixes the problem.
Clogged Nozzle
Soap buildup can block the nozzle, stopping soap from coming out smoothly. This happens when soap dries or if the dispenser sits unused for a while.
Try soaking the nozzle in warm water to dissolve hardened soap. You can also use a toothpick or a small needle to clear any blockages carefully. Regular cleaning prevents this hassle and keeps the soap flowing freely.
Pump Not Working
If pressing down on the pump doesn’t release soap, the internal mechanism may be stuck or broken. Soap residue sometimes hardens inside, restricting the pump movement.
Remove the pump from the bottle and rinse it under warm water. Pump the water through several times to clear clogs. If the pump still doesn’t work, check for cracks or broken parts; replacing the pump head might be necessary.

Credit: www.amazon.co.uk
Tools And Materials Needed
Fixing your kitchen sink soap dispenser becomes much easier when you have the right tools and materials at hand. Without them, even a simple repair can turn frustrating and time-consuming. Let’s look at what you’ll need to get your dispenser working smoothly again.
Basic Repair Tools
- Screwdriver set:Both flathead and Phillips screwdrivers are essential for removing screws and opening dispenser parts.
- Pliers:These help you grip small parts, twist tubes, or loosen tight fittings.
- Utility knife:Useful for cutting tubing or scraping away old soap residue.
- Towel or rag:Keeps your workspace clean and helps catch drips during the repair.
Having a small flashlight or headlamp can also help you see inside tight spaces clearly. Have you ever tried fixing something only to struggle because you couldn’t see what you were doing?
Replacement Parts
- Soap dispenser pump:If the pump mechanism is broken or clogged beyond cleaning, a new one will be necessary.
- Soap reservoir or bottle:Cracks or leaks in the soap container call for a replacement to avoid messes.
- O-rings and seals:These small rubber components prevent leaks and often wear out over time.
- Tubing:The tube that draws soap up might need replacing if it’s cracked or clogged.
Check your dispenser model to order the right parts—using the wrong size can make the problem worse. Have you checked if your dispenser has manufacturer-specific parts available?
Cleaning Supplies
- White vinegar:Excellent for breaking down soap buildup and mineral deposits.
- Warm water:Helps rinse away loosened debris during cleaning.
- Soft brush or old toothbrush:Perfect for scrubbing small areas without causing damage.
- Dish soap:A mild cleaner to remove grease and residue from parts.
Cleaning is often overlooked but crucial for a long-lasting repair. Have you noticed how much gunk can accumulate inside your dispenser over time?
Step-by-step Repair Process
Repairing a kitchen sink soap dispenser is easier than it seems. Follow clear steps to fix common problems. This guide helps you understand the repair process simply and effectively. Each step focuses on key actions to get your dispenser working again.
Removing The Dispenser
Start by clearing the area under the sink. Look for a nut holding the dispenser in place. Use a wrench or pliers to loosen it. Carefully pull the dispenser up through the sink hole. Disconnect the soap bottle from the dispenser pump. Set all parts on a clean surface for easy access.
Cleaning The Nozzle And Pump
Soap residue often clogs the nozzle and pump. Rinse them under warm water to remove buildup. Use a small brush or toothpick to clear tight spots. Soak the pump in warm, soapy water for 10 minutes. Pump the handle several times while soaking to clear blockages. Dry all parts with a clean cloth before reassembling.
Fixing Leaks
Check for cracks or worn seals causing leaks. Replace damaged O-rings or gaskets with new ones. Apply plumber’s tape around threaded connections to ensure a tight seal. Tighten all nuts and screws firmly but avoid over-tightening. Test the dispenser by pumping soap to confirm no leaks remain.
Reassembling The Dispenser
Attach the soap bottle to the pump securely. Insert the dispenser back into the sink hole. Tighten the mounting nut under the sink to hold it in place. Ensure the dispenser head turns smoothly and pumps soap easily. Wipe the area clean and test the dispenser for proper function.
Preventive Maintenance Tips
Keep the soap dispenser clean and free from soap buildup to avoid clogs. Regularly check for leaks and tighten loose parts to maintain smooth operation. Simple repairs can extend the life of your kitchen sink soap dispenser.
Preventive maintenance of your kitchen sink soap dispenser is key to extending its lifespan and ensuring it functions flawlessly. While it's tempting to wait until something goes wrong, proactive care can save you the hassle of unexpected repairs. By integrating simple habits into your routine, you can keep your dispenser in top condition.
Regular Cleaning Schedule
A consistent cleaning schedule is essential for maintaining your soap dispenser. Residue from soap can build up over time, leading to clogs and reduced functionality. Make it a habit to clean the dispenser nozzle and pump every two weeks. Use warm water and a gentle brush to remove any soap buildup. This simple routine can prevent blockages and ensure smooth operation.
Using The Right Soap
Choosing the correct type of soap can make a significant difference in the performance of your dispenser. Thick or overly concentrated soaps can clog the pump and reduce its efficiency. Opt for liquid soaps that are specifically labeled for dispensers. Dilute thicker soaps with water for a smoother flow. This small adjustment can prevent unnecessary wear and tear on the pump mechanism.
Avoiding Common Mistakes
Avoiding common mistakes can save you time and frustration. One frequent error is overfilling the soap reservoir, which can lead to leaks and spills. Ensure there's a small air gap to prevent pressure build-up. Another common issue is using the dispenser as a handle or support, which can damage the pump. Handle with care, and it will reward you with reliable service. By incorporating these preventive maintenance tips into your routine, you not only ensure the longevity of your kitchen sink soap dispenser but also enjoy a hassle-free kitchen experience. What simple changes will you make today to keep your dispenser running smoothly?
When To Replace The Dispenser
Knowing when to replace your kitchen sink soap dispenser can save you time and frustration. Not every issue calls for a full replacement, but some signs indicate it's time to get a new one. Paying attention to these details helps you avoid leaks, clogs, or constant repairs that waste both effort and money.
Signs Of Irreparable Damage
Look for cracks or broken parts that no longer hold soap properly. If the pump mechanism feels loose or doesn’t dispense soap even after cleaning, it might be beyond repair.
Persistent leaks under the sink or soap pooling around the dispenser base are also red flags. Sometimes, corrosion or plastic wear means the dispenser can't function reliably anymore.
Choosing A New Dispenser
When picking a replacement, consider the size and style that fits your sink setup. Make sure it matches the hole size and thickness of your countertop to avoid extra work.
Think about the type of soap you use—some dispensers work better with thicker soaps or lotions. Also, check for durable materials like stainless steel if you want something long-lasting.
Installation Basics
Installing a new dispenser usually requires just a few tools: a wrench, screwdriver, and maybe plumber’s tape. Start by removing the old unit carefully, keeping an eye on the mounting hardware and soap reservoir.
Attach the new dispenser’s pump and bottle securely, then tighten the mounting nut under the sink. Finally, test the dispenser by pumping soap several times to ensure it works smoothly without leaks.

Credit: www.youtube.com

Credit: www.amazon.com
Frequently Asked Questions
How Do I Fix A Clogged Kitchen Sink Soap Dispenser?
To fix a clogged dispenser, remove the pump and soak it in warm water. Clean any soap residue from the nozzle. Use a small brush or toothpick to clear blockages. Reassemble and test the dispenser for smooth soap flow.
Why Is My Kitchen Sink Soap Dispenser Not Pumping?
A soap dispenser may not pump due to airlocks, clogs, or broken springs. Check and clean the pump mechanism. Ensure the soap bottle is not empty. Refill and prime the dispenser by pumping several times.
Can I Repair A Leaking Soap Dispenser Myself?
Yes, you can repair leaks by tightening connections or replacing worn washers. Inspect the dispenser’s base and hose for cracks. Use plumber’s tape on loose fittings. If damaged parts persist, consider replacing the dispenser.
What Tools Do I Need To Repair A Soap Dispenser?
Basic tools include a wrench, screwdriver, warm water, and a small brush. Toothpicks or pipe cleaners help clear narrow openings. Having plumber’s tape is useful for sealing leaks. These tools cover most common repairs.
Conclusion
Fixing your kitchen sink soap dispenser can save time and money. Small problems often have simple solutions. Tighten parts, clean clogged areas, and check the pump. Test the dispenser after each step to see if it works. With patience, most issues can be resolved quickly.
Keep tools handy for future repairs. A working dispenser makes kitchen tasks easier and cleaner. Try these tips to keep your soap dispenser running smoothly. Don’t ignore small leaks or jams—they can get worse over time. Regular care helps your dispenser last longer and work better.