
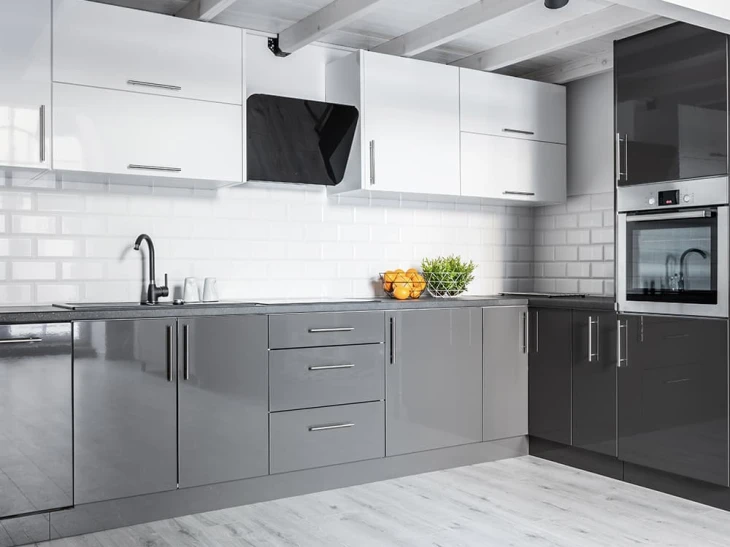
Are you tired of your glossy kitchen cabinets reflecting every little smudge and fingerprint? Or maybe you want to give them a fresh, stylish look without the hassle of a full remodel.
Covering gloss kitchen cabinets can transform your space quickly and affordably. In this guide, you’ll discover simple, effective ways to update your cabinets so they look brand new. Stick with me, and you’ll learn tricks that save time, avoid common mistakes, and make your kitchen the envy of everyone who walks in.
Ready to get started? Let’s dive in!
Preparing Gloss Cabinets
Preparing gloss cabinets properly is key to achieving a smooth, lasting finish. Skipping or rushing through this stage can cause paint or covering materials to peel or chip quickly. Taking the time to clean, sand, and remove hardware sets a solid foundation for any kitchen makeover.
Cleaning The Surface
Start by wiping down your gloss cabinets with a gentle degreaser or a mixture of warm water and dish soap. Gloss finishes often attract fingerprints and grease, so removing these contaminants is essential.
Use a soft cloth or sponge to avoid scratching the surface. After cleaning, let the cabinets dry completely before moving on.
Sanding For Adhesion
Glossy cabinets are notoriously slippery surfaces for paint or adhesive films. Lightly sanding them with fine-grit sandpaper (around 220 grit) creates tiny rough patches that help new coatings stick better.
Focus on sanding evenly without removing too much of the original finish. You’ll notice the surface changes from shiny to slightly dull—this is exactly what you want.
Removing Hardware
Before applying any coverings, take off all knobs, handles, and hinges. This step prevents missed spots and ensures a clean, professional look.
Keep the hardware organized in labeled containers so you can easily reinstall them later. If you’re planning to replace them, this is the perfect moment to pick something fresh and modern.

Credit: www.rvinyl.com
Choosing The Right Materials
Choosing the right materials can make or break your kitchen cabinet painting project. Gloss cabinets are smooth and shiny, so your materials must ensure proper adhesion and a flawless finish. Picking the wrong paint or tools can lead to peeling, brush marks, or uneven coverage, turning your effort into frustration.
Selecting Paint Types
Opt for paints designed to stick well to glossy surfaces. Acrylic latex paint with a satin or semi-gloss finish works great because it balances durability and looks. Oil-based paints also provide a hard, smooth finish but take longer to dry and need strong ventilation.
Think about the cabinet use. Are they exposed to heavy moisture or frequent cleaning? Choosing a paint with washable and scratch-resistant qualities will keep your cabinets looking fresh longer.
Picking Brushes And Rollers
Your brush or roller choice directly affects the smoothness of the final coat. A high-quality synthetic brush with fine bristles helps avoid streaks and visible brush marks on glossy surfaces. Foam rollers are excellent for covering flat areas quickly without leaving texture behind.
Don’t underestimate the size of your tools. Smaller angled brushes are perfect for edges and corners, while larger foam rollers cover broad cabinet faces efficiently. Have you ever tried painting with the wrong brush and ended up sanding down rough spots? Avoid that by matching your tools to the task.
Using Primers
Primers are essential for glossy cabinets, especially if you want the paint to stick and last. Choose a bonding primer formulated for slick surfaces to create a rough base for the paint. Skipping primer might save time upfront but often results in peeling or chipping later.
Consider your cabinet’s current color and condition. A tinted primer can help cover dark colors or stains, reducing the number of paint coats needed. Applying the right primer is like laying a strong foundation—it supports everything else you add.
Applying Primer And Paint
Applying primer and paint to gloss kitchen cabinets is a crucial step that determines the durability and finish of your project. Proper preparation and technique ensure the paint adheres well, prevents peeling, and provides a smooth, professional look. Let’s break down how to handle this process effectively.
Applying Primer Evenly
Start by choosing a high-quality primer designed for glossy surfaces. It’s essential to apply the primer in thin, even coats to avoid drips and uneven texture.
Use a good synthetic brush or a foam roller for smooth coverage. Work in one direction and avoid over-brushing, as this can create streaks.
Have you noticed how some primers dry with a patchy appearance? This usually means the layer is too thick or uneven. Light, consistent strokes help the primer bond better to the glossy surface.
Tips For Smooth Paint Application
Once the primer is completely dry, apply the paint using the same tools you used for priming. Thin coats work best to prevent runs and bubbles.
Maintain a steady hand and move in long, even strokes. If you spot any drips or imperfections, gently sand them with fine-grit sandpaper before applying another coat.
- Use a paint with good flow and leveling properties.
- Keep your work area dust-free to avoid particles sticking to wet paint.
- Consider a spray gun for the smoothest finish if you’re comfortable with the equipment.
Drying Times And Conditions
Patience is key during drying stages. Check the paint can for recommended drying times, but remember environmental factors like humidity and temperature affect drying speed.
Try to keep your kitchen well-ventilated but avoid direct airflow that can cause uneven drying. A cool, dry room is ideal.
Have you ever rushed the drying process only to find fingerprints or smudges later? Waiting longer than the minimum time can save you from redoing work and frustration.

Credit: www.workshop.bunnings.com.au
Adding Protective Finishes
Adding protective finishes to gloss kitchen cabinets is essential to keep their shiny appeal intact and prevent damage from everyday use. These finishes act as a shield, guarding against scratches, moisture, and stains. Without the right protection, your cabinets can quickly lose their vibrant look and become dull or damaged.
Choosing A Sealer
Picking the right sealer depends on your cabinet material and the level of protection you need. Water-based sealers dry quickly and keep the gloss intact without yellowing over time. Oil-based sealers offer stronger protection but may slightly alter the cabinet’s color.
Think about how often your kitchen gets heavy use. If you cook frequently, a tougher sealer is worth the extra effort. Also, check if the sealer is compatible with your cabinet’s finish to avoid any peeling or cloudiness later.
Applying Clear Coats
Clear coats add an extra layer of defense and enhance the shine on your cabinets. Use a high-quality brush or a sprayer for even application to avoid streaks or bubbles. Apply thin, even layers and let each coat dry completely before adding another.
Patience during this step pays off. Rushing can cause uneven surfaces, which defeats the purpose of a smooth gloss finish. Are you prepared to wait for drying times to get that flawless look?
Maintaining The Finish
After applying protective finishes, maintenance is key to extending their life. Clean your cabinets regularly with a soft cloth and mild detergent. Avoid harsh chemicals or abrasive scrubbing that can wear down the finish.
Consider placing felt pads on cabinet handles or knobs to reduce scratches. Small habits like wiping spills immediately can make a big difference in keeping your cabinets looking new. What routine can you add to protect your investment daily?
Reassembling And Final Touches
Carefully put all cabinet parts back in place after the paint dries. Check for any missed spots and touch up for a smooth, even finish.
After you've invested time and effort into transforming your gloss kitchen cabinets, it's crucial to get the reassembly and final touches right. This stage can make or break the sleek look you’re aiming for. Paying attention to the details here ensures your kitchen will shine with a polished finish that reflects your personal style.
Reattaching Hardware
Begin by carefully reattaching the hardware. Use a screwdriver to secure handles and hinges, ensuring they are tight yet not over-torqued. This prevents damage to the glossy surface, which can be more delicate than other finishes. Consider upgrading your hardware if it no longer matches the refreshed look. Sleek handles or modern knobs can elevate the entire aesthetic of your cabinets. Make sure each piece aligns perfectly with its counterpart for a seamless appearance.
Cleaning Up
After reassembly, it's time to clean up. Use a microfiber cloth to gently wipe down the cabinets. This removes any fingerprints or smudges left during installation. Opt for a non-abrasive cleaner suitable for glossy surfaces. This preserves the sheen and prevents any dulling of the finish. Remember to clean the surrounding areas, ensuring your kitchen sparkles from every angle.
Inspecting The Makeover
Take a step back and inspect your makeover. Look for any uneven surfaces or missed spots that might need a touch-up. This is your chance to catch any issues before they become bothersome. Invite a friend or family member for a second opinion. Sometimes a fresh set of eyes can spot what you might have missed. Are there areas that need a bit more attention or small adjustments? Engage with this process as it's all part of creating a space you'll love.

Credit: www.workshop.bunnings.com.au
Frequently Asked Questions
How Do You Prepare Gloss Cabinets For Painting?
Start by cleaning the surface with a degreaser. Sand the cabinets lightly to remove shine. Wipe with a damp cloth to remove dust. Apply a quality primer suitable for glossy surfaces before painting.
What Type Of Paint Works Best On Gloss Cabinets?
Use a high-quality enamel or acrylic latex paint. These paints provide a smooth, durable finish. Opt for a semi-gloss or satin sheen for easy cleaning and long-lasting results.
Can I Cover Gloss Cabinets Without Sanding?
Yes, but sanding improves paint adhesion. Use a liquid deglosser to roughen the surface if skipping sanding. Always apply a primer to ensure the paint sticks well.
How Long Does It Take To Paint Gloss Kitchen Cabinets?
Painting gloss cabinets typically takes 2-3 days. This includes cleaning, sanding, priming, and applying 2-3 paint coats. Allow proper drying time between each step for best results.
Conclusion
Covering gloss kitchen cabinets can change your kitchen’s look quickly. Choose the right materials and prepare surfaces carefully. Apply paint or adhesive films with patience and care. Small mistakes can affect the final result. Take your time and follow each step well.
A fresh cabinet look adds style and brightness to any kitchen. Enjoy your updated space without spending much money. Try this simple project for a fresh kitchen feel.