
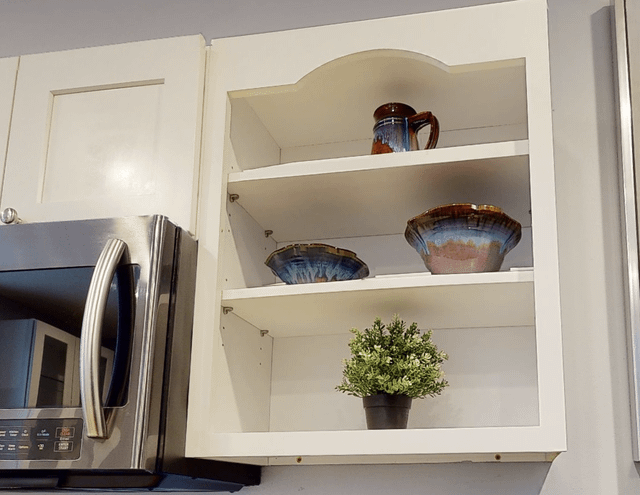
Are your kitchen cabinets looking tired or outdated? You don’t have to spend a fortune replacing them to give your kitchen a fresh new look.
Learning how to cover kitchen cabinets is easier than you think—and it can completely transform your space. Whether you want a quick fix or a long-lasting upgrade, this guide will show you simple, budget-friendly ways to revamp your cabinets. Keep reading, and you’ll discover tips and tricks that make the process smooth and enjoyable.
Your dream kitchen is closer than you imagine!
Preparing Your Cabinets
Preparing your kitchen cabinets properly is key to achieving a flawless finish. Skipping or rushing this stage can lead to uneven coverage and a less durable result. Taking your time to set the right foundation makes the entire project smoother and more satisfying.
Gathering Materials
Start by collecting all the tools and supplies you’ll need. This includes:
- Cleaning agents like mild detergent or degreaser
- Screwdrivers to remove cabinet hardware
- Sandpaper with different grits, usually 120 and 220
- Lint-free cloths or tack cloths
- Drop cloths to protect floors and countertops
Having everything ready avoids interruptions and helps you focus on each task. What materials do you already have on hand that could save you a trip to the store?
Cleaning And Removing Hardware
Cleaning your cabinets removes grease, dust, and dirt that block paint or adhesive from sticking. Use a mild detergent or a degreaser and scrub gently with a sponge. Focus on corners and edges where buildup is common.
Next, remove all handles, knobs, and hinges carefully. Label each piece and keep screws in small containers to prevent losing them. This step lets you work freely and prevents hardware from getting damaged during sanding or painting.
Sanding For Smooth Surfaces
Sanding smooths out any rough spots, old finishes, or surface imperfections. Start with coarser grit sandpaper (around 120) to remove the top layer of finish or any bumps. Then switch to finer grit (220) to create a smooth surface ready for paint or covering.
Use a sanding block or an electric sander for even pressure. Don’t forget to wipe away dust with a tack cloth—dust left behind will ruin your finish. Have you noticed how much smoother your cabinets feel after sanding? That’s the difference preparation makes.

Credit: www.create-enjoy.com
Choosing The Right Paint
Choosing the right paint is key to a fresh kitchen look. The paint must stick well, resist stains, and handle kitchen moisture. It should also match your style and last for years. Picking the right paint type and color makes a big difference.
Types Of Paint Suitable For Cabinets
Cabinet paint needs to be tough and smooth. Some common types work best:
- Latex Paint:Easy to clean and dries quickly. It is low in odor and good for beginners.
- Oil-Based Paint:Very durable and smooth. It takes longer to dry and has a stronger smell.
- Acrylic Paint:Offers good adhesion and color retention. It handles moisture well.
- Chalk Paint:Popular for a matte, vintage look. Needs sealing for durability.
Choose paint that suits your skill level and kitchen use.
Selecting Colors For Your Style
Color sets the mood in your kitchen. Light colors make space feel bigger and bright. Dark colors add elegance and warmth.
Neutral shades like white, beige, or gray fit any design. Bold colors like navy or green create a statement. Think about your kitchen’s light and overall look.
Pick colors that match your home’s style and your taste. Test small paint samples to see the true color before buying.
Primer Options
Primer helps paint stick better and last longer. It also blocks stains and hides old colors.
- Oil-Based Primer:Works well on wood and tough stains. It seals the surface tightly.
- Latex Primer:Dries fast and is easy to clean. Good for smooth surfaces.
- Shellac Primer:Blocks odors and strong stains. It dries very quickly.
Pick a primer that fits your paint type and cabinet material. Always apply primer for a smooth, even finish.
Applying Paint Or Covering
Revamping your kitchen cabinets can give your space a fresh look. Painting or covering cabinets is a popular choice. It is cost-effective and can transform your kitchen. There are various methods to apply paint or coverings. Each method offers unique benefits. Let’s dive into some techniques.
Using Brushes And Rollers
Brushes are ideal for detailed work. They help reach corners and edges easily. Use a brush for intricate designs. Rollers cover large areas quickly. They provide a smooth finish on flat surfaces. Combine both for best results. Use a brush for edges and a roller for larger areas.
Spray Painting Techniques
Spray painting offers a sleek finish. It is faster than brushes and rollers. Ensure proper ventilation while spray painting. Protect surrounding areas with plastic sheets. Practice on a small piece first. Maintain a consistent distance from the surface. This avoids drips and uneven coverage.
Alternative Coverings Like Vinyl Or Contact Paper
Vinyl and contact paper are versatile. They come in various colors and patterns. Clean the cabinet surface thoroughly before application. Measure and cut the covering to fit. Peel off the backing and apply slowly. Use a squeegee to remove air bubbles. These coverings are easy to replace, offering flexibility.

Credit: www.youtube.com
Finishing Touches
Finishing touches bring your kitchen cabinet project to life. These final steps protect your work and enhance its look. Taking time with details ensures long-lasting beauty and functionality.
Adding Protective Seals
Apply a clear sealant to shield cabinets from moisture and stains. Use a brush or spray for even coverage. Let the seal dry fully before moving on. Sealing helps maintain color and prevents damage over time.
Reinstalling Hardware
Attach knobs, handles, and hinges with care. Match hardware to the cabinet style for a cohesive look. Tighten screws securely but avoid over-tightening. Proper hardware installation improves cabinet use and appearance.
Final Inspection And Touch-ups
Check all surfaces for missed spots or uneven paint. Use a small brush to fix any flaws. Open and close doors to test smooth operation. Clean up dust and debris to reveal your finished cabinets.
Maintenance Tips
Maintaining kitchen cabinets keeps them looking fresh and new. Regular care prevents damage and extends their life. Simple habits help preserve paint and surface quality. Small efforts save costly repairs or repainting later.
Cleaning Painted Cabinets
Use a soft cloth to wipe dirt and dust. Mild soap mixed with water works well for stains. Avoid harsh chemicals that can strip paint or cause dullness. Always dry cabinets with a clean towel to stop water damage. Clean spills quickly to prevent stains or warping.
Preventing Wear And Tear
Open and close cabinet doors gently to avoid loosening hinges. Use cabinet liners to protect shelves from scratches and stains. Avoid placing heavy items on cabinet doors or edges. Keep sharp objects away from painted surfaces to prevent chips. Regularly check and tighten screws to keep cabinets sturdy.

Credit: www.chismbrothers.com
Frequently Asked Questions
What Materials Are Best For Covering Kitchen Cabinets?
Popular materials include vinyl wraps, contact paper, paint, and wood veneer. Each offers durability and style. Choose based on budget, ease of application, and desired finish. Vinyl is great for quick updates, while paint offers customization options.
How Do I Prepare Cabinets Before Covering Them?
Clean cabinets thoroughly to remove grease and dirt. Sand surfaces lightly for better adhesion. Remove hardware and hinges. Ensure cabinets are dry and smooth. Proper prep ensures a long-lasting, professional-looking finish.
Can I Cover Kitchen Cabinets Without Professional Help?
Yes, many covering methods like peel-and-stick vinyl or paint are DIY-friendly. Follow instructions carefully and take your time. DIY saves money but requires patience and attention to detail.
How Long Does It Take To Cover Kitchen Cabinets?
Covering cabinets can take from a few hours to several days. Time depends on method, cabinet size, and prep work. Paint may require drying time, while vinyl wraps apply faster.
Conclusion
Covering kitchen cabinets can refresh your space quickly. Choose the right materials that fit your style and budget. Take your time to prepare surfaces well for better results. Small changes can make a big difference in your kitchen’s look. Enjoy the process and the new feel of your room.
With simple steps, you can update cabinets without much hassle. This project adds value and charm to your home. Try it yourself and see how easy it can be.